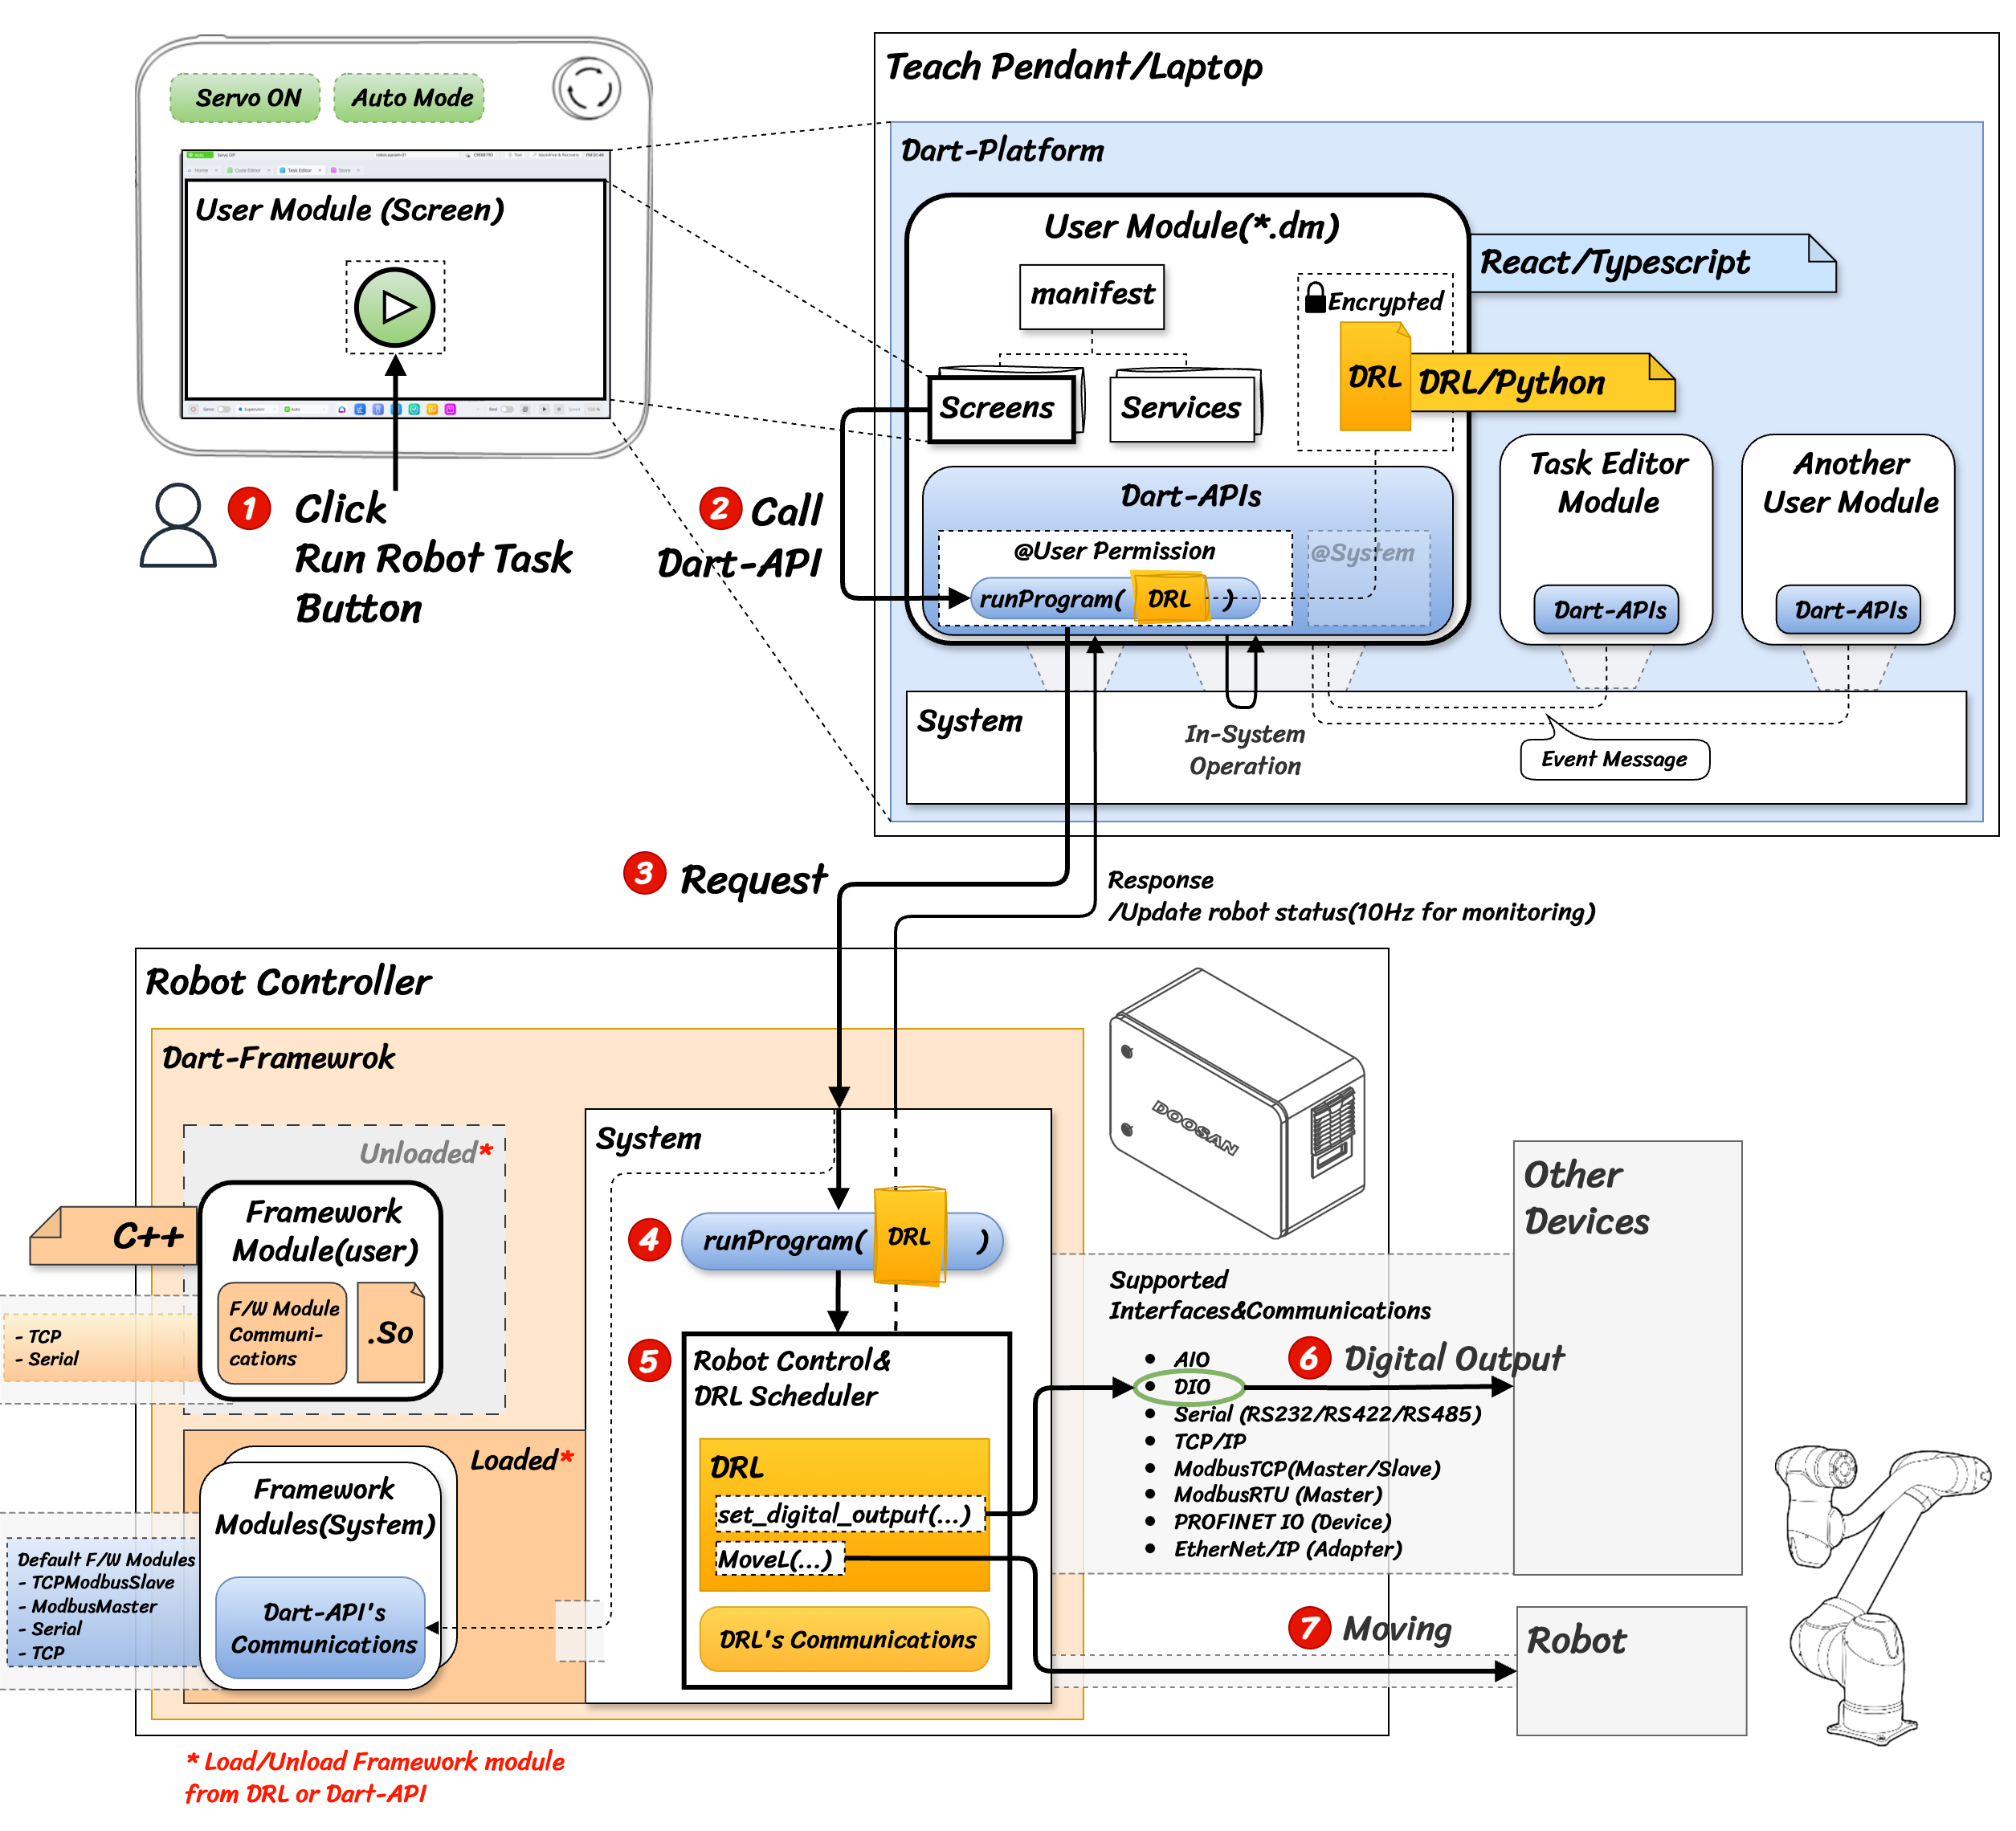
Module Structure Overview
In this section, we will explain the key components of the Module structure using a simple diagram.
Before diving into the explanation, there are a few basic concepts you should know.
Module Structure Diagram
Consider designing a Module that allows you to execute personalized robot task(DRL) with a simple button press on the screen.
It works in a more complex way, but simply put, it can be described as follows.
1. [Module Screen] Click the UI Button for running the robot program.
2. [Module] Call
runProgram()Dart-APIs to asking the function to Dart-Platform.Condition: The robot's status and mode must be as follows
servo state: ON
robot mode: AUTO
3. [Dart-Platform] Request the command to Dart-Framework.
4. [Dart-Framework] Run the robot program.
5. [Robot Control&DRL Scheduler] Schedule and execute DRL to control the robot system.
6. [Dart-Framework] When the
set_digital_output()command is executed, the robot controller will output a digital signal to external devices.7. [Dart-Framework] When the
moveL()command is executed, the robot will initiate movement.
The remarkable features of Dart-Suite Modules are as follows:
When the functionality of a Module is modified or changed, it can be updated through the Dart-Store (or installed locally).
Compatibility support for the SDK(including Dart APIs) used in the Module ensures operation on the latest Dart-Platform.
DRL is encrypted within the Module, protecting the assets of the Module developer.
By using Dart-APIs, there is no need to separately develop database, communications and more; you can simply use them.
Screens or services of one Module can be bound to screens or services of another Module, allowing Modules to exchange event messages based on actions and categories.

