Skip table of contents

Developing a User Command

Overview

User Command refers to various commands that operate on the robot. User Command operates in the Task Editor module that is installed by default in the Dart-Platform, and can create a number of commands necessary for robot operation, such as basic motion, communication, and control of the robot.

User Command can be operated using DRL, and can not only be used independently in the Task Editor, but can also be used in conjunction with the installed module of the Dart-Platform.

image-20240118-073043.png
image-20240118-074656.png

How to develop User Command in the project

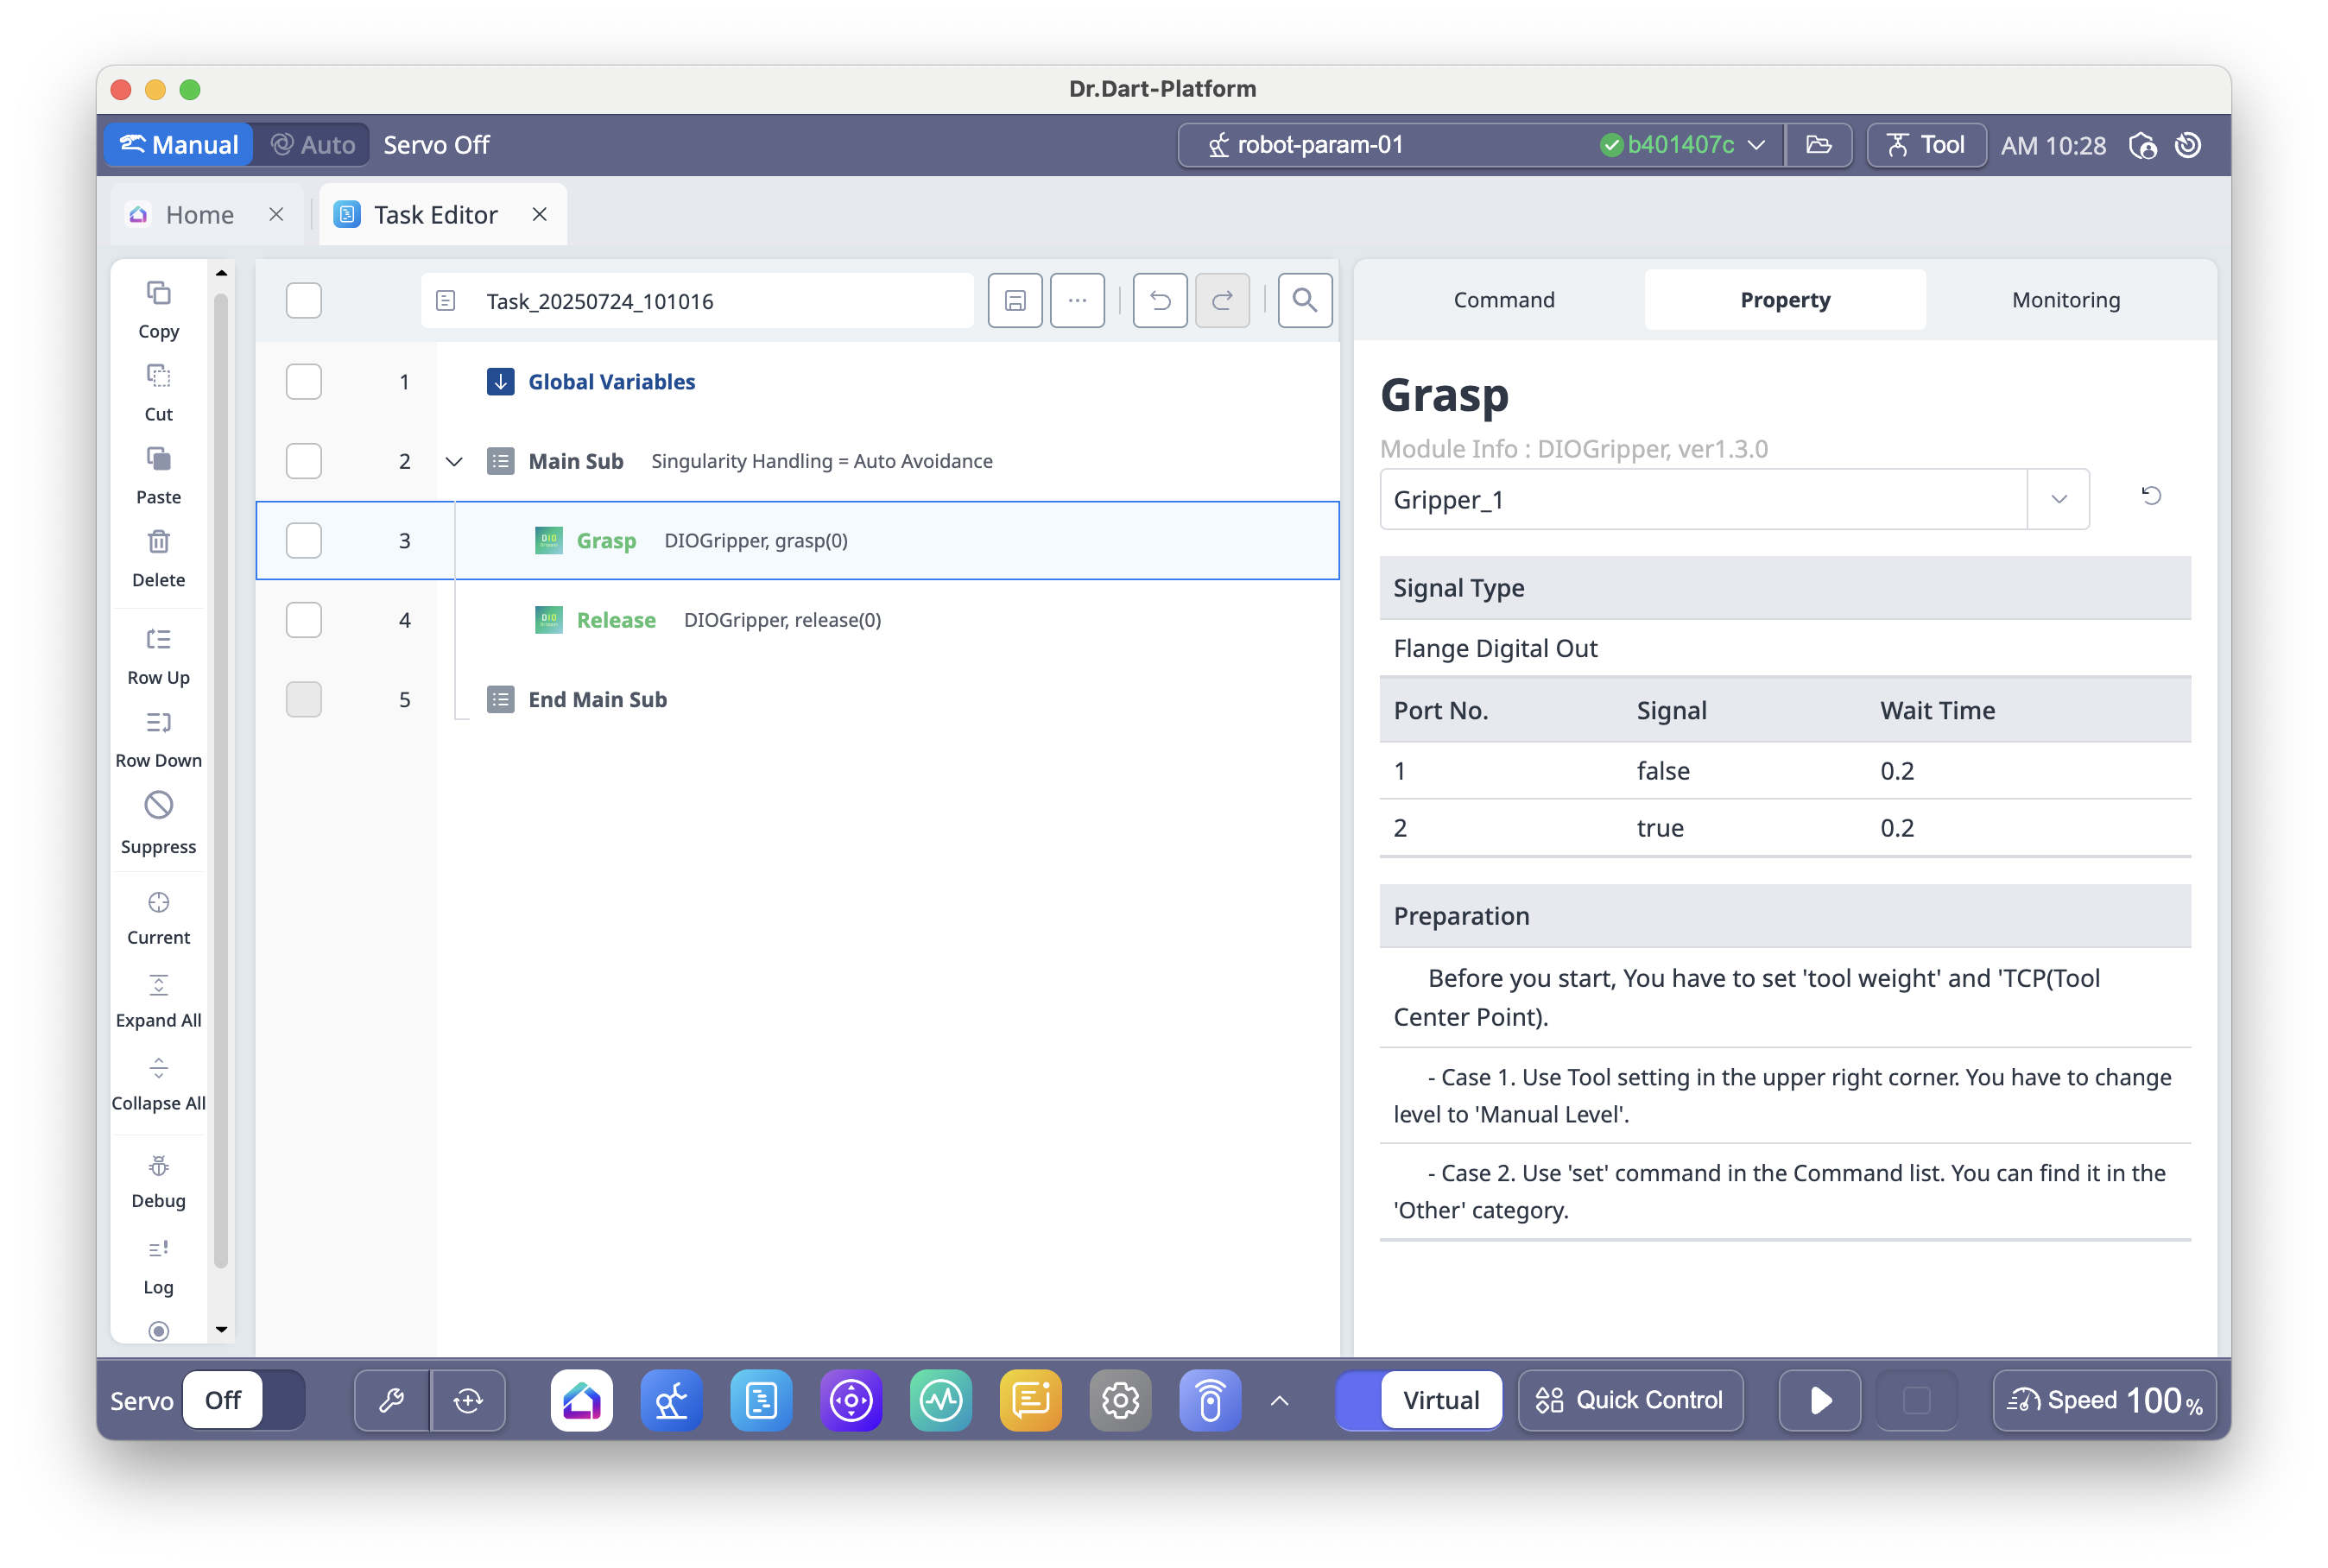
This guide will provide a detailed overview of implementing a general User Command, using the DIO Gripper Module sample as a reference. It includes clear explanations and examples to enhance understanding.

To develop a User Command module, the following five parts must be implemented:

  • Step 1. User Command List-up

    • Define the Screen and Service of the User Command with their identifiers (componentId). This is used in the Task Editor > Command tab to display the command list and show the screen when a command block is clicked.

  • Step 2. Sub Program Implementation

    • Create a DRL file and define one def function for each User Command.

  • Step 3. Sub Program Run Implementation

    • In the Task Editor > Property tab, retrieve the stored values entered by the user and add them as parameters to the def function to generate the execution statement (text).

  • Step 4. PIP Screen Implementation

    • Construct the screen displayed in the Task Editor > Property tab. The data entered by the user on the screen is saved in the Task Editor as savedData.

  • Step 5. Returning Screens and Services

    • Link each screen and service according to their identifiers (componentId).

1. User Command List Up (manifest.json)

Source

com.sample.diogripper/com.sample.diogripper/manifest.json

Purpose

  1. Display the User Command module block installed on Dart-Platform under the 'User Commands' category

  2. Register Component Id

Description

The items included in this manifest are divided into two categories: screens and services.

Implementation

1.Screens

This is the User Command content that will be displayed in the Task editor. It is used for displaying and listing the PIP Screen.

  1. name: Write the name of the Command to be displayed on UserCommand.

  2. id: Each command's unique componentId. Each command must have a different id.

  3. messageFilters: A filter for distinguishing the User command screen. This content should not be modified.

CODE
"name": "Grasp",
"id": "pip_grasp",
"messageFilters": [
  {
    "action": "com.dart.module.taskeditor.action.USER_COMMAND",
    "category": "dart.message.category.PIP_SCREEN"
  }
]

2.Services

This service is used to deliver the list of User Commands and is used in Sub Program Run.

  1. name: Represents the Service name of the User Command. This part can be written freely.

  2. id: The unique componentId of the command service.

Note

The id of the command service must be the same as the id defined in screens.

  1. messageFilters: A filter for distinguishing the User command service. This content should not be modified.

CODE
"name": "Grasp Service",
"id": "pip_grasp",
"messageFilters": [
  {
    "action": "com.dart.module.taskeditor.action.USER_COMMAND",
    "category": "dart.message.category.SERVICE"
  }
]
example
CODE
//manifest.json

{
    "main": "index.bundle.js",
    "usesPermissions": [],
    "supportedLanguages": [],
    "type": "DEVICE_SETTING",
    "screens": [
        {
            "name": "Digital IO",
            "id": "MainScreen",
            "messageFilters": [
                {
                    "action": "dart.message.action.MAIN",
                    "category": "dart.message.category.SCREEN"
                }
            ]
        },
        {
            "name": "Grasp",
            "id": "pip_grasp",
            "messageFilters": [
              {
                "action": "com.dart.module.taskeditor.action.USER_COMMAND",
                "category": "dart.message.category.PIP_SCREEN"
              }
            ]
          },
        {
            "name": "Release",
            "id": "pip_release",
            "messageFilters": [
              {
                "action": "com.dart.module.taskeditor.action.USER_COMMAND",
                "category": "dart.message.category.PIP_SCREEN"
              }
            ]
          }
    ],
    "services": [
        {
           "name": "User Command Service",
           "id": "usercommand",
           "messageFilters": [
             {
               "action": "com.dart.module.taskeditor.action.USER_COMMAND",
               "category": "dart.message.category.SERVICE"
             }
           ]
          },
        {
           "name": "Grasp Service",
           "id": "pip_grasp",
           "messageFilters": [
             {
               "action": "com.dart.module.taskeditor.action.USER_COMMAND",
               "category": "dart.message.category.SERVICE"
             }
           ]
          },
        {
           "name": "Release Service",
           "id": "pip_release",
           "messageFilters": [
             {
               "action": "com.dart.module.taskeditor.action.USER_COMMAND",
               "category": "dart.message.category.SERVICE"
             }
           ]
          }
    ]
}

2. Sub Program Implementation (*.drl)

Source

Purpose

Implement the DRL file corresponding to the Sub Program

Description

  1. This is a method of creating the DRL file directly.

  2. After creating a drl file in the IDE, detailed editing is possible.

  3. As this drl is a sub function, only function definitions are included.

example
CODE
def grasp(io_type, io_port1, io_port2, io_signal1, io_signal2):
  #wait_time[sec]
  wait_time = 0.15
  #Set IO
  if io_type == 'Controller Digital Out':
    set_digital_output()
    set_digital_output()
    wait()
    set_digital_output()
    wait()
    set_digital_output()
  elif io_type == 'Flange Digital Out':
    set_tool_digital_output(io_port1, 0)
    set_tool_digital_output(io_port2, 0)
    wait()
    set_tool_digital_output(io_port1, io_signal1)
    wait()
    set_tool_digital_output(io_port2, io_signal2)
  wait()

3. Sub Program Run Implementation (UserCommandService.ts)

Source

com.sample.diogripper/com.sample.diogripper/src/UserCommandService/UserCommandService.ts

Purpose

Implement an interface to run Sub Program

Required Include Files

CODE
import {
    Context,
    ModuleService,
    IModuleChannel,
    IProgramManager,
    ProgramSaveMode,
    Message,
    IDartFileSystem,
} from 'dart-api';

// import the DRL file as shown below.
import drlDataCollection from './test.drl';

Description

This is a class for loading the Sub Program corresponding to the User Command. It is implemented by extending ModuleService in Dart-APIs.

Implementation

1.file_read

Function for reading the DRL file.

CODE
async file_read(path: string) {
  const dartfs = this.moduleContext.getSystemLibrary(Context.DART_FILE_SYSTEM) as IDartFileSystem;
  const drl = await dartfs.readFile(this.moduleContext, path);

  return drl;
}

2.onBind

This is the part where the function that is linked with Task Editor Module is defined.

It receives commands from the channel (from Task Editor Module) and defines the corresponding conten

CODE
onBind(message: Message, channel: IModuleChannel): boolean { 
  .....
  
  return true
}

3.ProgramManager

It is declared to save SubProgram.

CODE
 const programManager = this.moduleContext.getSystemManager(Context.PROGRAM_MANAGER) as IProgramManager;

4.req_to_save_
commands_def_
as_sub_program

This is the event for retrieving the DRL code content corresponding to the User Command.

In the function declarations that correspond to the Sub Program, from DRCF import * \r\n should be defined at the very beginning. Therefore, declare the phrase at the very beginning and create the DRL code by appending the DRL code behind it.

Once the DRL code is completed, use the saveSubProgram function of the ProgramManager to download the Sub Program. At this time, the result can be confirmed with the result using .then, and this result is delivered to the Task Editor side.

CODE
channel.receive('req_to_save_commands_def_as_sub_program', ({ programName }) => {
  //1-1-1. Use DRL File
  let program = `from DRCF import * \r\n`;
  this.file_read(drlDataCollection)
  .then((drl) => {
     program = program + drl;  
    // 1-2. Save Sub Program function
    programManager.saveSubProgram(ProgramSaveMode.SAVE, programName, program).then((result) => {
        //Send result of save sub program
         channel.send('req_to_save_commands_def_as_sub_program', result);
         console.log(`Save Sub Program Result = ${result}`);
      }); //subProgram.then
  }); // file_read
}); // channel.receive(save command)

5.gen_command_call (componentId, data)

This is the event for creating the execution statement of the User Command.

  1. componentId: The component Id of each command is used to distinguish command execution statements.

  2. data: It is data delivered from the PiP Screen and used to specify arguments and return values.

When running the event, create separate execution statements according to componentId.

  1. The execution statement should be saved in the form of function name(argument1, argument2, ...., argumentN).

    1. (ex. movej([0,0,0,0,0,0]), div(width='100%', height='100%'))

  2. Since the execution statement is run by python, each variable type should be written as follows.

    1. string: To enter as a string, double quotes ““ must be around the variable. Therefore, the string content should be inside the parentheses of JSON.stringify().

    2. boolean: Since the true, false of python's Boolean starts with a capital letter, an error may occur. Therefore, the Boolean content should be inside the parentheses of Number().

    3. number: int and float can be entered as they are.

  3. Create the execution statement and deliver it to the Task Editor side.

    1. command: execution statement

    2. variableName: The variable name where the result value of the command will be saved.

Info.

When the data is invalid and the DRL cannot be generated, you should return the value should be provided as shown below.
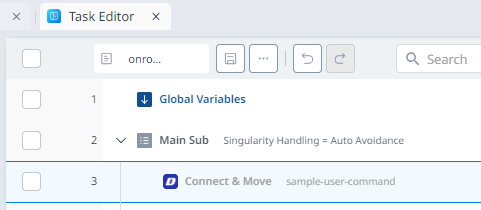
image-20241101-064114.png
CODE
channel.send('gen_command_call', {
   validity: false
});
CODE
channel.receive('gen_command_call', ({ componentId, data }) => {
  // 1. generate execute statement
  let result = ``;

  if (componentId == "pip_grasp") {
    result += `grasp(`
  }
  else if(componentId == "pip_release") {
    result += `release(`
  }

  result += JSON.stringify(data.userCommandInfos.signalType) + `,`
  + data.userCommandInfos.port[0] + `,`
  + data.userCommandInfos.port[1] + `,`
  + Number(data.userCommandInfos.signal[0]) + `,`
  + Number(data.userCommandInfos.signal[1]) + `)`

  // 2. send execute statement
  channel.send('gen_command_call', {
    command: result,
    variableName: JSON.stringify(data.globalValue) != `{}` ? data.globalValue : '',
  });
}); //channel.receive(gen command call)
example
CODE
/*
    BSD 3-Clause License
    Copyright (c) 2023, Doosan Robotics Inc.
*/
import {
    Context,
    ModuleService,
    IModuleChannel,
    IProgramManager,
    ProgramSaveMode,
    Message,
    IDartFileSystem,
} from 'dart-api';

//DRL Code.
import { DRL_Sub } from './constDRL';
import drlDataCollection from './test.drl';

//Sub program class
export class ServiceForTaskEditor extends ModuleService {
    // Read DRL File
    async file_read(path: string) {
        const dartfs = this.moduleContext.getSystemLibrary(Context.DART_FILE_SYSTEM) as IDartFileSystem;
        const drl = await dartfs.readFile(this.moduleContext, path);

        return drl;
    }

    /*********
     * onBind
     *********/
    onBind(message: Message, channel: IModuleChannel): boolean {
        console.log(`User command onBind: ${this.moduleContext.componentId}, ${JSON.stringify(message)}`);

        //Set ProgramManager
        const programManager = this.moduleContext.getSystemManager(Context.PROGRAM_MANAGER) as IProgramManager;

        /*********
         *   1. Event "req_to_save_commands_def_as_sub_program"
         *   Define and save Sub Program Function
         *   componentId : Screen component Id. Write in mainfest.json
         *   programName : The program name created by the taskeditor. It will automatically generated by the task editor.
         *********/

        channel.receive('req_to_save_commands_def_as_sub_program', ({ programName }) => {
            console.log(`Sub_DRL check Program Name = ${programName}  `);

            // 1-1. Define Sub Program function
            let program = `from DRCF import * \r\n`;

            // 1-1-1. Use DRL File
            // this.file_read(drlDataCollection).then((drl) => {
            //     program = program + drl;
            //     console.log(`Sub_DRL : ${program}`);
            //     // 1-2. Save Sub Program function
            //     programManager.saveSubProgram(ProgramSaveMode.SAVE, programName, program).then((result) => {
            //         //Send result of save sub program
            //         channel.send('req_to_save_commands_def_as_sub_program', result);
            //         console.log(`Save Sub Program Result = ${result}`);
            //     }); //subProgram.then
            // });

            // 1-1-2. Use string value
            program = program + DRL_Sub;

            console.log(`Sub_DRL : ${program}`);

            // 1-2. Save Sub Program function
            programManager.saveSubProgram(ProgramSaveMode.SAVE, programName, program).then((result) => {
                //Send result of save sub program
                channel.send('req_to_save_commands_def_as_sub_program', result);
                console.log(`Save Sub Program Result = ${result}`);
            }); //subProgram.then

        }); //channel.receive(save command)

        /*********
         *   2. Event "gen_command_call"
         *   Define function execute statement and send it to Task Editor
         *   componentId : Screen component Id. Write in mainfest.json
         *   data : Saved data. Received by PiP Screen.
         *********/

        channel.receive('gen_command_call', ({ componentId, data }) => {
            console.log(`gen command call : , ComponentID = ${componentId}, data = ${JSON.stringify(data)}  `);
            //Execute statement for sub program
            let result = ``;

            /*************
             *  2-1. Generate execute statement
             *  Update Gripper Value and Make execute statement
             *  ex) result = 'function name(' + 'value1' + 'value2' + ... + 'last value' + ')'
             *  string value : Use JSON.stringify().
             *  boolean value : Use number().
             *  number value: Use as it is.
             *************/
            if (componentId == 'pip_grasp') {
                result += `grasp(`;
            } else if (componentId == 'pip_release') {
                result += `release(`;
            }

            result +=
                JSON.stringify(data.userCommandInfos.signalType) +
                `,` +
                data.userCommandInfos.port[0] +
                `,` +
                data.userCommandInfos.port[1] +
                `,` +
                Number(data.userCommandInfos.signal[0]) +
                `,` +
                Number(data.userCommandInfos.signal[1]) +
                `)`;

            // 2-2. Send execute statement
            console.log('Execute Statement => ', result);
            console.log('return value => ', data.globalValue);

            channel.send('gen_command_call', {
                command: result,
                variableName: JSON.stringify(data.globalValue) != `{}` ? data.globalValue : '',
            });
        }); //channel.receive(gen command call)
        return true;
    } //onBind
} //ServiceForTaskEditor

4. PIP Screen Implementation (PIPScreen.tsx)

Source

com.sample.diogripper/com.sample.diogripper/src/UserCommand_PiPScreen/PIPScreen.tsx

Purpose

Display the properties of the selected User Command (PIP Screen) and initialize data

Required Include Files

CODE
import React from 'react';

//for ui
import {
    CircularProgress,
} from '@mui/material';

//for ui theme
import { ThemeProvider } from '@mui/material/styles';

//api service
import { ModuleScreen, IModuleChannel, Message, ModuleScreenProps, IToast, Toast } from 'dart-api';

Description

This is the setting window of the User command where you can specify the input that will be executed in the command, and the variable where the results will be stored.

Implementation

1.data interface

Declare the data format to be sent to the Task Editor as an interface before the class declaration.

CODE
/**
 * A data interface use for Gripper.
 **/
interface GripperUserCommandInfo {
    signalType: string;
    port: string[];
    signal: boolean[];
}

2.PiP Screen

Implemented as a class, it is implemented by extending ModuleScreen from Dart-api.

CODE
export default class PipScreenForTaskEditor extends ModuleScreen

3.channel

Used for communication with the task editor.

Set the channel from the onBind to send messages to the channel whenever the state changes.

CODE
//Use for data change
private channel = {} as IModuleChannel;

4.(optional) get data from database

Declare an array to get the database set in the module and display it as a List.

CODE
    const dataList = await DatabaseManager.getUserCommandData();
    let infos = [] as GripperUserCommandInfo[];

5.constructor

This segment is executed upon the initial entry to the Property screen. It initializes the state variables necessary for usage within this screen.

Required State

  • globalValues

    • A collection of global variables currently saved within the task editor.

  • selectedValue

    • The global variable name designated to store the result post-DRL execution.

  • showProgress

    • This state verifies whether the database has been successfully loaded.

Subsequently, it sets the state information to be utilized as input in the execution statement.

CODE
constructor(props: ModuleScreenProps) {
        super(props);
        this.state = {
            // Use for set Return Global Value
            globalValues: [
                {
                    division: 0,
                    type: 0,
                    name: '',
                    data: '',
                },
            ] as MonitoringVariable[],
            selectedValue: '',

            //Use for signal setting of DRL
            indexSelected: 0,
            gripperNames: [] as String[],
            userCommandInfos: {} as GripperUserCommandInfo,
            showProgress: false,
        };
        this.handleChange = this.handleChange.bind(this);
        console.log(`Constructor Complete`);
    } // constructor

6.componentDidMount

This segment is executed when the component is mounted (i.e., when the PIP Screen is accessed for the first time). In this segment, you can load the variable values stored in the existing task editor.

  • If you do not use a database, it can be directly implemented in a way that loads them immediately.

CODE
async componentDidMount() {
  logger.debug(`componentDidMount: ${this.moduleContext.componentId}`);
  
  // 1. if database not exist
  if (this.message.data?.hasOwnProperty('savedData')) {
      const version = this.message.data['savedVersion'];
      const data = this.message.data['savedData'];

      if (data != null) {
        logger.debug(`saved data detected : ${JSON.stringify(data)}`);

        this.setState({
          userCommandInfos: data.userCommandInfos,
          indexSelected: data.indexSelected,
          selectedValue: data.globalValue,
        });
      }// if(data != null)
    }//if(save data exist)
} //componentDidMountEditor
  • If you use a database, you can retrieve the variable values stored in the task editor after the function execution.

CODE
async componentDidMount() {
  logger.debug(`componentDidMount: ${this.moduleContext.componentId}`);
    
  // 2. if database exist
  //get database from Digital IO module
  await this.UpdatePreloadData(() => {
    if (this.message.data?.hasOwnProperty('savedData')) {
      const version = this.message.data['savedVersion'];
      const data = this.message.data['savedData'];

      if (data != null) {
        logger.debug(`saved data detected : ${JSON.stringify(data)}`);

        this.setState({
          userCommandInfos: data.userCommandInfos,
          indexSelected: data.indexSelected,
          selectedValue: data.globalValue,
        });
      }// if(data != null)
    }//if(save data exist)
    
  });//this.UpdatePreloadData
} //componentDidMountEditor

this.UpdatePreloadData

  • Fetches the data stored in the database.

  • It is utilized to load the data set in the MainScreen..

7.onBind

This segment defines the function to be executed when saving tasks or transitioning properties in the Task Editor.

  • The incoming channel when the bind is executed is stored in this.channel to deliver messages to the channel post-bind execution.

CODE
this.channel = channel;

get_current_Data

  • Sends data to the Task Editor upon the initial execution of the module.

  • data:

    • userCommandInfos: input required for executing DRL

    • globalValue: the variable name to store the resulting value.

CODE
// Make event "get_current_data"
channel.receive('get_current_data', () => {
    const data: Record<string, any> = {};

    // 3. Update data in PiPScreen
    data['userCommandInfos'] = this.state.userCommandInfos;
    data['globalValue'] = this.state.selectedValue;

    // 4. Send data to Task Editor
    channel.send('get_current_data', data);
});

get_variables

  • Retrieves the currently set global variables in the Task Editor.

CODE
// get variables
channel.receive('get_variables', (data) => {
  if (data) {
    this.setState({ globalValues: data });
  }
});

// wait
setTimeout(() => {
  channel.send('get_variables');
}, 100);

changed_variables

  • Fetches the global variable list when there is a change in the Task Editor.

CODE
channel.receive('changed_variables', (data) => {
  if (data) {
    this.setState({ globalValues: data });
  }
});

dataChange

  • This function delivers the data to the Task Editor when it is altered in the settings screen.

  • After onBind, if the channel is set, this function transmits the changed state to the Task Editor.

  • At the moment the data changes, you can call this function to apply it.

CODE
dataChange = () => {
    if (this.channel.send !== undefined) {
        const data: Record<string, any> = {};

        // Update data in PiPScreen
        data['userCommandInfos'] = this.state.userCommandInfos;
        data['globalValue'] = this.state.selectedValue;

        // Send data to Task Editor
        this.channel.send('dataChanged', data);
    }
};

8.render

This stage involves composing the UI and functionality to be displayed on the screen.

  • Before displaying the content, state values should be assigned to variables separately to prevent potential errors related to state display.

CODE
const { selectedValue, globalValues, gripperNames, userCommandInfos } = this.state;

Then, it returns the screen to be displayed on the PIP Screen. At this time, the UI content is declared between <ThemeProvider> </ThemeProvider>, and within this part, you can create the Property screen using the IDE.

  • If the state related to the Screen could not save the DB when returning the screen, a loading screen can be displayed using CircularProgress.

CODE
if (!this.state.isDatabaseInitialized) {
  return (
    <div
      style={{
        display: 'flex',
        alignItems: 'center',
        justifyContent: 'center',
        height: '100vh',
      }}
    >
      <CircularProgress />
    </div>
  );
} else {
  return (
  <ThemeProvider theme={this.systemTheme}>
    <Typography
      id="typography_8aee"
      sx={{
        'fontSize': '18px',
        'height': '80px',
        'marginLeft': '20px',
        'marginTop': '20px',
        'textAlign': 'center',
      }}
    >
      모듈에서 설정한 값으로 동작합니다.
    </Typography>
  </ThemeProvider>
);
}
example
CODE
/*
    BSD 3-Clause License
    Copyright (c) 2023, Doosan Robotics Inc.
*/
import React from 'react';
import {
    Container,
    Grid,
    MenuItem,
    Select,
    Table,
    TableBody,
    TableCell,
    TableContainer,
    TableHead,
    TableRow,
    Typography,
    CircularProgress,
} from '@mui/material';

//UI Setting
import { ThemeProvider } from '@mui/material/styles';
import styles from '../assets/styles/styles.scss';

//Dart-api
import { ModuleScreen, IModuleChannel, Message, ModuleScreenProps, IToast, Toast } from 'dart-api';

//Database manager
import DatabaseManager from '../utils/DatabaseManager';

//Import for Update Value
import {SignalWrite } from '../types';
import { USER_COMMAND_GRASP, USER_COMMAND_RELEASE } from '../constants';

/**
 * A data interface use for Gripper.
 **/
interface GripperUserCommandInfo {
    signalType: string;
    port: string[];
    signal: boolean[];
}


//PIP Screen class
export default class PipScreenForTaskEditor extends ModuleScreen {
    //Use for data change
    private channel = {} as IModuleChannel;
    private gripperUserCommandInfos = [] as GripperUserCommandInfo[]
    /*****
     * Main Life Cycle
     *
     * 1) First Initial
     * Constructor -> render -> ComponentDidMount -> componentDidUpdate -> OnBind
     *
     * 2) SetState occured
     * setstate -> render -> ComponentDidUpdate
     *
     *****/

    //Constructor. Initial PIP Screen value.
    constructor(props: ModuleScreenProps) {
        super(props);
        this.state = {
            //Use for signal setting of DRL
            indexSelected : 0,
            gripperNames : [] as String[],
            userCommandInfos : {} as GripperUserCommandInfo,
            isDatabaseInitialized : false
        };
        this.handleChange = this.handleChange.bind(this);
        console.log(`Constructor Complete`);
    } // constructor

    //ComponentDidMount. Initial List Value
    async componentDidMount() {
        console.log(`componentDidMount: ${this.moduleContext.componentId}`);

        //get database from Digital IO module
        await this.UpdatePreloadData(() => {
            // Update data recieved from Task Editor
            // AS-IS. Currently, savedData is sent on onBind.
            // TO-BE. After that, saved data should be read at componentDidMount timing.
            if (this.message.data?.hasOwnProperty('savedData')) {
                const version = this.message.data['savedVersion'];
                const data = this.message.data['savedData'];
                if (data != null) {
                    console.log(`saved data detected : ${JSON.stringify(data)}`);

                    this.setState({
                        userCommandInfos : data.userCommandInfos,
                    });
                }
            }
        });
    } //componentDidMount

    // OnBind. When Task Editor save Task, Send saved data.
    onBind(message: Message, channel: IModuleChannel): boolean {
        this.channel = channel;
        console.log(`PIP Screen onBind: ${this.moduleContext.componentId}`);

        //message.data?.hasOwnProperty('savedData')

        // AS-IS. Currently, savedData is sent on onBind.
        // 1. If savedData detected in message, Update PiP Screen value.
        if (message.data?.hasOwnProperty('savedData')) {
            const version = message.data['savedVersion'];
            const data = message.data['savedData'];
            if (data != null) {
                console.log(`saved data detected : ${JSON.stringify(data)}`);

                this.setState({
                    userCommandInfos : data.userCommandInfos,
                });
            }
        } //if message && savedData

        // 2. Make event "get_current_data"
        channel.receive('get_current_data', () => {
            console.log(`channel receive : get_current_data`);
            const data: Record<string, any> = {};

            // 3. Update data in PiPScreen
            data['userCommandInfos'] = this.state.userCommandInfos;

            // 4. Send data to Task Editor
            console.log(`Send current data : ${JSON.stringify(data)}`);
            channel.send('get_current_data', data);
        });
        return true;
    } //OnBind

    // ComponentDidUpdate. Occured when state updated.
    componentDidUpdate(prevProps: any, prevState: any) {
        /**************
         * !!!Optional part!!!
         * If SignalData changed, send it to Task Editor
         * You can comment it when you don't want to use it.
         **************/
        if (this.state.userCommandInfos !== prevState.userCommandInfos) {
            console.log('componentDidUpdate. state update detected');
            this.dataChange();
        }
    } //ComponentDidUpdate

    //Get State from Database. Use in ComponentDidMount
    UpdatePreloadData = (onComplete: () => void) => {
        //get database from main screen module
        let infos = [] as GripperUserCommandInfo[];
        let names = [] as String[];
        DatabaseManager.getDataAll((dataList) => {
            this.gripperUserCommandInfos = dataList.map(data => {
                let signals = data.writeSignals as SignalWrite[]
                console.log("getData data:", signals)
                if (signals === null || undefined)
                    return;
                
                //Get Value from Database
                if (this.moduleContext.componentId == 'pip_grasp') {
                    return this.getGripperInfo(signals.find((v: SignalWrite) => v.name === USER_COMMAND_GRASP))
                } else if (this.moduleContext.componentId == 'pip_release') {
                    return this.getGripperInfo(signals.find((v: SignalWrite) => v.name === USER_COMMAND_RELEASE));
                }
            }) as GripperUserCommandInfo[];

            names = dataList.map(v => v.selectedTool.toolName)
        })
        .then(() => {
            this.setState({
                gripperNames : names,
                userCommandInfos : this.gripperUserCommandInfos[this.state.indexSelected],
                isDatabaseInitialized : true,
            }) 
            onComplete();
        });
    };

    //Select Tool setting list event. Use in render(select.onchange)
    handleChange = (e: any) => {
        let index = e.target.value;
        this.setState({
            indexSelected : index,
            userCommandInfos : this.gripperUserCommandInfos[index],
        }, () =>{
            Toast.show(IToast.TYPE_SUCCESS, 'Success', 'Data Load Success', false);
        });
    }; //handlechange

    //Send changed data to Task Editor. Use in ComponentDidUpdate
    //This function is OPTINAL !!!
    dataChange = () => {
        if (this.channel.send !== undefined) {
            console.log('data_changed');
            const data: Record<string, any> = {};

            // 3. Update data in PiPScreen
            data['userCommandInfos'] = this.state.userCommandInfos;

            // 4. Send data to Task Editor
            console.log(`Send current data : ${JSON.stringify(data)}`);
            this.channel.send('data_changed', data);
        }
    };

     /**
     * A function use to get Gripper value
     **/
    getGripperInfo = (writeSignals: SignalWrite) => {
        return {
            signalType: writeSignals.signalType,
            port: writeSignals.writeSignalsChild.map(v => v.portNo),
            signal: writeSignals.writeSignalsChild.map(v => v.test),
        } as GripperUserCommandInfo;
    }

    /*****
     * Render Screen UI
     * Please make PiP Screen interface in the ThemeProvider. It'll make default design of PiP Screen.
     *****/
    render() {
        const { indexSelected , gripperNames, userCommandInfos } = this.state;
        if (!this.state.isDatabaseInitialized) {
            return (
                <div
                    style={{
                        display: 'flex',
                        alignItems: 'center',
                        justifyContent: 'center',
                        height: '100vh',
                    }}
                >
                    <CircularProgress />
                </div>
            );
        } else {
            return (
                <ThemeProvider theme={this.systemTheme}>
                    <Container>
                        <Grid
                            container
                            justifyContent="space-between"
                            sx={{
                                '&.MuiGrid-root:empty': {
                                    'min-height': '50px',
                                },
                            }}
                            id="grid_5f5f"
                        >
                            <Typography
                                id="typography_8aee"
                                sx={{
                                    'fontSize': '26px',
                                    'fontWeight': 'bold',
                                    'marginBottom': '10px',
                                    'marginLeft': '20px',
                                    'marginTop': '10px',
                                    'textAlign': 'center',
                                }}
                            >
                                Select DIO Gripper
                            </Typography>
                        </Grid>
                        <Grid
                            item
                            sx={{
                                'width': '100%',
                            }}
                        >
                            <Select
                                value={this.state.indexSelected}
                                onChange={(e) => this.handleChange(e)}
                                sx={{
                                    'width': '100%',
                                }}
                            >
                                {gripperNames.map((name: string, index: number) => (
                                    <MenuItem name={name} value={index}>
                                        {name}
                                    </MenuItem>
                                ))}
                            </Select>
                        </Grid>
                        <TableContainer className={`${styles['table-container']}`}>
                            <Table aria-label="simple table">
                                <TableHead>
                                    <TableRow>
                                        <TableCell width="100%" className={`${styles['first-thead-cell']}`}>
                                            {' '}
                                            Preparation
                                        </TableCell>
                                    </TableRow>
                                </TableHead>
                                <TableBody>
                                    <TableRow>
                                        <TableCell width="100%">
                                            <Typography
                                                id="typography_8aee"
                                                sx={{
                                                    'fontSize': '14px',
                                                    'height': '80px',
                                                    'marginLeft': '20px',
                                                    'marginTop': '20px',
                                                    'textAlign': 'center',
                                                }}
                                            >
                                                Before you start, You have to set 'tool weight' and 'TCP(Tool Center
                                                Position).
                                            </Typography>
                                        </TableCell>
                                    </TableRow>
                                    <TableRow>
                                        <TableCell width="100%">
                                            <Typography
                                                id="typography_8aee"
                                                sx={{
                                                    'fontSize': '13px',
                                                    'height': '80px',
                                                    'marginLeft': '20px',
                                                    'marginTop': '20px',
                                                    'textAlign': 'center',
                                                }}
                                            >
                                                {' '}
                                                - Case 1. Use Tool setting in the upper right corner. You have to change
                                                level to 'Manual Level'.
                                            </Typography>
                                        </TableCell>
                                    </TableRow>
                                    <TableRow>
                                        <TableCell width="100%">
                                            <Typography
                                                id="typography_8aee"
                                                sx={{
                                                    'fontSize': '13px',
                                                    'height': '80px',
                                                    'marginLeft': '20px',
                                                    'marginTop': '20px',
                                                    'textAlign': 'center',
                                                }}
                                            >
                                                {' '}
                                                - Case 2. Use 'set' command in the Command list. You can find it in the
                                                'Other' category.{' '}
                                            </Typography>
                                        </TableCell>
                                    </TableRow>
                                    <TableRow></TableRow>
                                    <TableRow></TableRow>
                                </TableBody>
                            </Table>
                        </TableContainer>

                        <TableContainer className={`${styles['table-container']}`}>
                            <Table aria-label="simple table">
                                <TableHead>
                                    <TableRow>
                                        <TableCell width="100%" className={`${styles['first-thead-cell']}`}>
                                            Signal Type
                                        </TableCell>
                                    </TableRow>
                                </TableHead>
                                <TableBody>
                                    <TableRow>
                                        <TableCell width="100%">{userCommandInfos?.signalType}</TableCell>
                                    </TableRow>
                                </TableBody>
                            </Table>
                        </TableContainer>

                        <TableContainer className={`${styles['table-container']}`}>
                            <Table aria-label="simple table">
                                <TableHead>
                                    <TableRow>
                                        <TableCell width="25%" className={`${styles['first-thead-cell']}`}>
                                            Port No.
                                        </TableCell>
                                        <TableCell width="25%" className={`${styles['first-thead-cell']}`}>
                                            Signal
                                        </TableCell>
                                    </TableRow>
                                </TableHead>
                                <TableBody>
                                    {userCommandInfos?.port.map((port : string, index : number) =>(
                                        <TableRow>
                                            <TableCell width="25%">{port}</TableCell>
                                            <TableCell width="25%">{JSON.stringify(userCommandInfos.signal[index])}</TableCell>
                                        </TableRow>
                                    ))}                                  
                                </TableBody>
                            </Table>
                        </TableContainer>
                    </Container>
                </ThemeProvider>
            );
        }
    }
}

5. Returning Screens and Services (index.tsx)

Source

com.sample.diogripper/com.sample.diogripper/src/index.tsx

Purpose

This screen is designated for calling the previously created classes. You only need to modify the Module class here.

Required Include Files

CODE
//Dart-api
import { System, BaseModule, ModuleScreen, ModuleScreenProps, ModuleService} from 'dart-api';

import PipScreenForTaskEditor from './drl/DRL_PIP';
import { ServiceForTaskEditor } from './drl/DRL_User_Command';

Description

Module: A class for calling Screen and Service, used by extending BaseModule.

Implementation

1.getModuleScreen

This selects the screen to be displayed using the component id set in the manifest.json.

CODE
getModuleScreen(componentId: string) {
   console.log(`getModuleScreen: ${this.packageInfo.packageName}, ${componentId}`);
    if (componentId === 'MainScreen') {
        //Main screen
        return MainScreen;
    } else if (componentId === 'pip_grasp') {
        //PIP Screen
        return PipScreenForTaskEditor;
    } else if (componentId === 'pip_release') {
        //PIP Screen
        return PipScreenForTaskEditor;
    }
    return null;
}

2.getModuleService

This function is used to run the service executed by usercommand. In this example, since the User Command instructions are generated within a single ServiceForTaskEditor using the componentId, the code is written as follows.

CODE
getModuleService(componentId: string): typeof ModuleService | null {
        console.log(`getModuleService: ${this.packageInfo.packageName}, ${componentId}`);
        return ServiceForTaskEditor;
    }

Developing User Command Using Visual Scripting(beta)

How to make User Command using Visual Scripting(beta)

1. How to make User Command

Make New Project

Create a new project and select User Command as shown below to create the project.

image-20240513-041936.png

Define Command Name

You can add a command name by writing code directly, but you can add a command more easily using Visual Scripting.

image-20240513-043844.png

Press the “+” button in the “User Command Interface” Node, then enter the command name and ID (unique ID) you want to add.

Note: After setting the Command name, you must click the Save button to save the changes.

If an error occurs in Main Screen Ui Preview after adding the command, add the following code in UserCommandService.ts below.

image-20240517-080048.png

After saving the changes, the Command settings are automatically added to the “<packageName>/manifest.json” file, the UI Screen related to the Command, and the functions required to execute the Command are added.

CODE
// manifest.json

"screens": [
        {
            "name": "Command1",
            "id": "id3",
            "messageFilters": [
                {
                    "action": "com.dart.module.taskeditor.action.USER_COMMAND",
                    "category": "dart.message.category.PIP_SCREEN"
                }
            ]
        }
    ]
......
"services": [
        {
            "name": "Command1",
            "id": "id3",
            "messageFilters": [
                {
                    "action": "com.dart.module.taskeditor.action.USER_COMMAND",
                    "category": "dart.message.category.SERVICE"
                }
            ]
        }
    ]

Define DRL function

To create a User Command, you must write a DRL. Before writing a DRL, you must register the name of the function you want to add as shown below. The registration method can be written in code, but registration can be done easily using Visual Scripting.

Define DRL Function

Open the UserCommandDRL.drl file in the UserCommand folder and write the function you want to add.

Here, a function was written to display the values ​​entered in arg1, arg2, and arg3 through tp_popup.

image-20240517-064424.png
Add Function arguments

Set the arguments applied to the DRL function in Visual Scripting corresponding to the generated Command.

image-20240517-065026.png

Note: After setting arguments, you must click the Save button.

If the arguments have been created properly, enter the command to be executed in the UserCommand/UserCommandService.ts file in Code as shown below.

CODE
// UserCommand/UserCommandService.ts

................
.....

 channel.receive('gen_command_call', ({
      componentId,
      data
    }) => {
      let result = ``;

      // Start describe your function which you will call command
      const stringGenerating_12345 = `test_user_command("${data.arg1}",${data.arg2},"${data.arg3}")`;
      if (componentId === '12345') {
        result += stringGenerating_12345;
      }
      // End

      channel.send('gen_command_call', {
        command: result,
        variableName: JSON.stringify(data.globalValue) != `{}` ? data.globalValue : ''
      });
    });
    return true;
  }

In addition to setting by writing directly in code, the above settings can also be made in the Visual Scripting menu of index.tsx as shown below.

There are several rules to set commands using Visual Scripting.

image-20240517-065716.png
image-20240517-070138.png
  1. Enter the name of the function you want to run. At the end of the function name, you must include the “(“ symbol, which indicates the beginning of the argument.

  2. Add the argument to be delivered in the “String Generating” Node (click the “+” button) and connect the argument to be delivered in the “User Command DRL Function Call” Node.

  3. You must connect the separators as shown in the picture. If the value is an array, you must enter the “[]” symbols in order as shown in the picture above.

Note: When Argument is set to String and a function is created using VisualScripting, ““ must be added in UserCommandService.ts as follows.

image-20240517-073806.png

Make UI Property

You must proceed with the process of configuring a configurable UI in the added Command and saving the entered values ​​in DataBase. Additionally, it explains how to implement actions that change the value entered by the user in the UI.

The UI described here will consist of the screens below. This is the screen displayed in TaskEditor, and the screen composition will vary depending on the command.

image-20240514-022751.png
Set UI Property in Visual Scripting

This chapter explains the connection between the composed UI Components and the Argument passed to the Command (DRL) with a simple example.

First, let's delete the UI Components predefined in UI Preview and the UI Data node group in Visual Scripting and add three TextFields.

image-20240517-054706.png

As shown in the picture above, if you add 3 TextFields to UI Preview, you can see that 3 TextField nodes are added to the “UI Components” Node group in Visual Scripting.

The UI Component Node is composed of Input and Output settings. Press the Input button as shown below to select the Value, then specify and connect one of the Arguments entering the DRL displayed in “Load User Command Data” as shown below.

image-20240517-055727.png

This means that the value entered in the UI is entered as the value of the DRL's Augment (arg1 in the picture above).

Connect the remaining TextFields in the same way.

Note: Node blocks within the Node Group can be freely moved except for the UI Components Node, and if the connection between nodes is complex, the Node location can be changed.

After completing the previous data loading function, this time we will explain the operation of the connection to save the entered value. The Node related to saving data is the “Save User Command Data” Node.

First, press the Output button on the TextField Node. By pressing the Output button, you can select various Event Properties corresponding to TextField. This time, we add two things: onChange() and Value.

image-20240517-061305.png

As shown in the picture, connect the added Event (onChange()) to “Entry” of “Save User Command Data”, and connect the Value to the Argument (arg1 in the picture above) of the DRL to be saved. Set the remaining TextField Nodes the same way.

When you complete the settings and install it on the Dart-Platform, a command will appear in the Task Editor as follows.

image-20240517-074130.png

If you add a Command and look at the “Property” Tab, you will see three TextFields appear. And when you run the command, you can see a message appear depending on the value entered in the TextField.

image-20240517-074251.png
image-20240517-074722.png
DRL example for input array values

This example explains how to receive array values as input and pass it to the DRL Argument. In this example, we will configure and set up two TextFields to receive input of a single value and array values.

As described above, add two TextFields to the UI Preview as shown below and add two Arguments to the “Define User Command Data” Node.

image-20240521-061742.png

Note: To input array values, you must set the value using the [ ] symbol.

image-20240521-061826.png

After completing the UI settings, proceed with the connection operation of the “Load User Command Data” Node and the “Save User Command Data” Node as shown below, then save the modified contents.

image-20240521-061900.png

If you have completed the connection setup, now proceed with setting the function to be executed and the Argument in Visual Scripting in index.tsx.

image-20240521-061927.png

Note: The Argument of this function includes Array, so when setting the Argument in the “String Generating” Node, check that the [] symbol is used as shown above.

When you install the configured Command, a TextField will appear where you can input array values ​​as shown below. When entering, separate the values ​​using the “,” symbol.

image-20240521-062022.png
image-20240521-062128.png

JavaScript errors detected

Please note, these errors can depend on your browser setup.

If this problem persists, please contact our support.