Account Management
Overview
If you want to manage your accounts, such as edit or update information, this section offers information on handling user accounts in the Dart-Store. Follow our guide to learn what you can do with your account in Dart-Store.
How to view your profile information?
Let's follow these steps to view your profile information in Dart-Store.
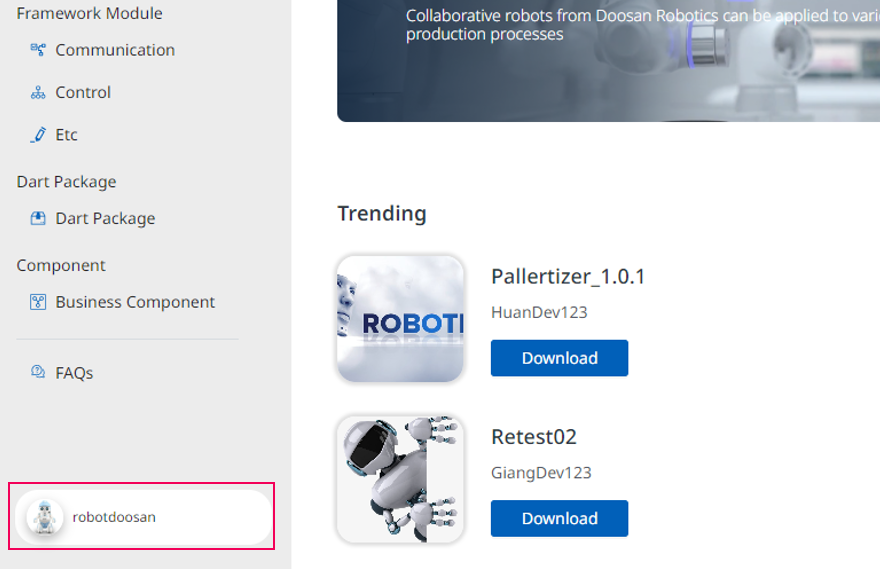
Step 1: On the main screen of Dr.Dart-Store, click the
Profileicon at the bottom left corner, and thePublish Portalpage will appear.
Step 2: Open the
Account Informationpage
There are two ways:
On the top right of the screen:
(1) Click the
⋮icon(2) Select the
Settingoption
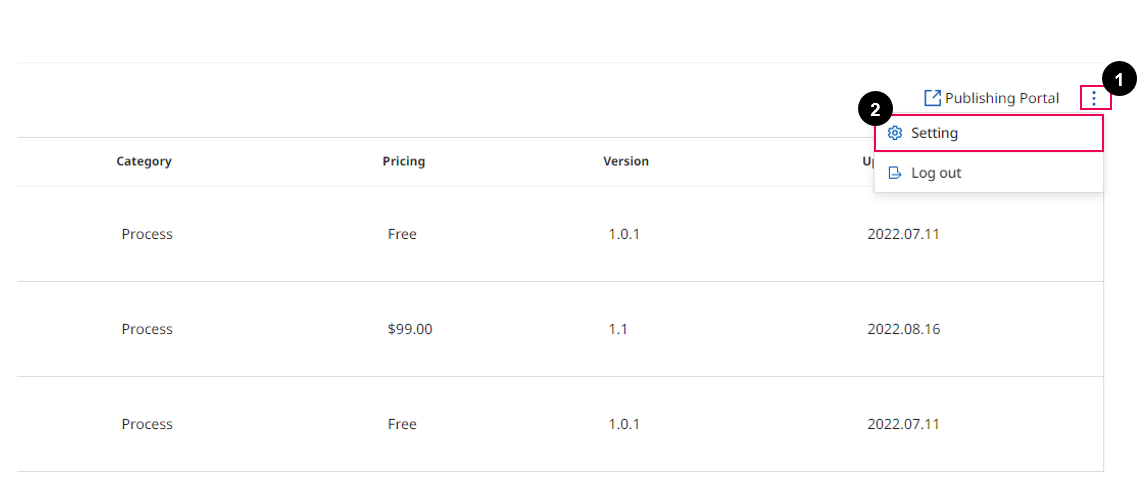
It will have another option. If you click this Setting option, your Developer Account will transit to User account.
Step 1: Click
Publishing Portal
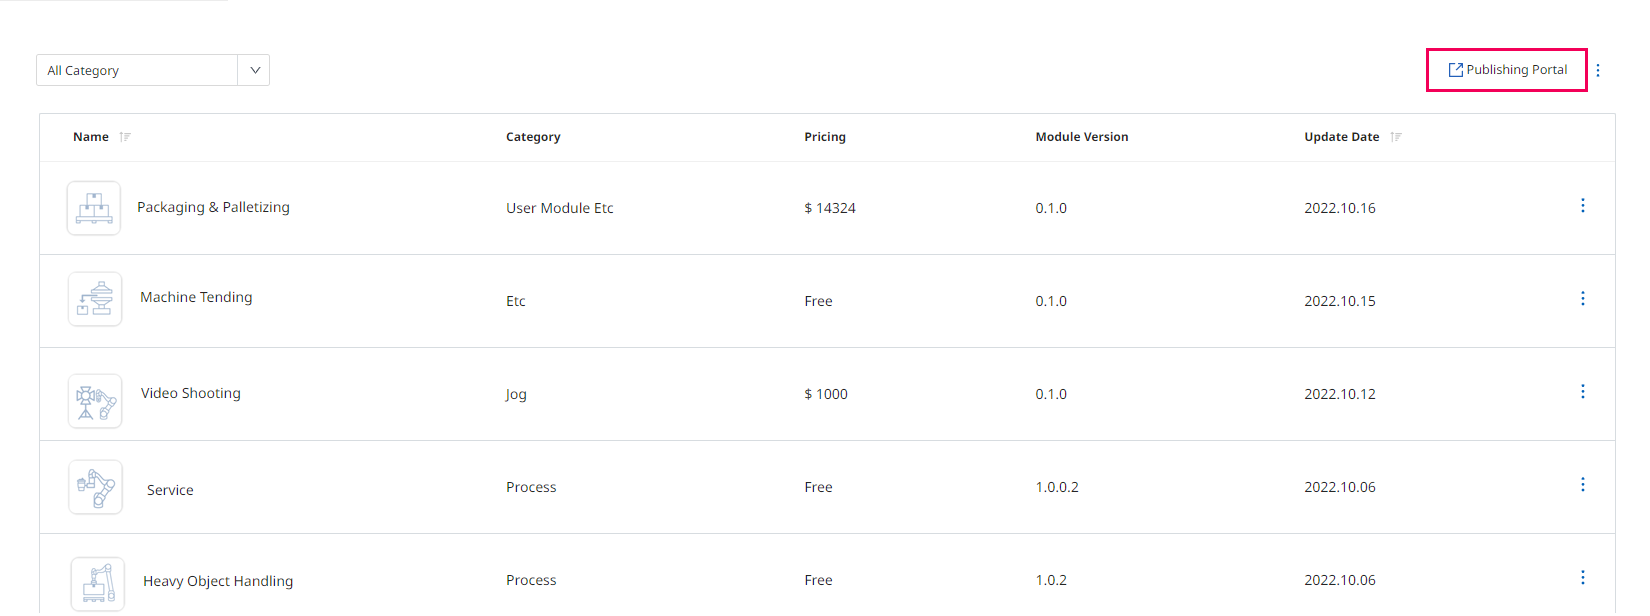
Step 2: Select the
Account Informationoption
And the result is as the following image:
.png?inst-v=e75a4ade-066f-4d34-ad33-80172badf055)
Account Information Page
How to upgrade to a Developer Account?
You might be using a General account, so you must upgrade your account to a Developer Account to experience more functions. Follow the steps below to upgrade your account without paying any fee.
Step 1: On the main screen of Dr.Dart-Store, click the
Profileicon at the bottom left corner, and thePublish Portalpage will appear.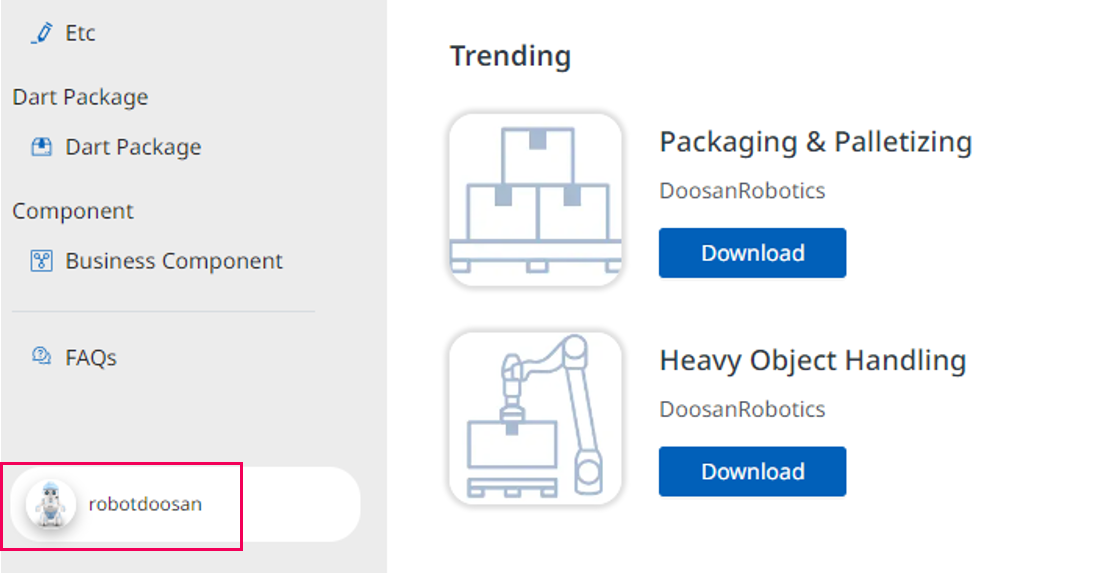
Profile icon
Step 2: On the
Publish Portalpage, clickPublishing Portal, and the popupRegister as Developerwill show up.
Step 3: On the
Register as Developerpopup, clickGet Startedbutton.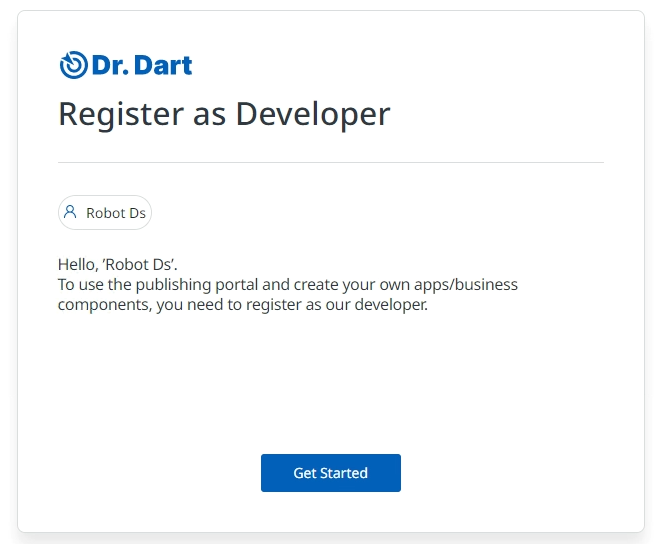
Register as Developer
Step 4: The
Register Formwill show up. You need to fill in the required information. After filling out the required fields, click theRegister Accountbutton to submit all information you filled in and register to the Developer account.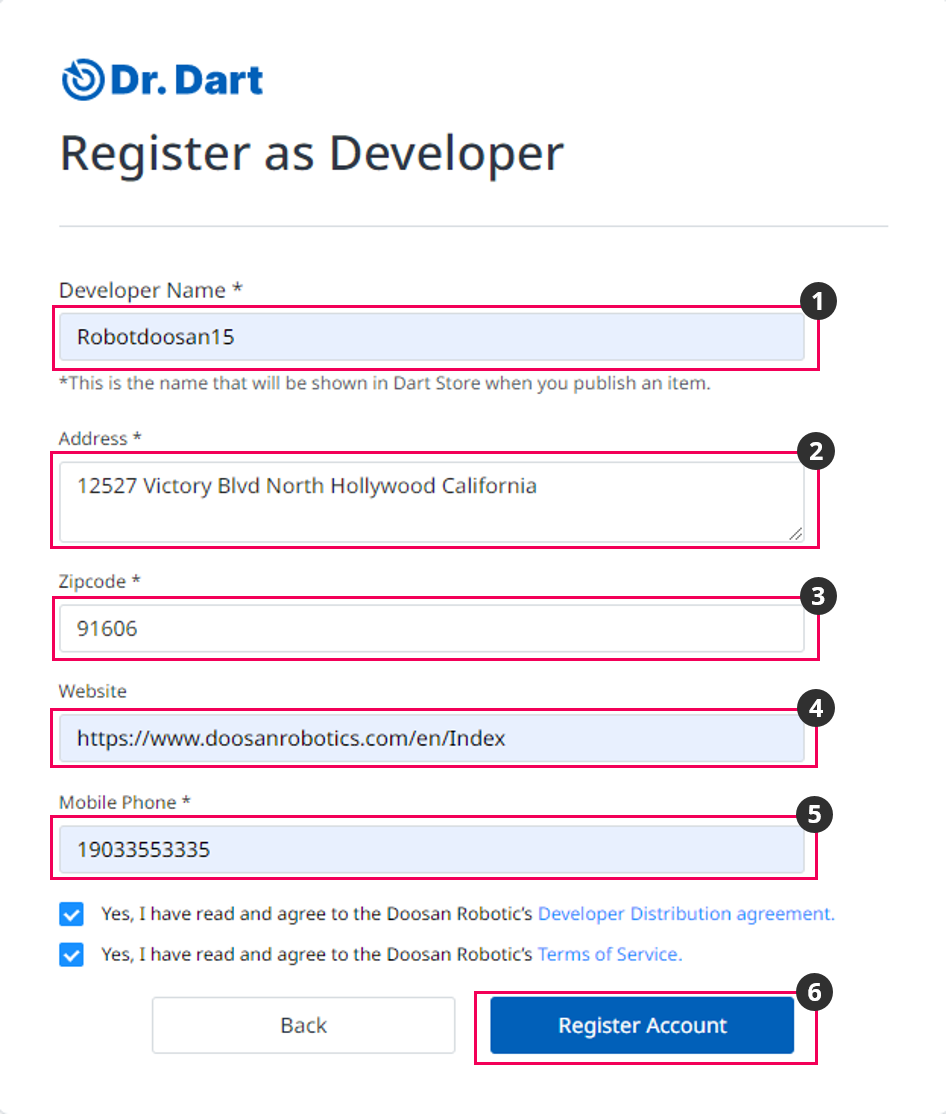
Register Form
Number | Name | Description |
|---|---|---|
1 | Developer Name | The Developer's name is in Dart-Store. |
2 | Address | The user's address. |
3 | Zip code | The zip code of the address. |
4 | Website | The website or link of social media. |
5 | Mobile Phone | The phone number. |
6 | Register Account | The button to submit and register an account. |
To register, you must select two checkbox(s) to agree with the Dart-Store's Policy.
Step 5: There will be a
Developer Registration Completepopup. Click theLoginbutton to get full access to the publishing portal..png?inst-v=e75a4ade-066f-4d34-ad33-80172badf055)
Registration successfully
Now, your account has been upgraded to Developer Account. You can go back to the Account Information page to check your account information.
On the Account Information page, you will see your information, and the Developer Name will appear.
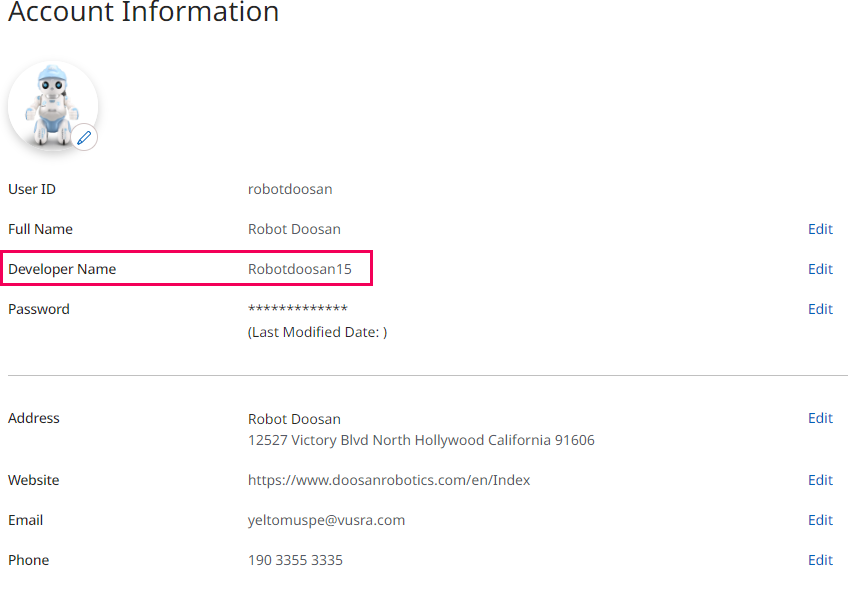
Developer account information
How to update general account information?
Step 1: Your
Developer account informationshows up. View your account information and get to know what you can change on your account.
If you do not know how to go to the Developer account information page, follow Account Management | How-to-view-your-profile-information?
.png?inst-v=e75a4ade-066f-4d34-ad33-80172badf055)
Developer account information
Step 2: Click
Editnext to each field to change your information.Full Name: Click
Editto change yourFull Name, and fill in yourFirst NameandLast Name. ClickConfirmbutton to update yourFull Name..png?inst-v=e75a4ade-066f-4d34-ad33-80172badf055)
Edit Full Name
Address: Click
Editto change your address. Fill in yourFirst Name,Last Name,Address, andZipcode. ClickConfirmbutton to save toNew Address..png?inst-v=e75a4ade-066f-4d34-ad33-80172badf055)
Edit address
Website: Click
Editto change your website, and enter theURLof your website or social media profile. ClickConfirmbutton to save toNew Website..png?inst-v=e75a4ade-066f-4d34-ad33-80172badf055)
Edit Website URL
Phone: Click
Editto change yourPhone number, enter your new phone number, then clickConfirmbutton to save..png?inst-v=e75a4ade-066f-4d34-ad33-80172badf055)
Edit Phone Number
How to update your advanced information?
There are a few updates that you need to verify your password first before updating information such as Developer Name, Password, and Email. Follow the guide below to get more information.
Developer Name
Step 1: On the
Developer account informationpage, clickEditto change yourDeveloper Name. There will beEnter Passwordpopup..png?inst-v=e75a4ade-066f-4d34-ad33-80172badf055)
Input password
Step 2: After entering your password to verify then, click
Confirmbutton. TheDeveloper Namepopup shows up..png?inst-v=e75a4ade-066f-4d34-ad33-80172badf055)
Edit Developer Name
Step 3: Enter the
New Developer Nameand clickConfirmbutton to change. YourDeveloper Nameis updated after you clickConfirmbutton.
Password
Step 1: On the
Developer account informationpage, clickEditto change yourPassword. There will beEnter Passwordpopup..png?inst-v=e75a4ade-066f-4d34-ad33-80172badf055)
Input Password
Step 2: After entering your password to verify then, click
Confirmbutton. TheNew passwordpopup shows up. You are enteringNew Passwordand entering again to verify. ClickConfirmbutton.
Input New Password
Number | Name | Description |
|---|---|---|
1 | New password | Enter the new password that follows the rule. |
2 | Verify New Password | Enter your new password again to verify. |
Step 3: The
Password Successfully Changedpopup will show. ClickConfirmbutton to complete the process of changing the password. TheNew passwordwill be updated..png?inst-v=e75a4ade-066f-4d34-ad33-80172badf055)
Successfully Message
Step 1: On the
Developer account informationpage, clickEditto change yourEmail. There will beEnter Passwordpopup. Entering your password to verify, then clickConfirmbutton..png?inst-v=e75a4ade-066f-4d34-ad33-80172badf055)
Input Password
Step 2: The
Emailpopup shows up. Entering yournew email,then clickConfirmbutton..png?inst-v=e75a4ade-066f-4d34-ad33-80172badf055)
Input New Email
Step 3: The
Verification Codepopup will show up. There is a code sent to the new email. Check your email to get the code and copy and enter the code into the field. ClickConfirmbutton to change toNew Email. TheNew emailwill be updated afterward.
Input Verification Code
Manage The Payment Information ( User Account)
This section is for the User Account type.
There are two situations you must pay attention to:
If you don’t have a User Account, please refer to Step 1 on this page Payment | 2.-Register-a-Developer-or-Seller-Account.
If your account is a Developer/ Seller account, please follow the guideline below to transit the Developer/ Seller Account to the User Account. Then, you can see the purchase history, request a refund, and see the refund history.
Step 1: On the main screen of Dr.Dart-Store, click the
Profileicon at the bottom left corner, and thePublish Portalpage will appear.
Step 2: Open the
Account InformationpageOn the top right of the screen:
(1) Click the
⋮icon(2) Select the
Settingoption
When you buy business products or services from Dart-Store. You can use a credit or debit card or bank account to pay for the things you buy. Anytime you buy one or more than one module, you must fill in the payment information to buy them.
Purchase History
Click Purchase history on the Account Information page on the left menu, set the conditions, and press Enter. The complete information about your purchases will be shown up.
If you do not know how to go to the Purchase History page, follow Account Management | How-to-view-your-profile-information?
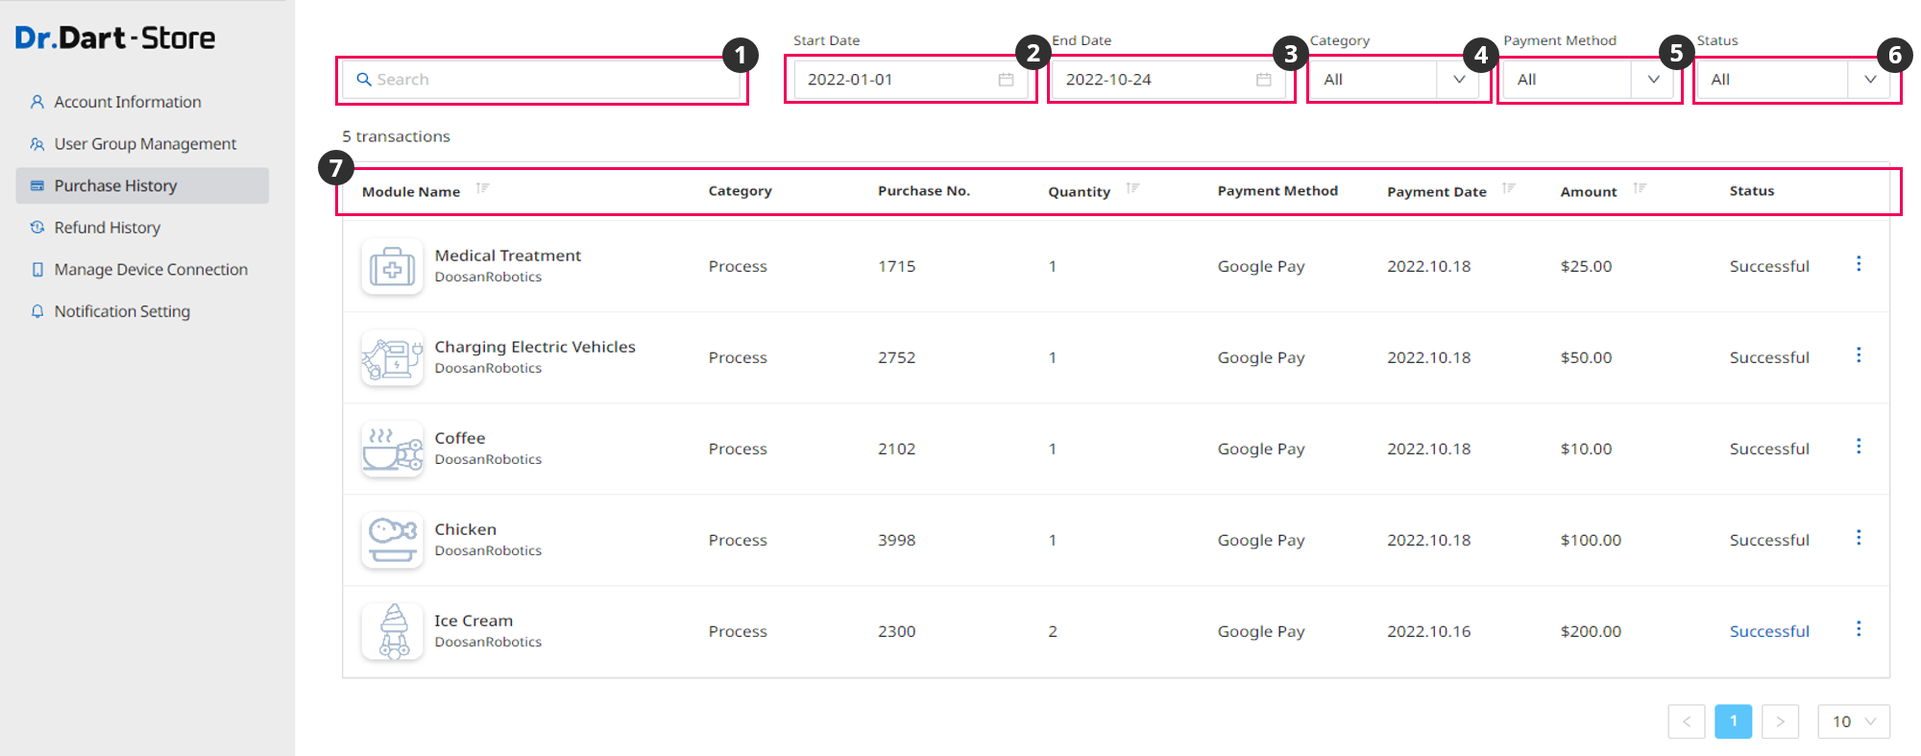
Number | Name | Description |
|---|---|---|
1 | Search | Search by |
2 | Start Date | Choose the Start Date on the Calendar. |
3 | End Date | Choose the End Date Calendar. |
4 | Category | Choose the module categories such as |
5 | Payment Method | Choose payment methods you used, such as |
6 | Status | Choose the payment status, such as |
7 | List of purchases | The module(s) will be shown below with default information, including |
Request a Refund
If the new purchase can not meet your demand, you might want to request a refund. The steps below will help you to do it.
Step 1: On the
Account Informationpage. Select thePurchase Historypage, and you can see theRequest Refundoption after clicking the⋮icon.

Step 2: Click
Request Refund.It will show the Request a Refund popup, input the information and clickSubmitbutton to submit your request.

Name | Description | |
|---|---|---|
| 1 | Purchase No | The number of the purchase. |
| 2 | Purchase Quantity | The quantity of the purchase. |
| 3 | Paid Amount | The total of the purchase. |
| 4 | Refund Quantity | The portion of the refunded item. |
| 5 | Refund Amount | The amount of money for the refunded item. |
| 6 | Issue | The reason to request a refund such as :
|
| 7 | Message to Developer | Leave the message to the Developer. |
| 8 | Attached Images | The image describes the reason why you want to get a refund. |
| 9 | Attached Videos | The video describes the reason why you want to refund |
If you choose the
Problem is not listed here, you may need to leave a message. Fill your message in the boxMessage to Developerto explain your purpose on how you want to request a refund.Reviewing your refund request by Store's Admin (s) takes time.
Refund History
To check refunded transactions, click Refund History on the left menu to see the trade history.
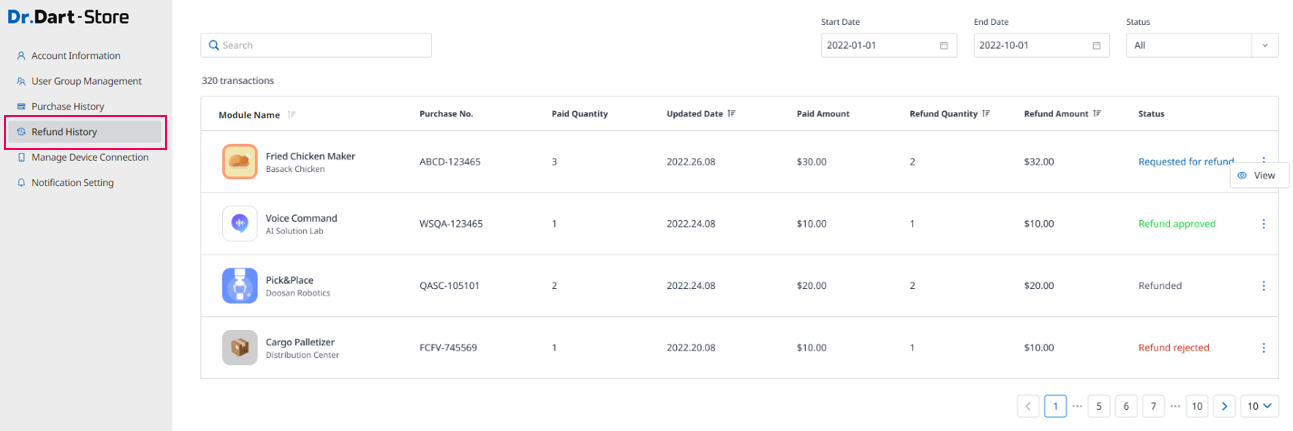
You can view the detailed information on each item by clicking the ⋮ icon.
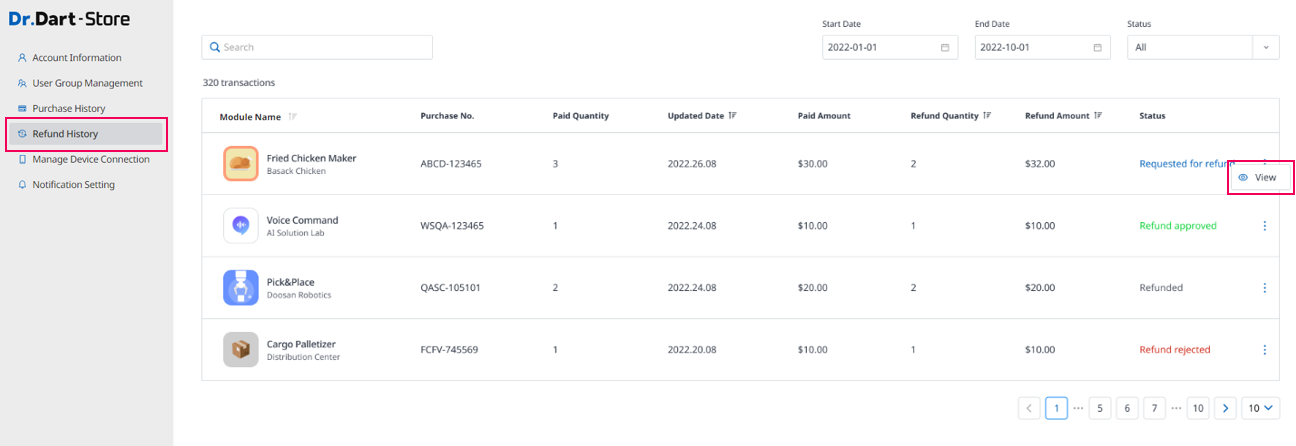
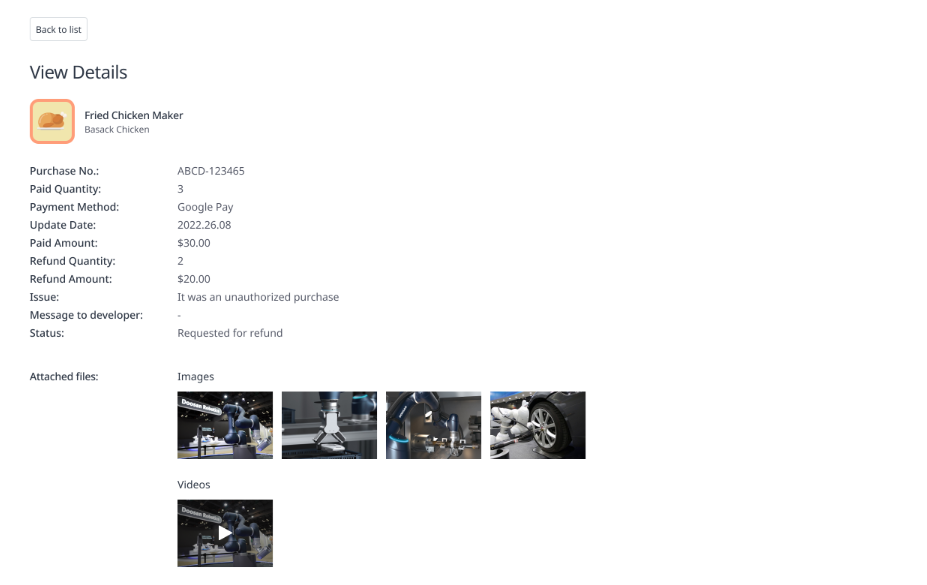
After clicking the ⋮ icon and choosing the View option, the screen will display like the below:
Guest Authority
When entering the Store website without logging, the user will be treated as guest and have several certain rights contacting with the Store page.
You will be able to see all the available functions, module for Guest Authority User with posts, categories in the left menu bar.
Main Screen
Main Screen when scrolling down.
Guest Authority User only allows you to see available modules. In case you want to make several purchases, you have to login or register an account.