Dart-Services
Overview
Dart-Services is a service program that helps install and run the build-environment of Dart-IDE and includes Robot Controller Simulator for connecting with Dart-Platform without robot & Controller.
Quickly update guide
Note
First-time installers should read the entire guide below before installing.
Update guide
Step 1. Delete old version of Dart-Services in your PC.
Step 2. Download new version of Dart-Services. :
Step 3. Install Dart-Services and once installation is complete, reboot your PC.
For additional installation and execution methods, please refer to the link below:
How to use Dr.Dart-Service
1) Features
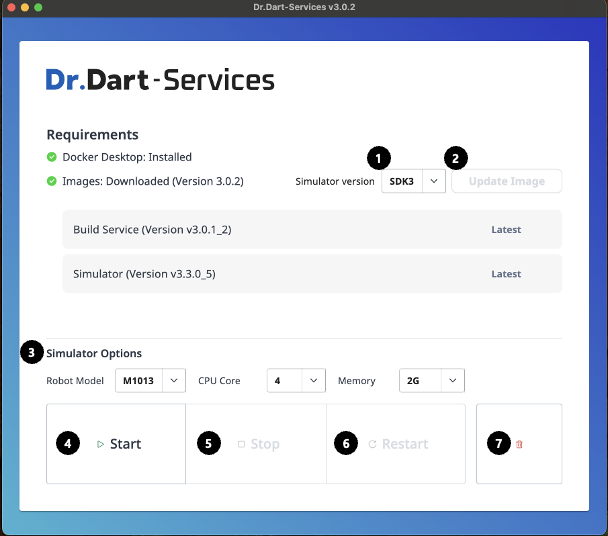
Simulator sdk version: Select simulator sdk version.Update Images: Update to the newest Docker image that fixed only bugs in Dart-Services.Simulator OptionsRobot Model: Select the robot model for simulator.CPU Cores:Sets the number of CPU cores for the simulator.Memory: Allocates memory for the simulator.Advanced Options: On Windows, allows for the configuration of WSL2 options.
Start: Run the Docker containers to simulate robot controller that can be connected to Dart-Platform and use build services in Dart-IDE.Run a Docker container. If there is no container created after downloading the Docker image, create a new container.
Stop: Stop the Docker container.Restart: Restart the Docker container.If you had trouble in the build, Click the
Restartbutton to restart the Docker.
Delete: Delete the Docker container.If you delete the Docker container, all data stored in Dart-Simulator will be lost.
2) How to use
Step 1. Select Simulator SDK Version.
If your version of the Dart-Platform is v3.3.0, you should select SDK3 for successful connection.
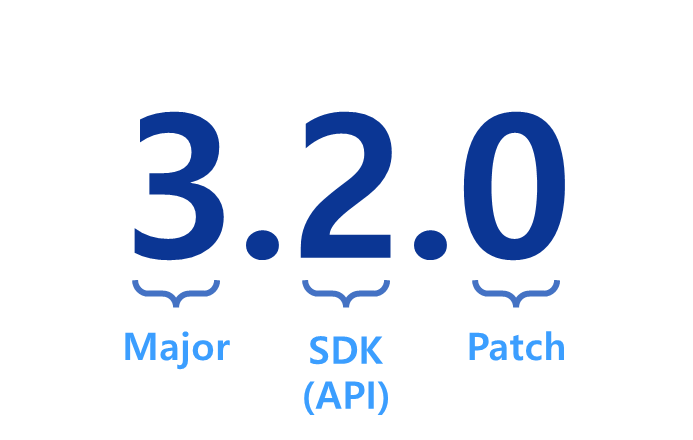
The version name of Dart-Platform consists of the following rules:
Major : A major change that is not compatible with lower (older) versions
(currently Dart-Platform 3)SDK(API) : SDK version (version of Dart-API).
Patch : When fixing bugs while being compatible with same SDK versions.
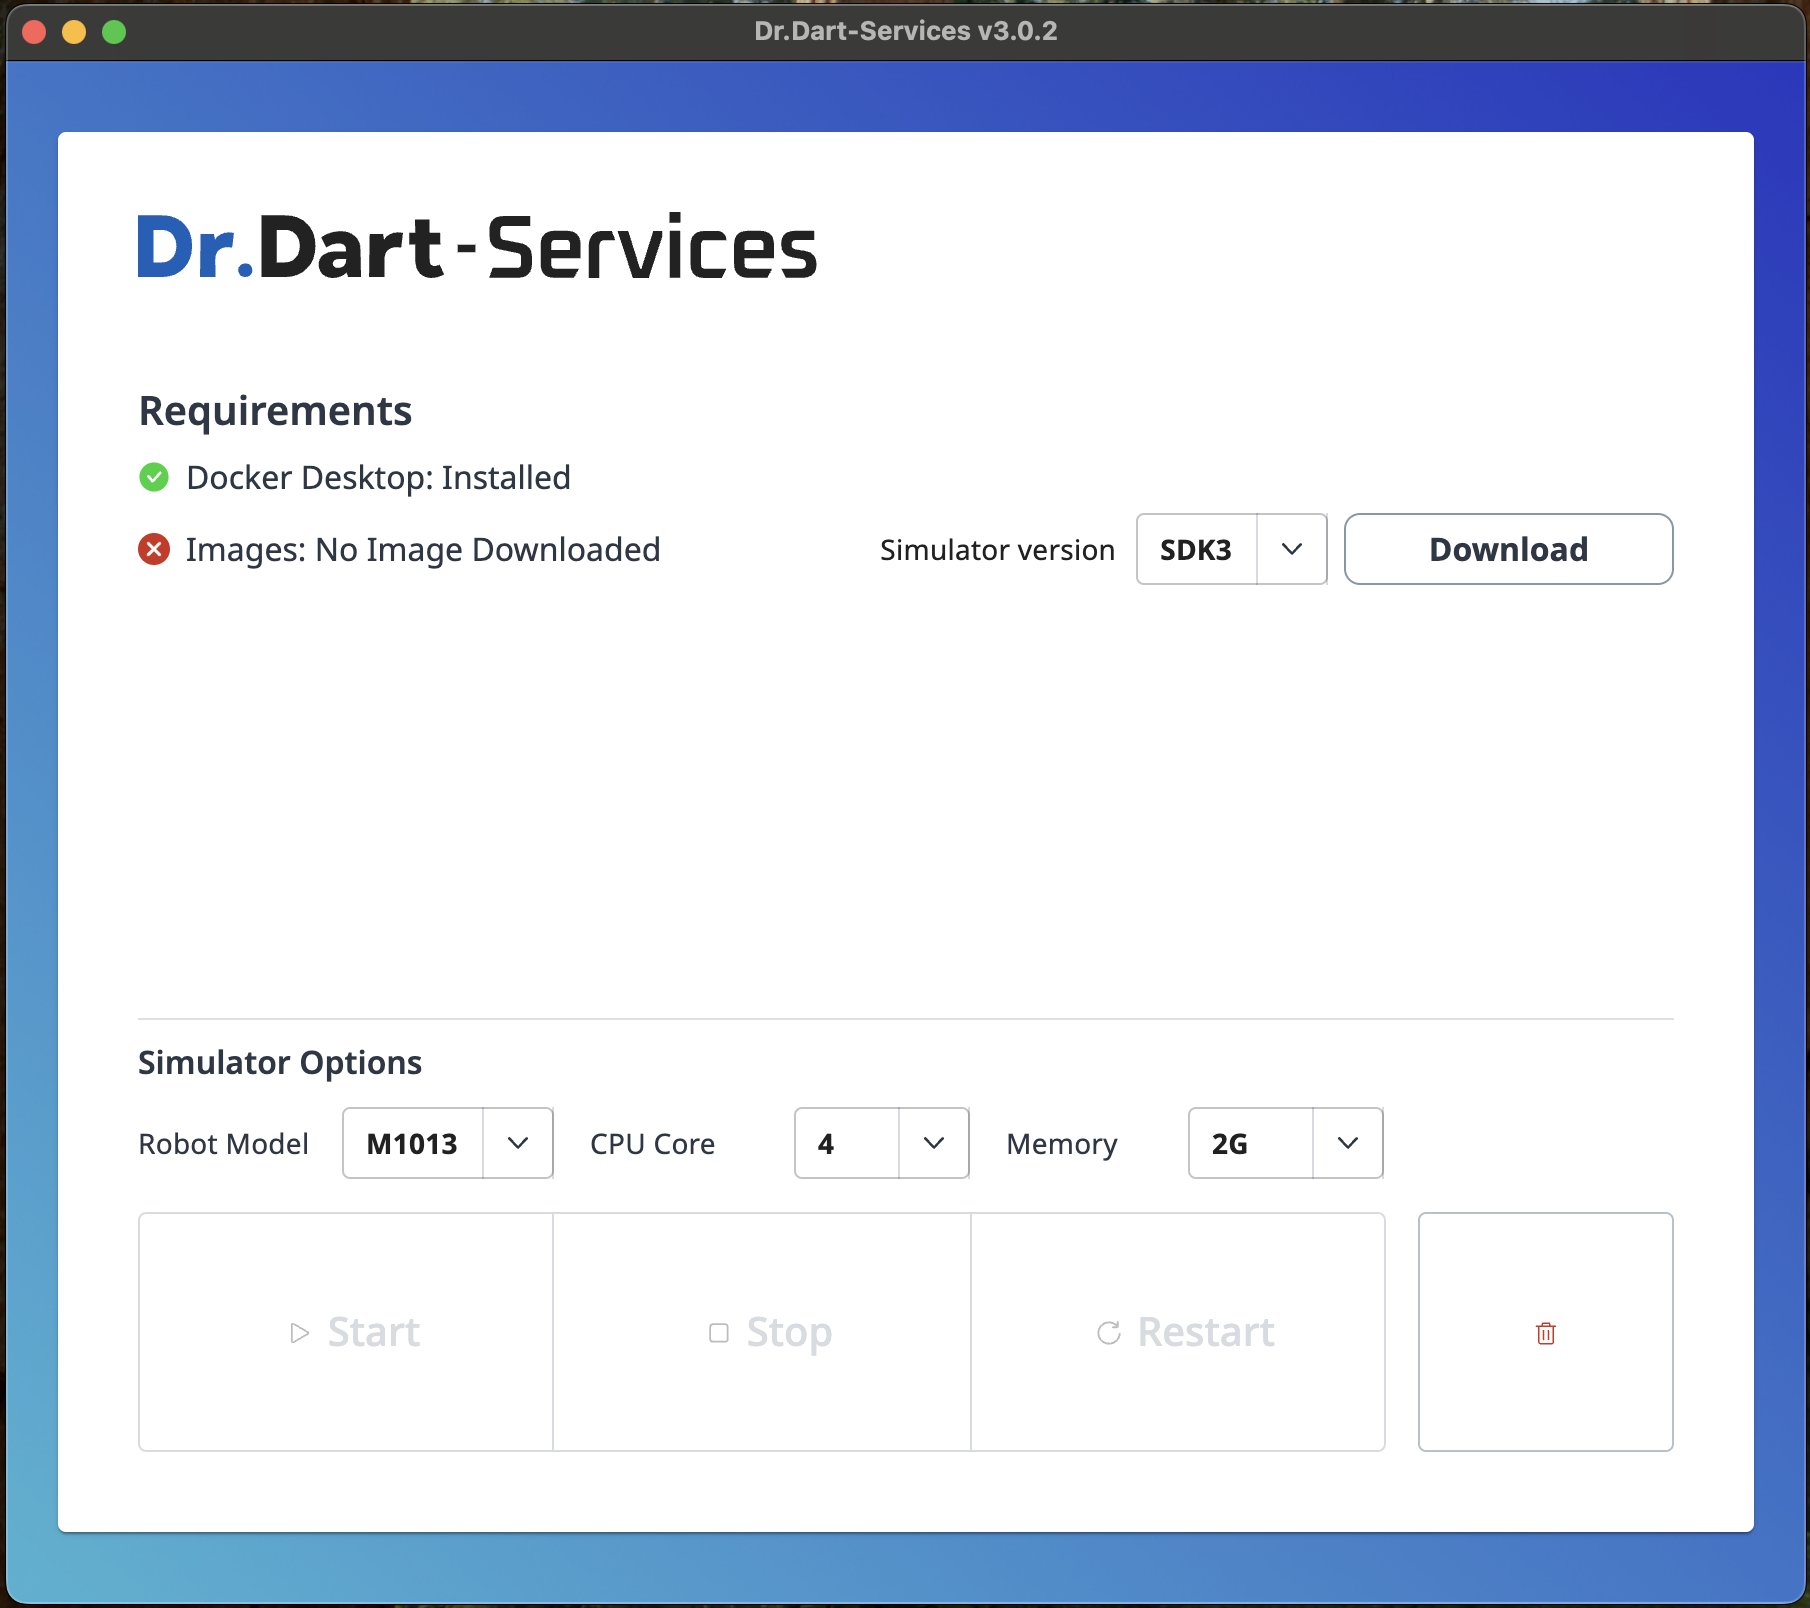
Step 2. Select
SDK Versionand ClickDownload ImageorUpdate Imagebutton
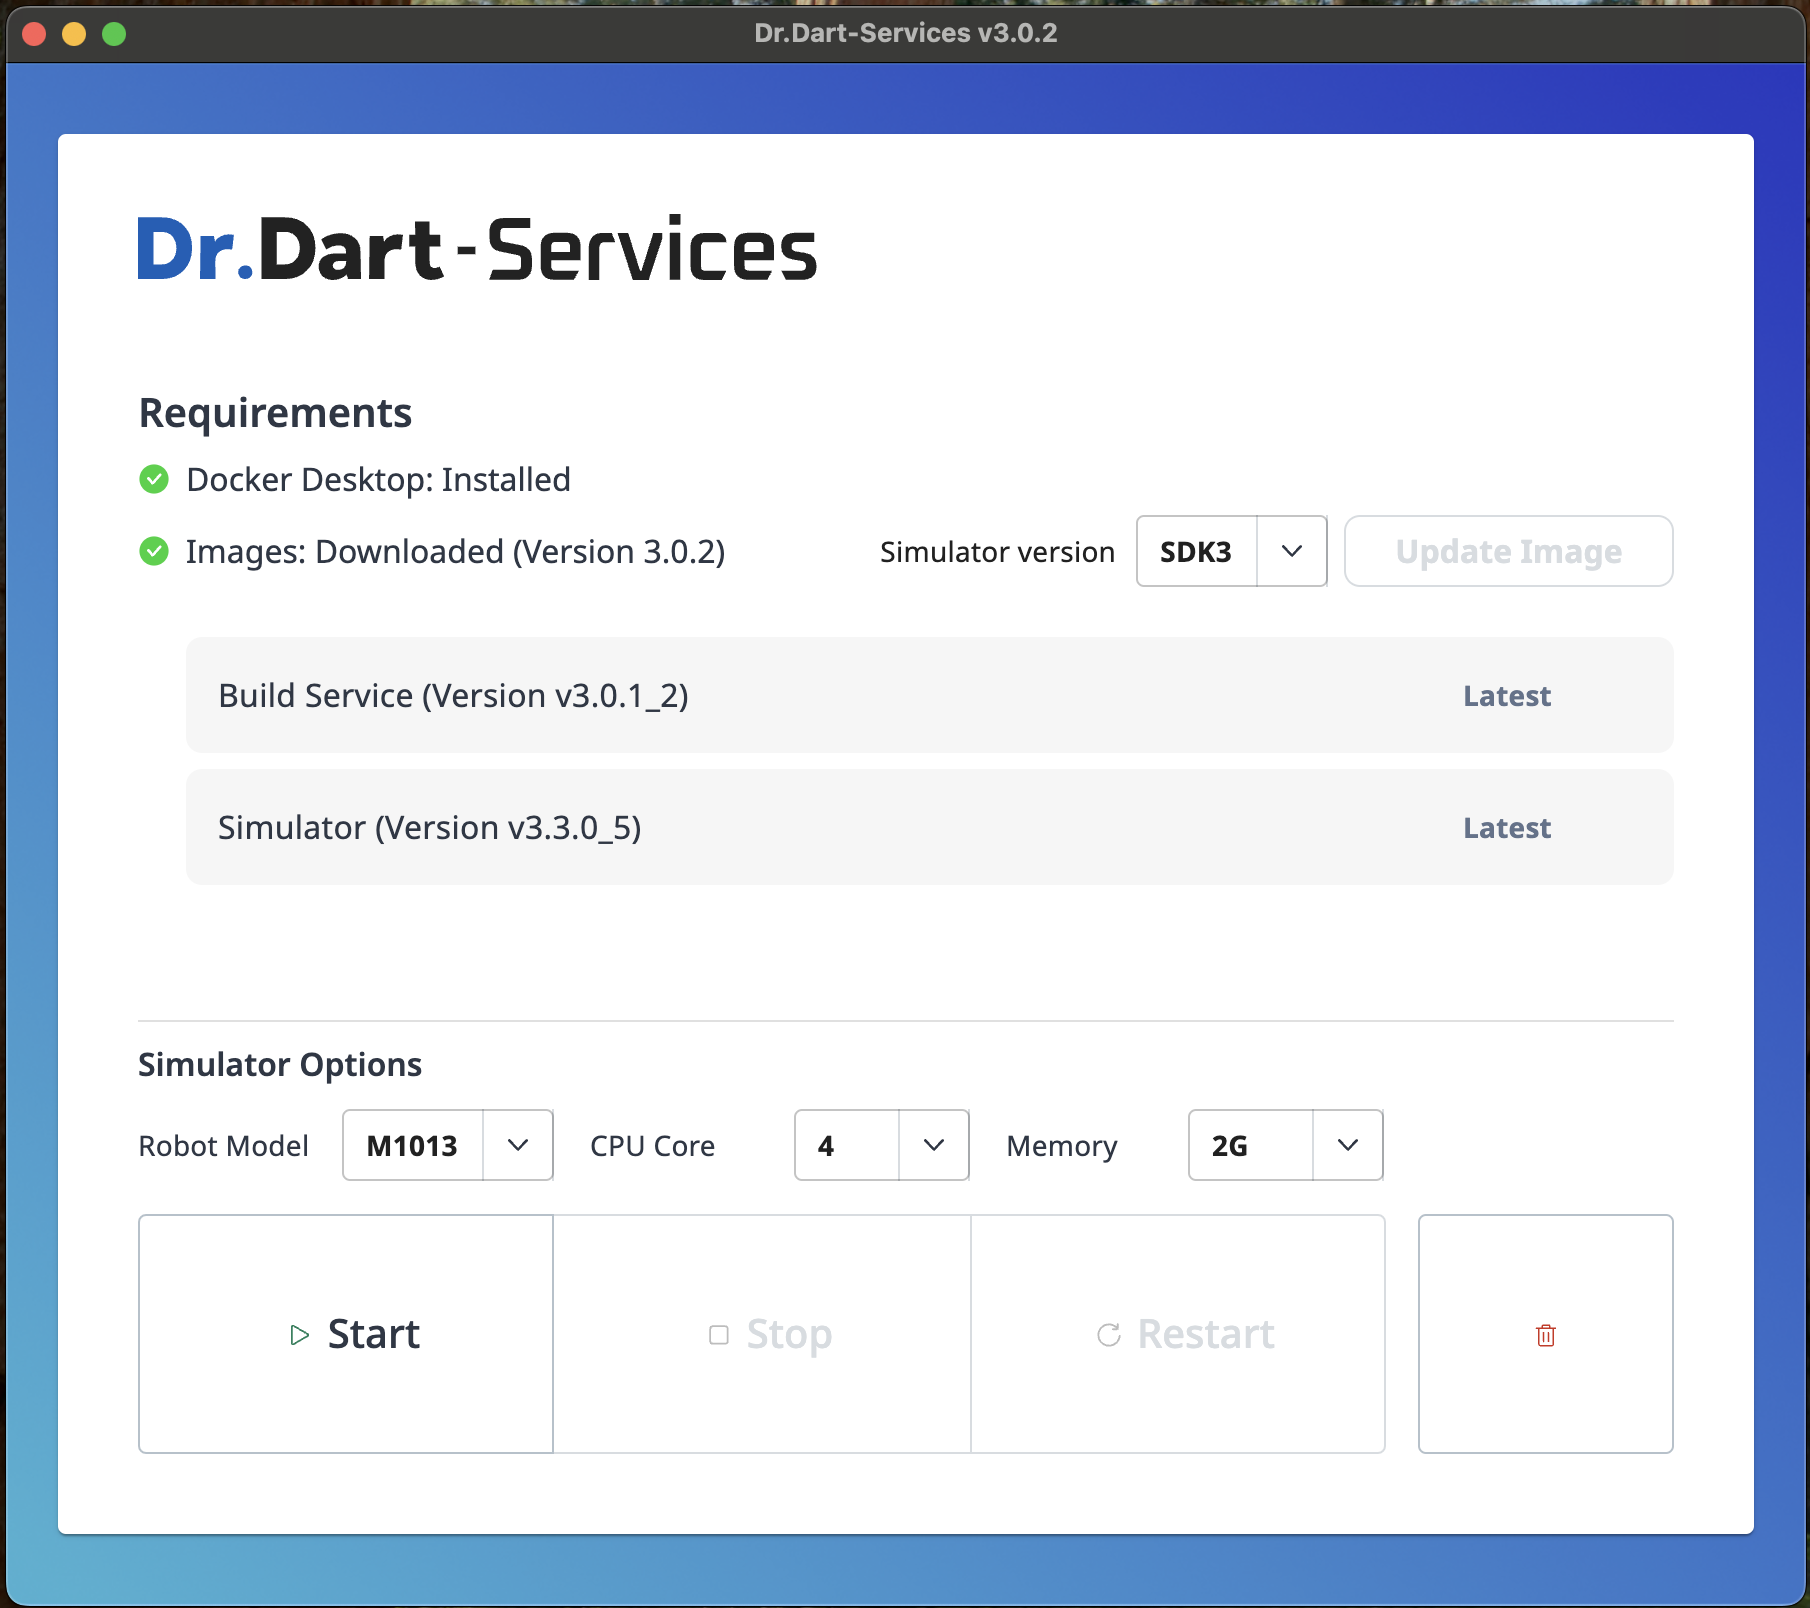
Step 3. Select the Robot Model and simulator options for the robot controller simulator.
Step 4. Click the
StartButton in Dart-Services and then wait until theLoading iconis changed toPause icon.
Info.
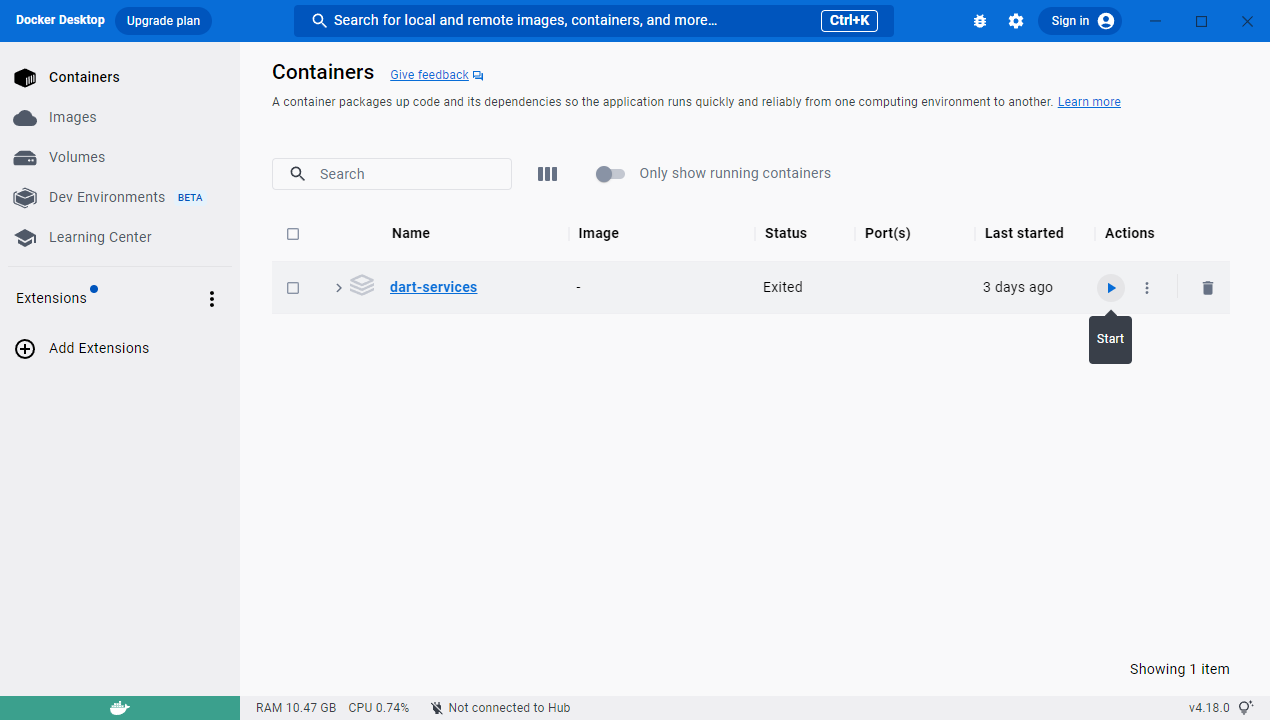
During normal operation, you can check that the Docker image called dart-services is normally in the Play state in Containers of the installed Docker Desktop.
Step 5. If there is a problem, try rebooting your PC and clicking the
Startbutton again.

Advanced Options: Optimizing CPU/Memory Usage
The simulator is designed to use the CPU to its full capacity. Therefore, it is necessary to modify the Docker runtime options.
Info.
This feature was added in the Dart-Services v3.0.2.

Automatic Configuration(Dart-Services v3.0.2 or higher)
Step1. Click
Advanced Optionbutton.Step2. Enter Memory and Processor Values
You can limit the maximum computing resources used by WSL (Windows Subsystem for Linux). This is useful if you notice your PC's memory usage nearing 90% or the cooling fan running at maximum speed. Adjust the values for the following:
processors: Sets the number of CPU cores for the simulator (e.g.,
4GB).memory: Sets the amount of memory for the simulator (e.g.,
8GB).
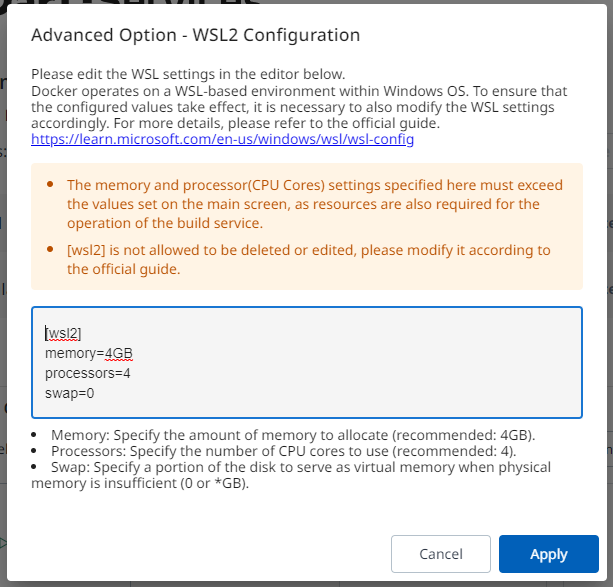
Step 3. Click the
Applybutton to proceed to the confirmation screen.Step4. Click the
Confirmbutton to apply the new settings. This will restart the Dart-Services.
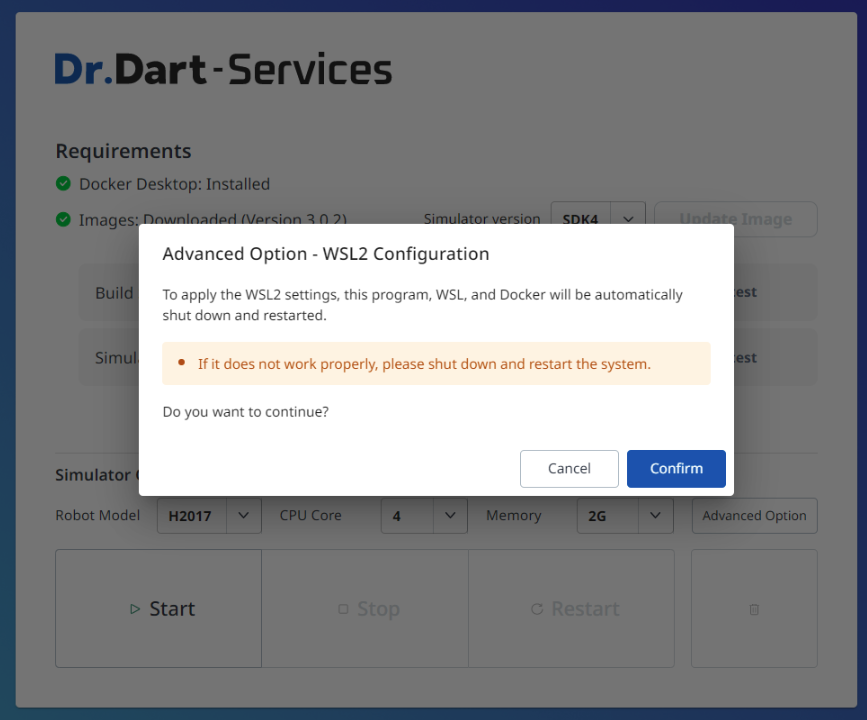
Manual Configuration
Step 1: Modify docker-compose.yml
Open the
docker-compose.ymlfile with a text editor.windows path:
C:\Program Files\Dr.Dart-Services\resources\assets\configs\docker-compose.ymlmac path:
/Applications/Dr.Dart-Services.app/Contents/Resources/assets/configure/docker-compose.yml
Add the
cpusparameter underservices > simulator > deploy > resources > limits, set its value in increments of 0.1, and save the file (admin rights required).CODEversion: '3.9' services: ... build_service: ... simulator: ... deploy: resources: limits: memory: 2G cpus: 0.5 # 4 -> 2 ...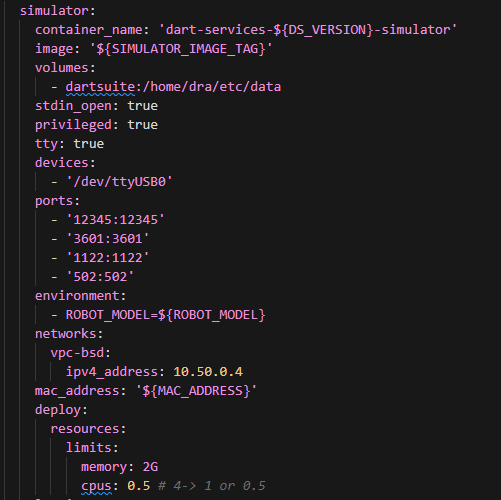
In dart-services, click the delete icon to remove the container.
In dart-services, click the
Startbutton to create and run a new container.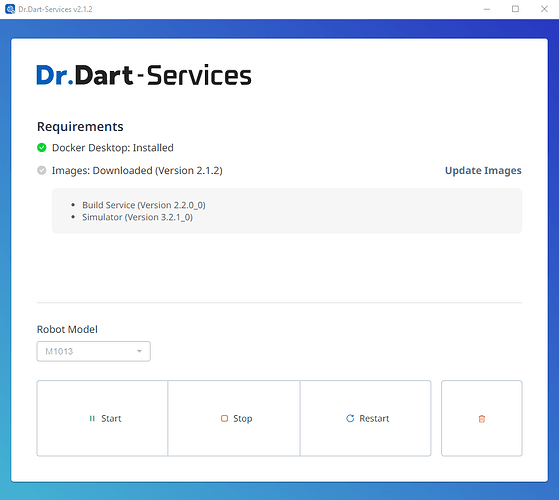
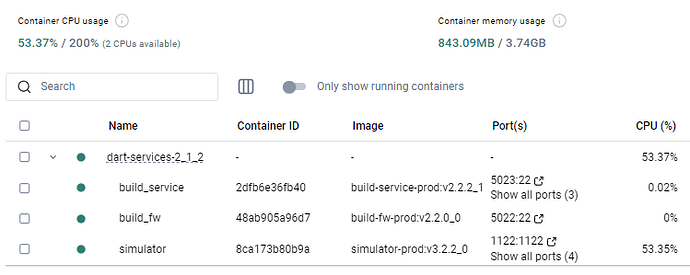
Step 2: Configure WSL Resources in Windows
Modifying Docker options alone may not prevent Vmmem from reaching near maximum usage because Docker operates based on WSL. Therefore, it is also necessary to limit WSL resources.


Navigate to the following folder path:
C:\Users{username} or access via the explorer address bar by typing
%USERPROFILE%Create a new text document named
New Text Document.txt.Enter the following content into the
New Text Document.txtand save it.CODE[wsl2] memory=4GB processors=2 swap=1GBmemory: The amount of memory to use (at least 2GB)processors: The number of CPU cores (at least 1)swap: Uses part of the disk as virtual memory when there is insufficient physical memory (0 or XGB)
Rename the New Text Document.txt file to .wslconfig (If the file extension change warning does not appear, enable Hidden items in the View menu of the Explorer before renaming).

Exit dart-services and Docker Desktop.
Run the command prompt.
Enter the following command:
CODEwsl --shutdownRun Docker Desktop or dart-services.
Known Issues
This app uses a Docker Desktop, so it will have a common problem. Refer to the link below:
Network & System specs may affect app performance.
The progress bar works unexpectedly.
If Docker Desktop does not start, you need to start manually (by clicking the icon Docker Desktop and re-start it)
MacOS requires apps installed from outside to be signed in or registered on the apple store for standard installation. Currently, you are working on the sign-in app method on MacOS and will soon include it in the next product release.
You can try the following guideline to bypass Apple protection steps: https://developer.apple.com/forums/thread/674539. When the app is installed successfully, use the command:
/Applications/Dr.Dart-Services.app/Contents/MacOS/Dr.Dart-Servicesto use the app with full permission.USB Serial and TCP/IP communication functions are not guaranteed in the Mac version.
