Process (Module Template) Guides
Overview
The Process Template is one of the tools you can use in Dart-IDE to create a module. It gives you a selection of pre-designed templates that you can use for your module with the User components. With these pre-made components, you can save time creating a module.
Project Tree structure

The purposes of Process Template
Save your resources on creating a module.
Easy-to-learn Templates.
Help you build a process module easily, step by step.
Example of Use
Create Project
We will guide you on how to use the Process Template on Dart-IDE.
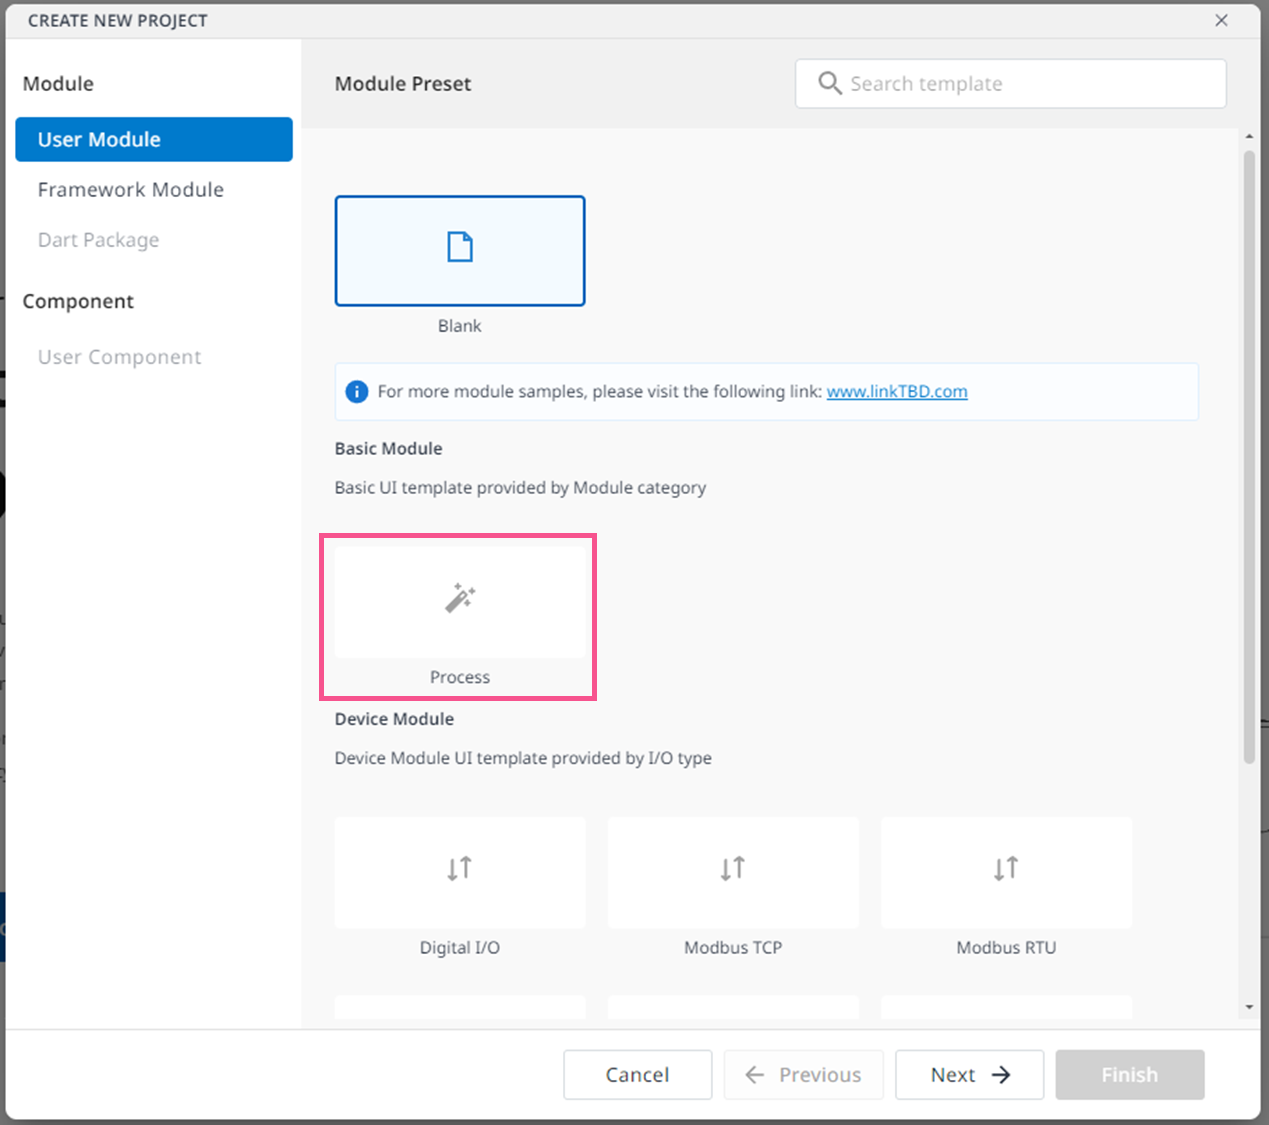
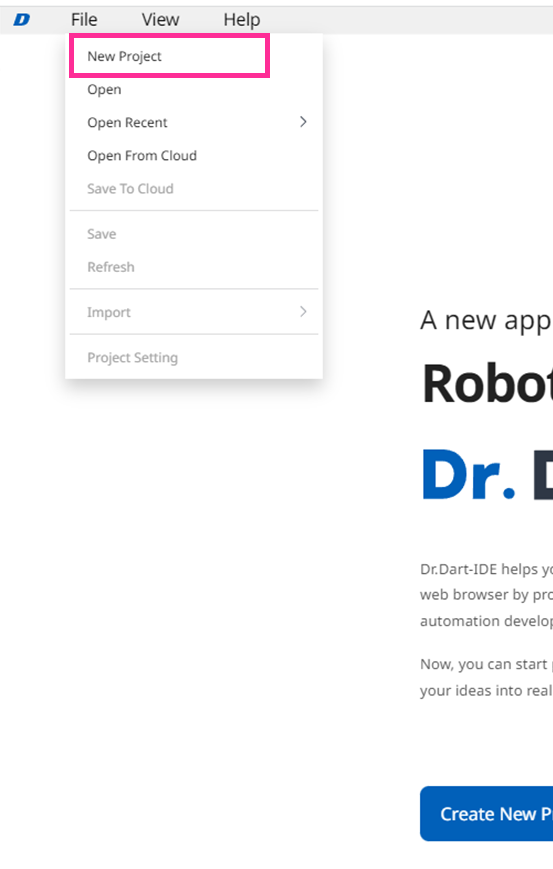
Step 1: Open Dart-IDE ‣ click File ‣ New Project, and Dart-IDE will show the Create New Project popup.
Step 2: On
Create New Projectpopup, click theProcessandNextbuttons. It will show theCreate New Projectform.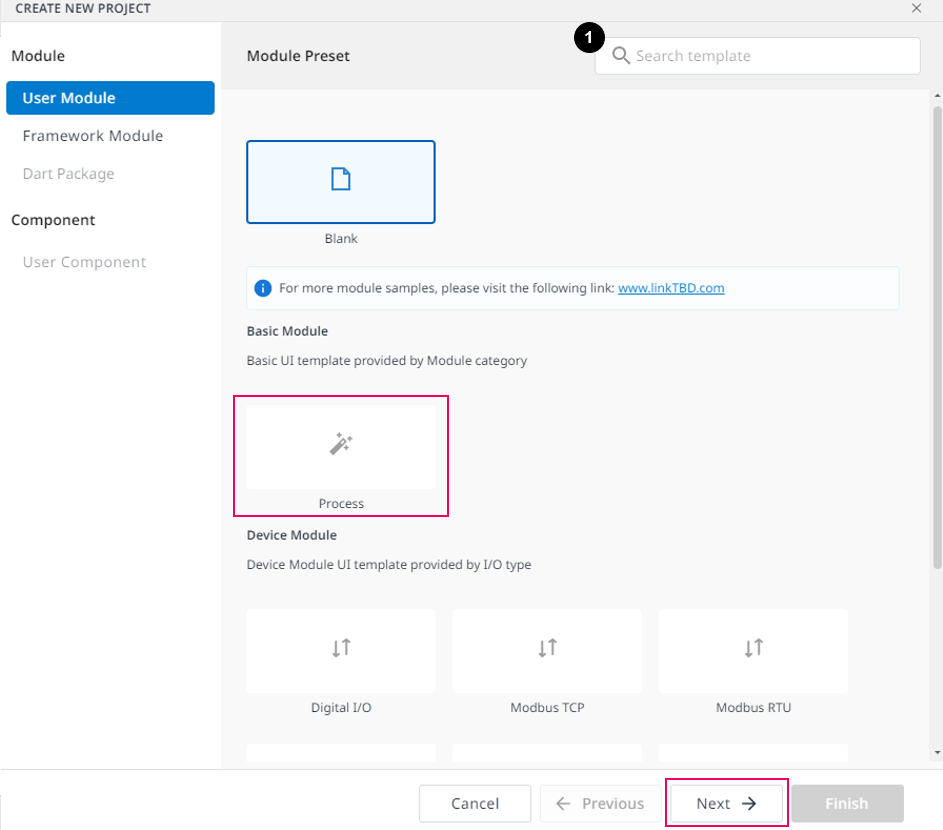
Name | Description | |
|---|---|---|
| 1 | Search | Search the name of the template. |
Step 3: There will be required fields you need to fill in, then click the
Finishbutton.
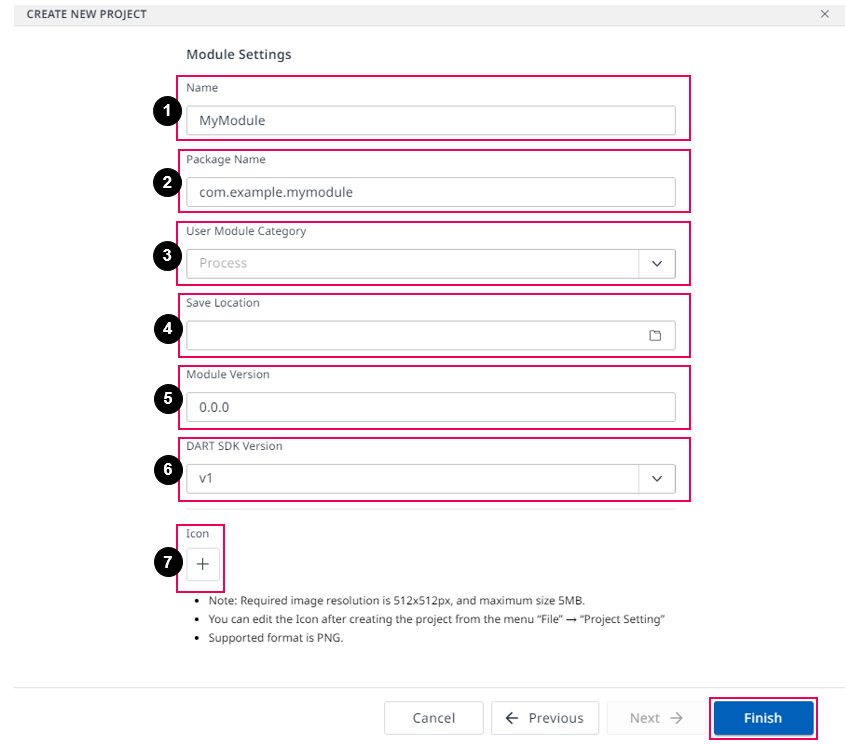
Name | Description | |
|---|---|---|
| 1 | Name | The name of the project. |
| 2 | Package Name | The Package Name of the project. |
| 3 | User Module Category | It is defaulted. |
| 4 | Save Location | The place where you save your project. |
| 5 | Module Version | Enter the version of your module. |
| 6 | Dart-SDK Version | Choose the newest version of SDK. |
| 7 | Icon | This is the thumbnail of the module which you created. |
Step 4: You will be led to the Dart-IDE main screen with your new project with the list of folders and files of
Process Templateon theEXPLORERpanel.
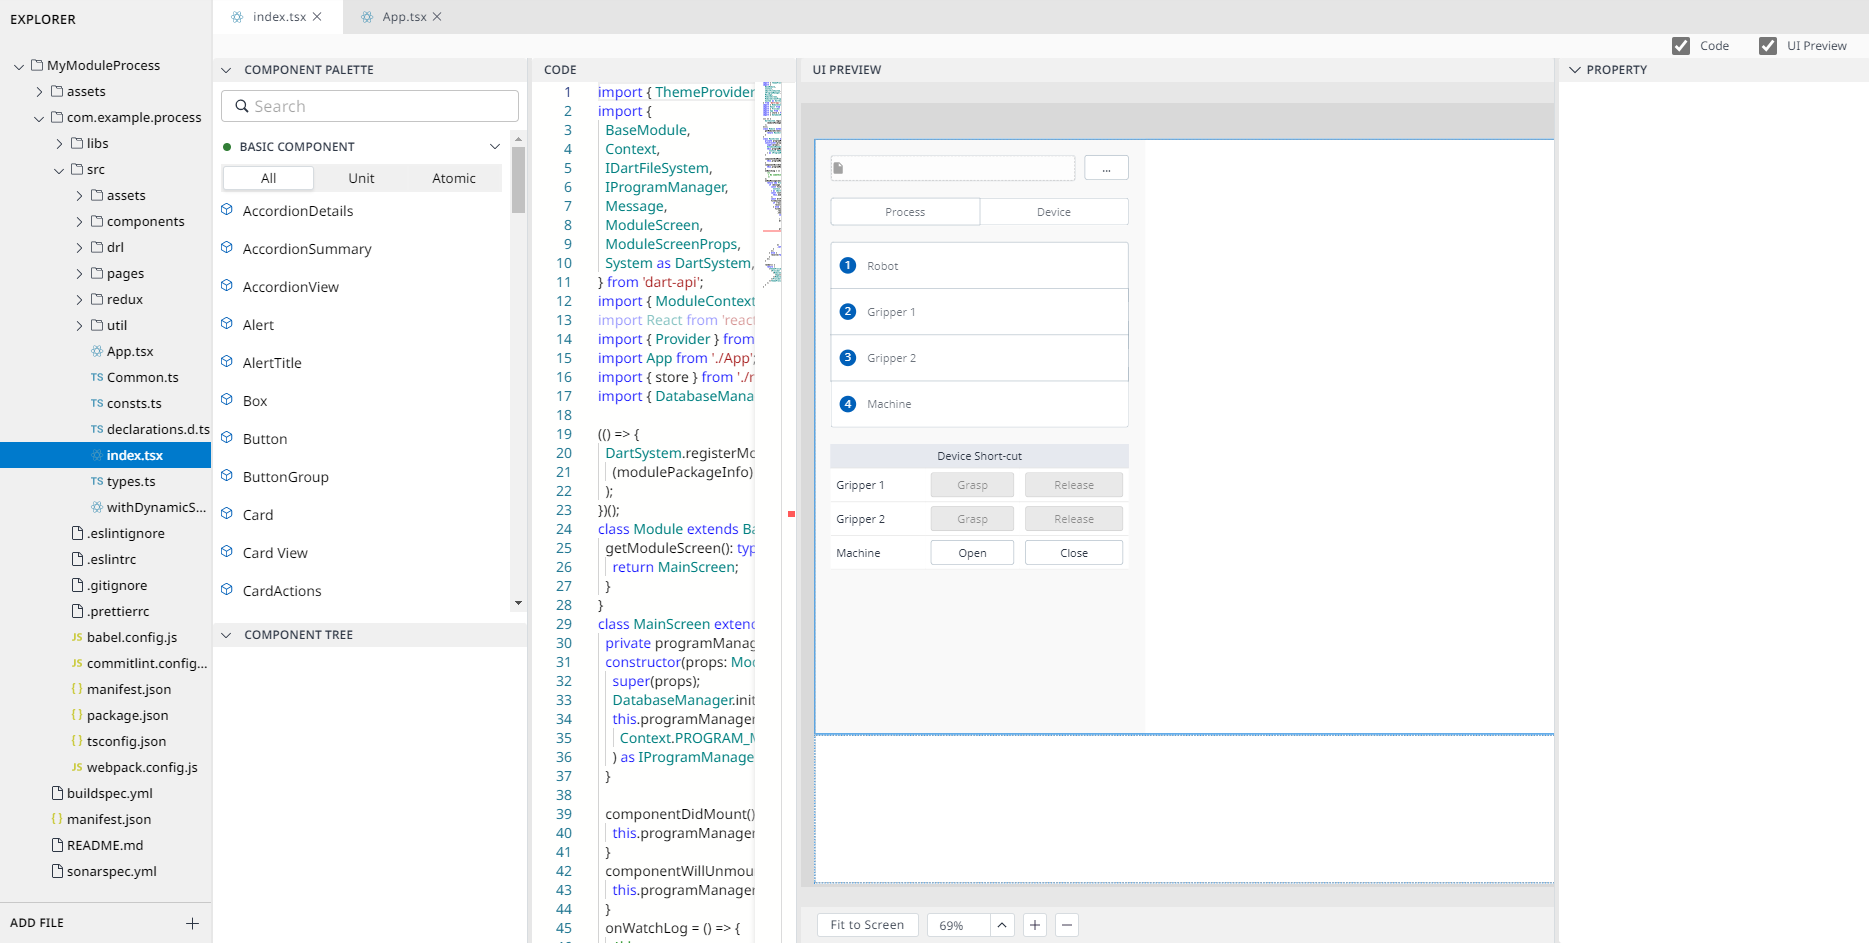
We have guided you in creating a new project using the Process Template with the information above. Follow Distribute a Module to keep completing your project.
Edit project
Before editing the project, you have to know exactly the structure of this template and vital tsx files.
Open Pages, then you have eight tsx files to pay attention to.
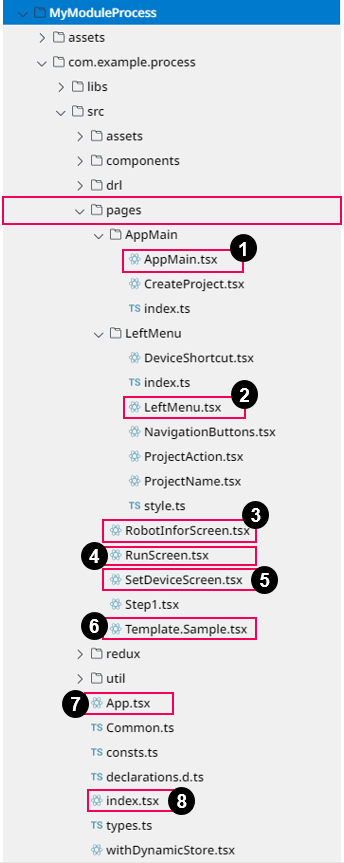
Name | Description | |
|---|---|---|
| 1 | AppMain.tsx |
As you can see the below image,
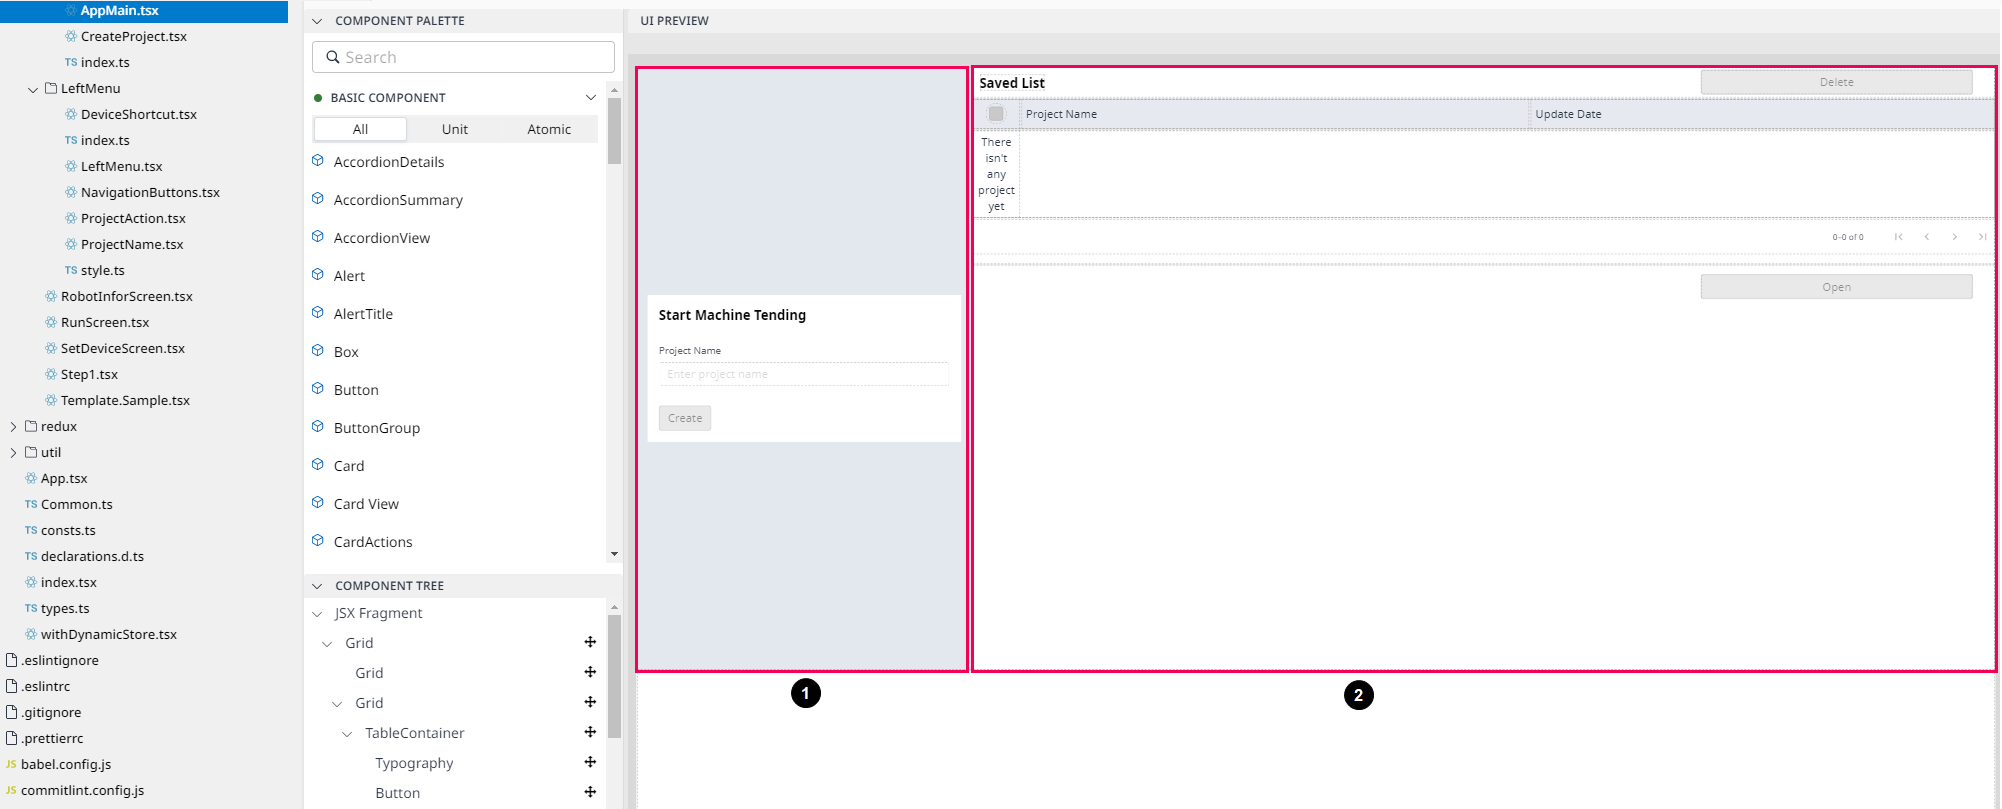 When you want to modify any components in part 1, you should open |
| 2 | LeftMenu.tsx | LeftMenu is compose by As you can see the below image, UI Preview divide into 4 part.
 When you want to modify any components, you should open corresponding file, then modify it. |
| 3 | RobotInforScreen.tsx |
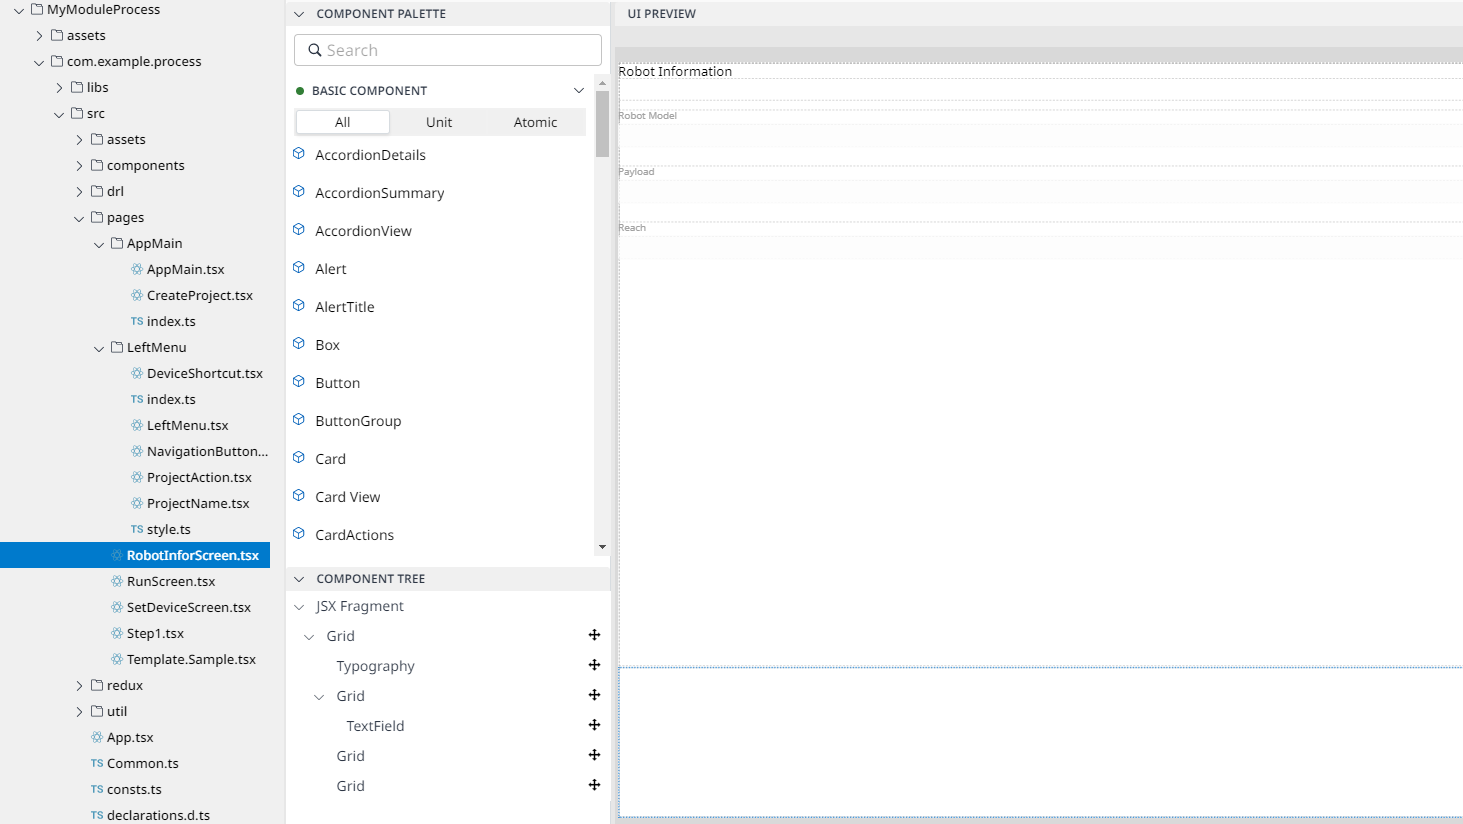 |
| 4 | RunScreen.tsx |
(There was a problem with SDK, I’ll revise this picture when developer revised this problem) 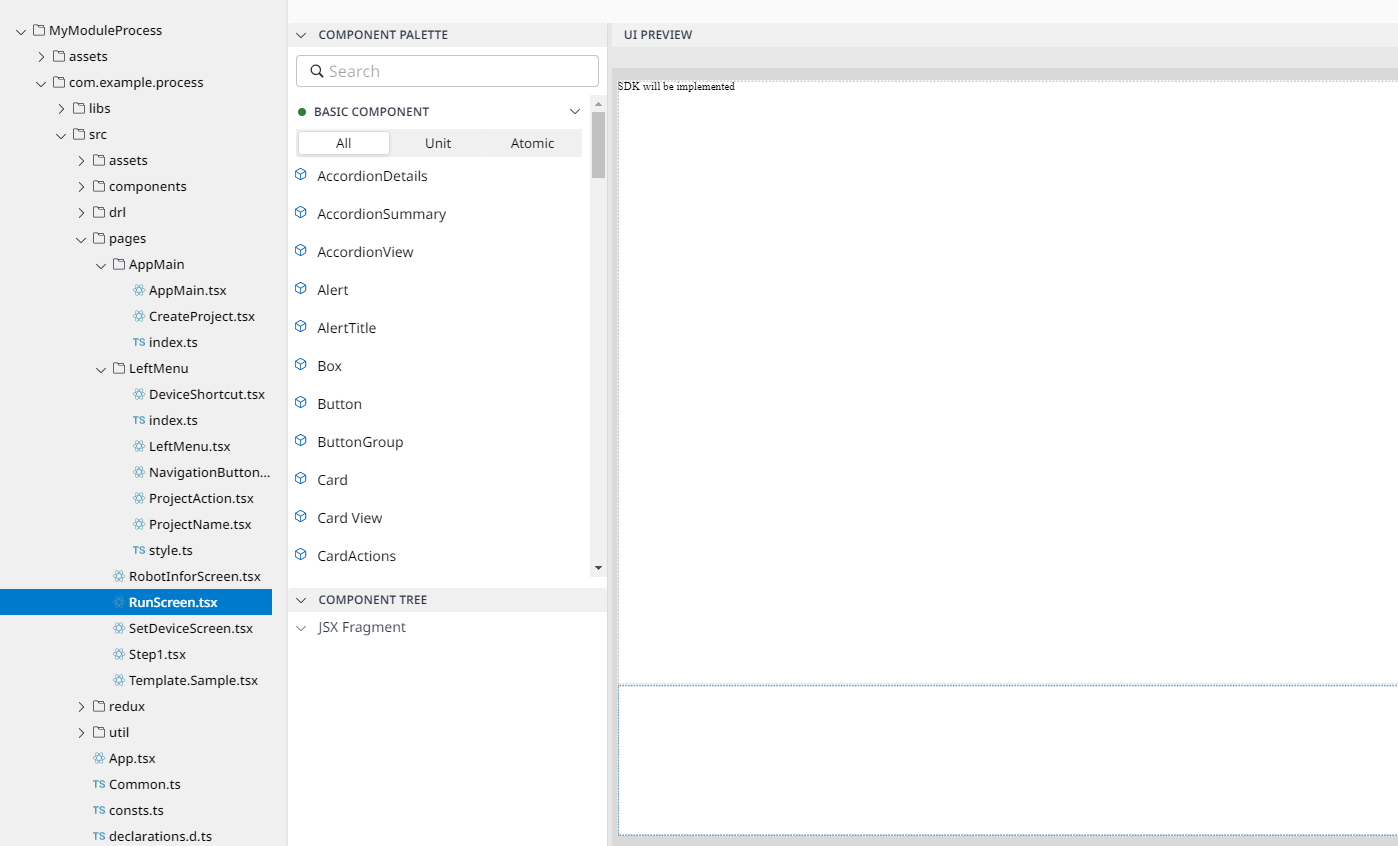 |
| 5 | SetDeviceScreen.tsx |
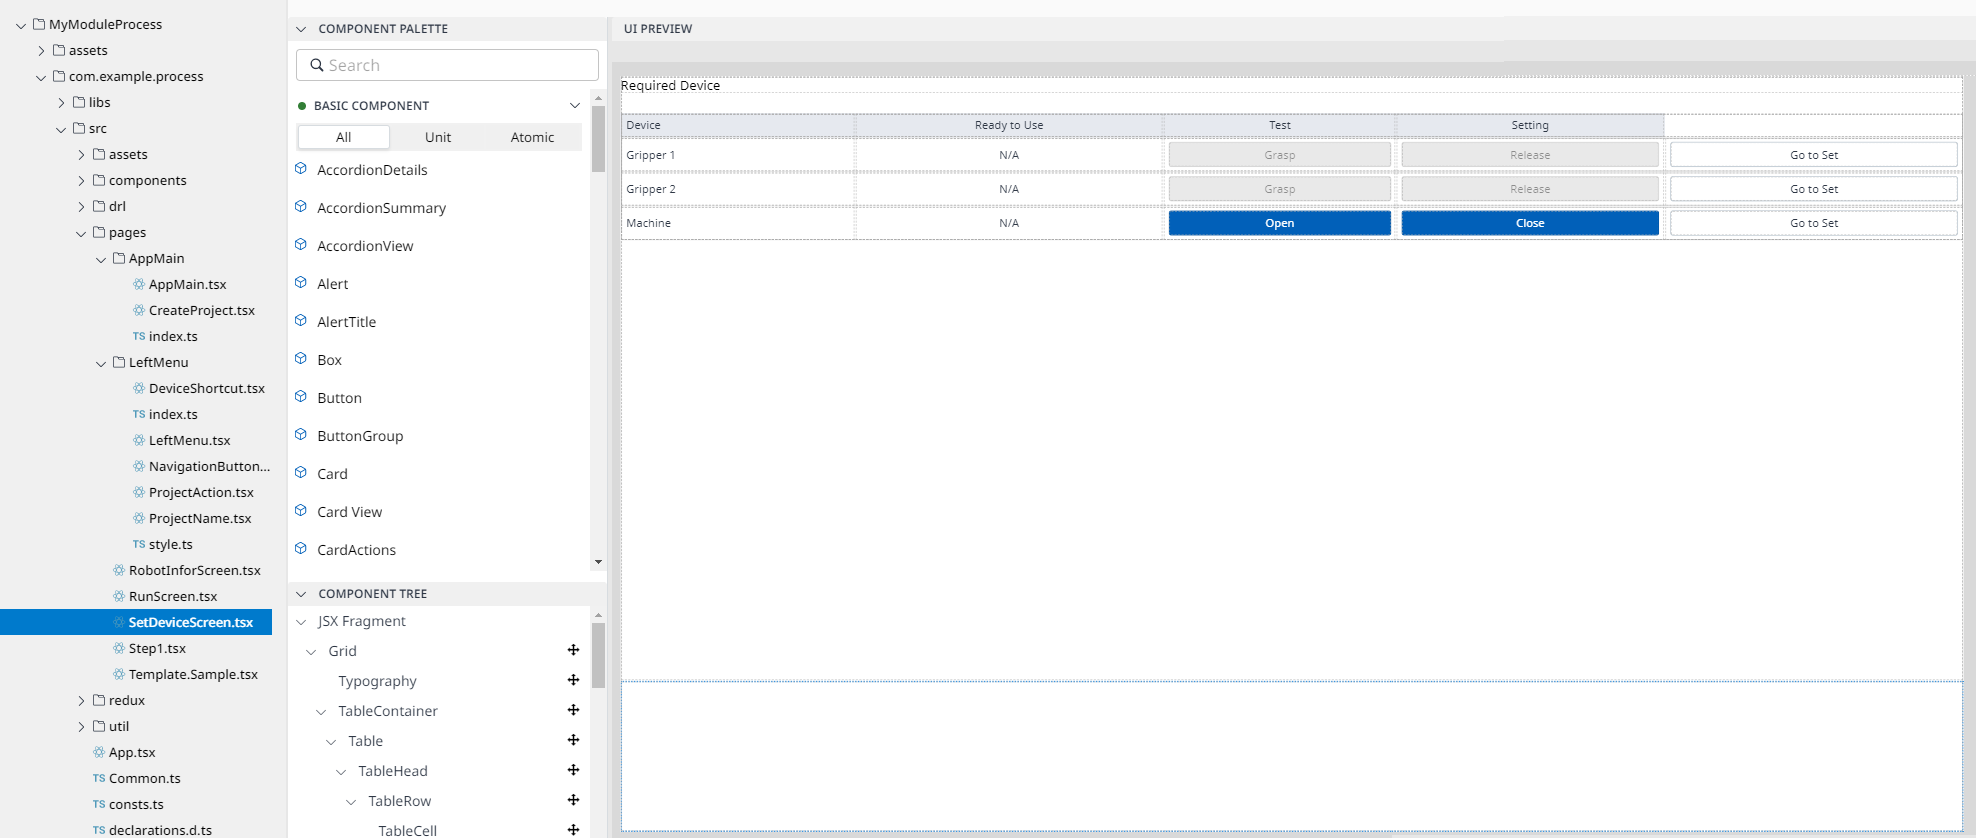 |
| 6 | Template.Sample.tsx | Template Sample is the Blank page. You can try your draft design to this page. |
| 7 | App.tsx |  |
| 8 | Index.tsx | A type of left menu which you can modify each component  |
How do you know what pages the Using When you open Code Editor, look at the top you can see the source code:
CODE
and in the 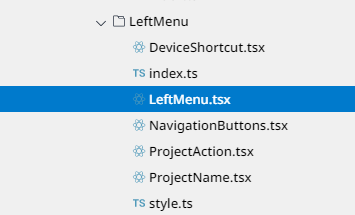 If you want to modify any part of |
Tip
While you create process module by
Process Template, you must arrange file reasonable.You must divide your big page to many small part and then collect it in one page similar to
LeftMenu.Each step of the process should have
LeftMenu.
Put the logo on the top.
Step 1: Drag & Drop the Image component on the top of
UI PREVIEWpanel.
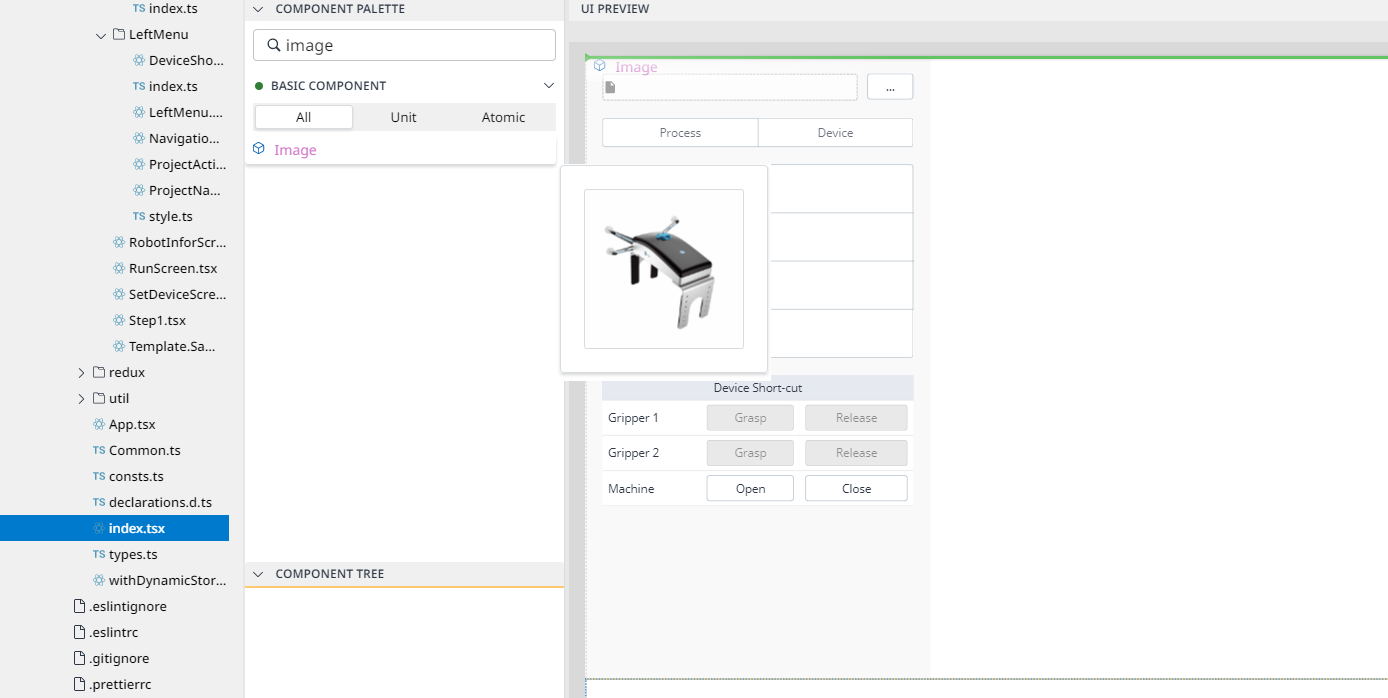
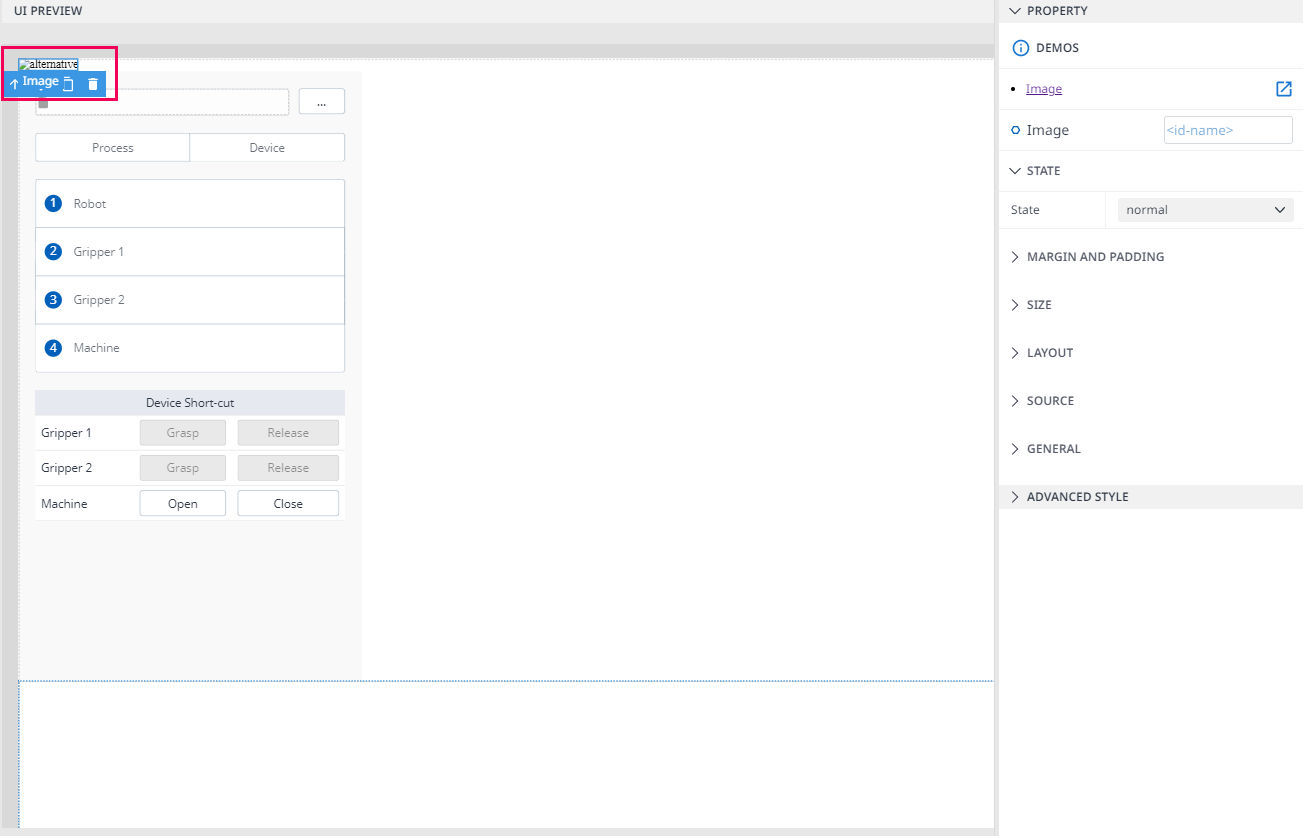
Step 2: On the
PROPERTY panel, click theSOURCEoption, and then the screen will display like the one below:
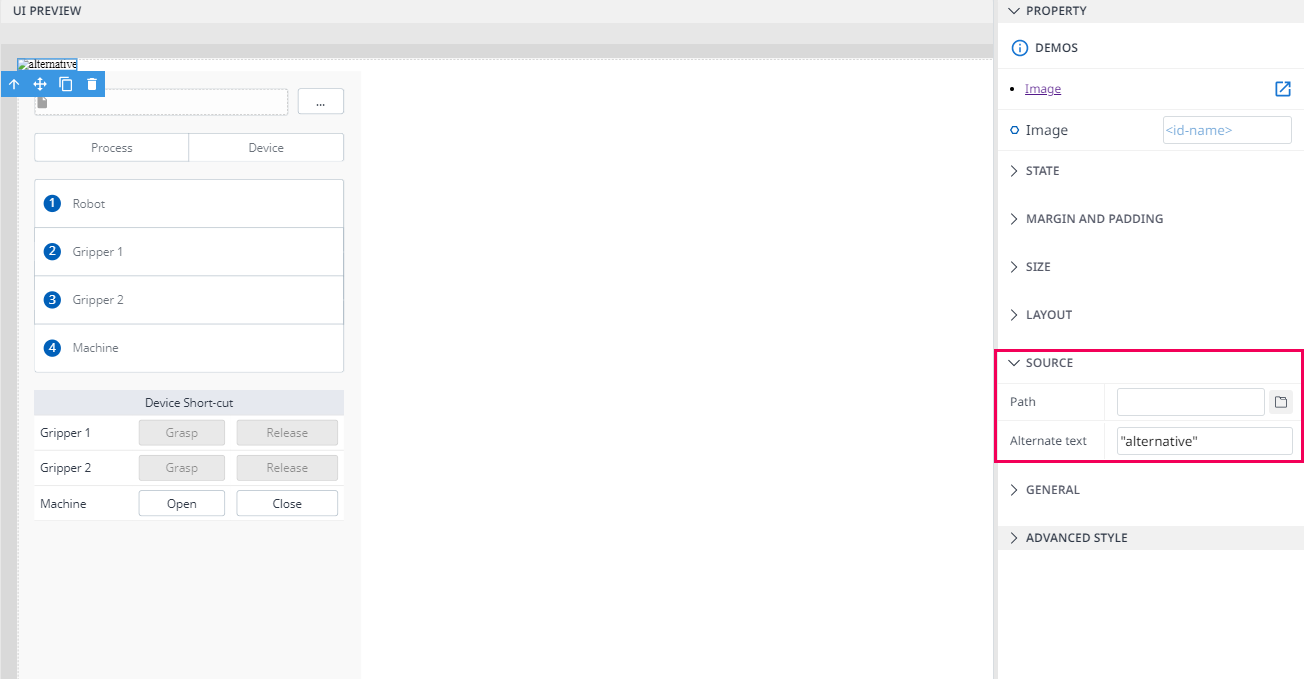
Step 3: Upload your logo by clicking the
File iconinPath.
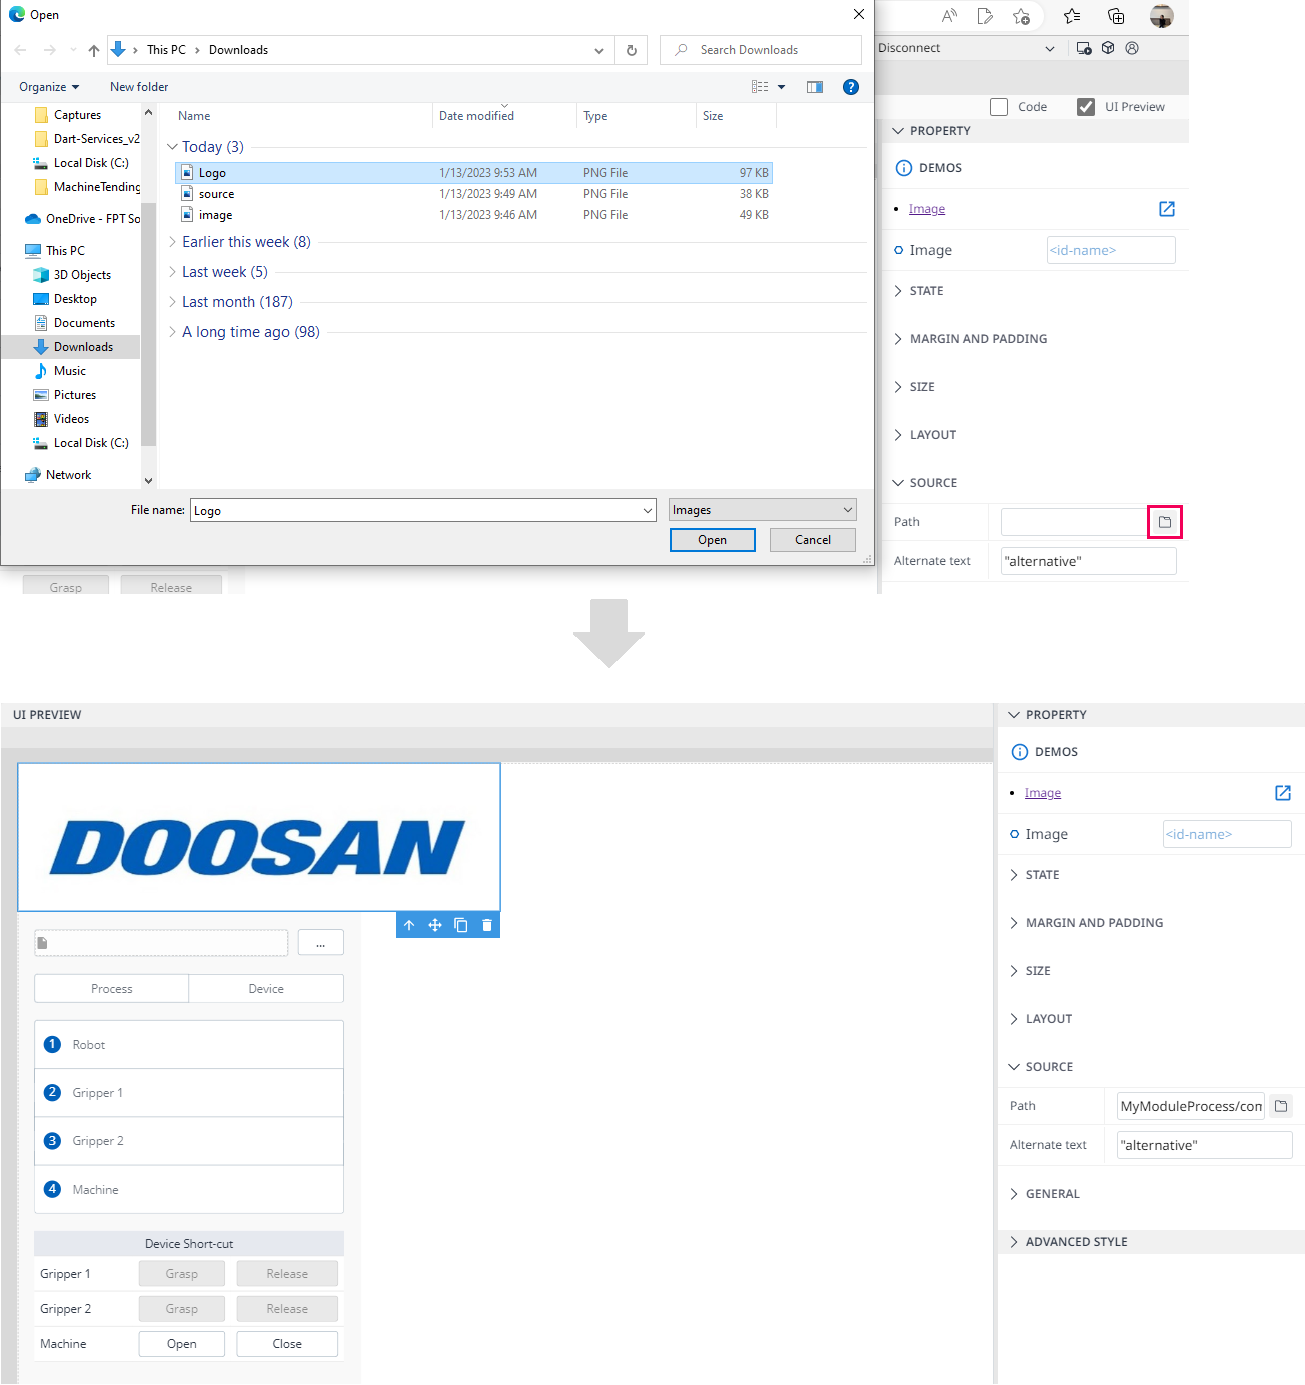
Step 4: You can edit the logo in order to make it better in the
PROPERTYpanel.
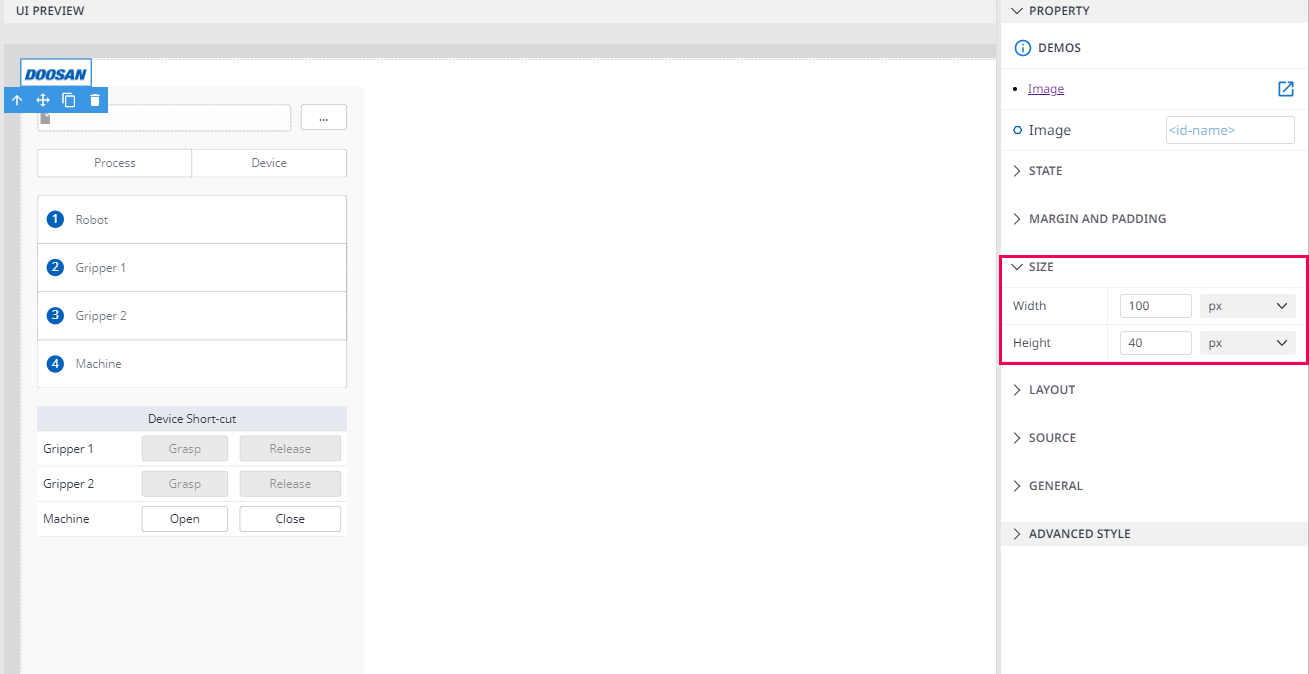
Re-design project (Minor level)
Besides adding images, you can edit the design by adjusting the component in the PROPERTY panel or adding some components by dragging & dropping to make your project look better.
You can follow the Sample from Section 2 to Section 4 in Create your first Module and apply for your project.
Info.
For easy understanding and complete imagination about the module, which Process Template made, you can refer to [Hide] Palletizer Sample and [Hide]Machine Tending Sample.
How to use Database
After you finish creating the Process module in Dart-IDE, build file.dm, and then you will be able to install it in Dart-Platform.
The database can be able to help you save your data. Anytime you enter data into this module in Dart-Platform, you can close the module and then reopen it without losing data. In order to do this, while creating the module, you must use Database. This guideline is for you, and please read it carefully: How To Use Database.
How to use DRL
This section assumes that you know well about DRL Function. If not, you can read this document DRL Generator to find out more information.
DRL plays an important role in controlling the robot’s actions. The process module is created by the process template. Between DRL and Database have a connection. DRL will be stored in Database, which helps users when using a module without losing DRL data.
