Create a User Component (UC)
Overview
The User Component (UC) is an essential and valuable component for developing your robot module by Dr.Dart-IDE.
This guide shows you how to create your User Component (UC) besides the existing components provided by default in Dart-IDE.
This article assumes you're already familiar with Dart-IDE. If you aren't, we suggest you retake a look at Dr.Dart-IDE.
Create a new User Component Project
Create a new project for building a User Component in Dart-IDE.
Step 1: Access to DART-IDE
Dart-IDE : https://ide.drdart.io
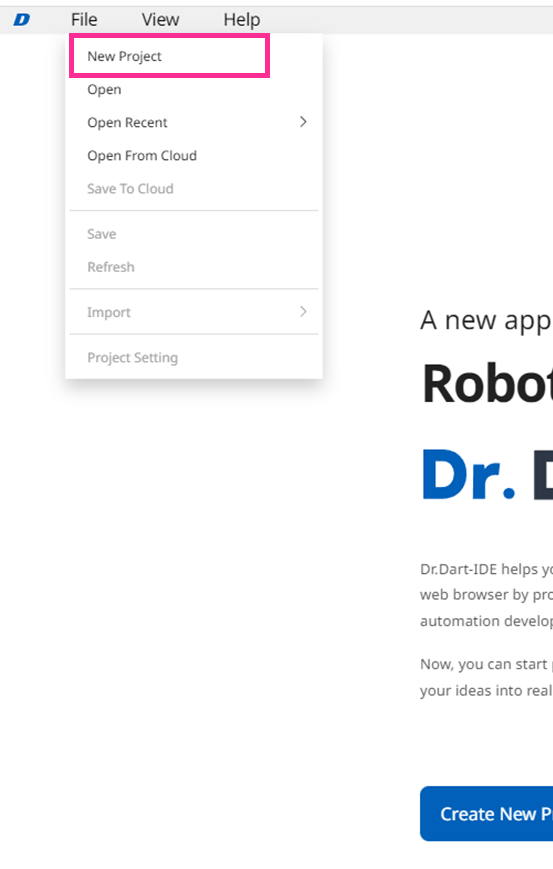
Step 2: Open a new project:
In the main menu, select File ‣ New Project.
Step 3: In the dialog that appears, select the
User Componentoption.
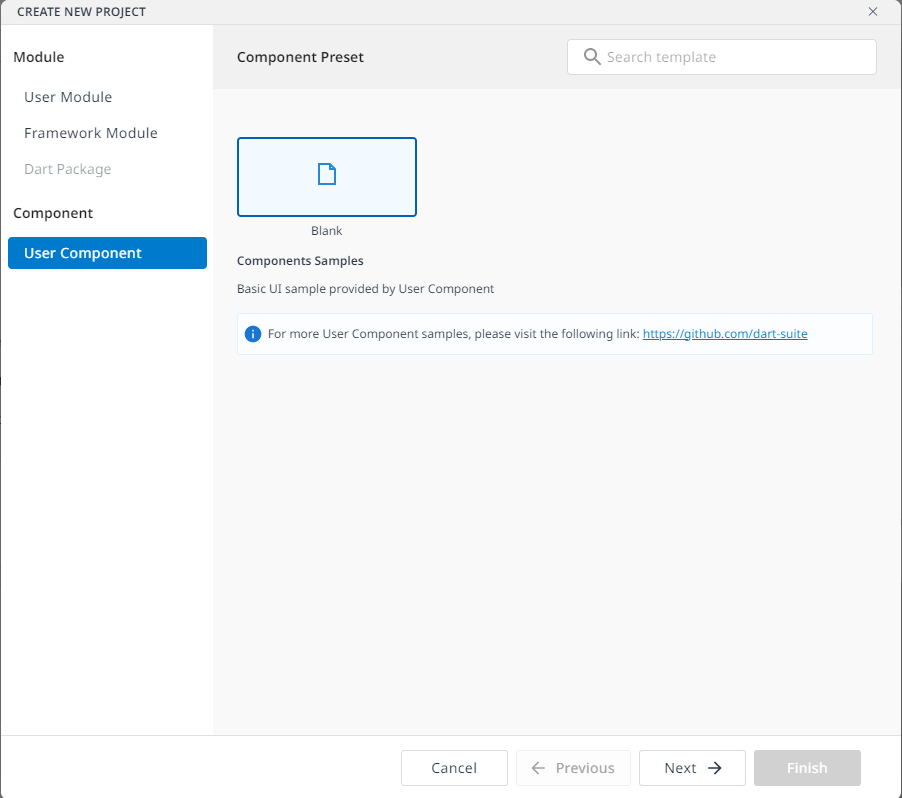
Step 4: Select the
Blankitem and clickNext button.
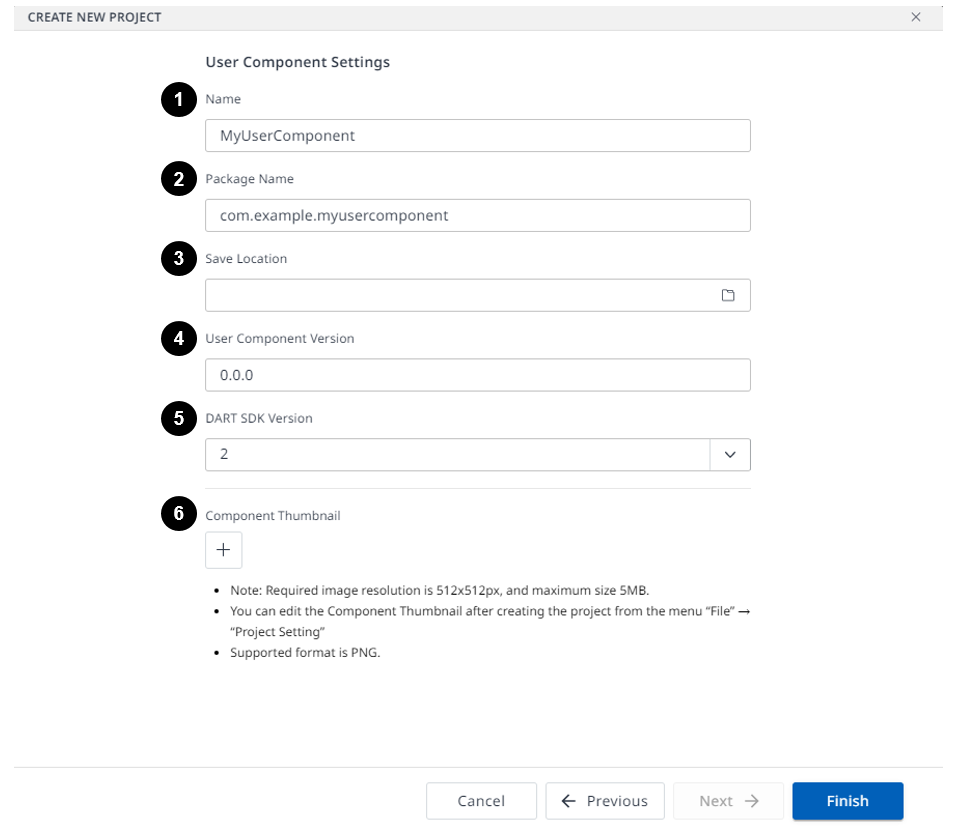
Step 5: In the dialog that appears, fill up all necessary information, then click the
Finish button.
Title | Description | |
|---|---|---|
| 1 | Name | The name of the new project. |
| 2 | Package Name | The package name of the new project. |
| 3 | Save Location | The folder where you save the new project on your local PC. |
| 4 | User Component Version | The version that you have made this User Component. |
| 5 | DART SDK Version | The Dr.Dart-SDK version of the new project. |
| 6 | Icon | The icon to represent your User Component when you upload it to Dart-Store. |
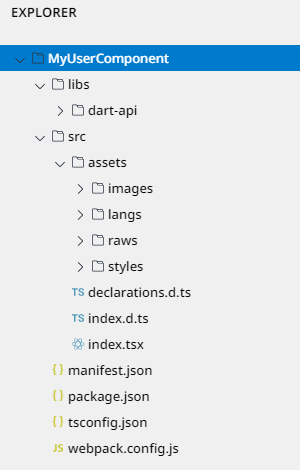
Step 6: Once the new project is created successfully, you can check its structure in the
Explorerpanel.
Step 7: Open the
index.tsxfile included in the assets folder of src folder to design your UC.
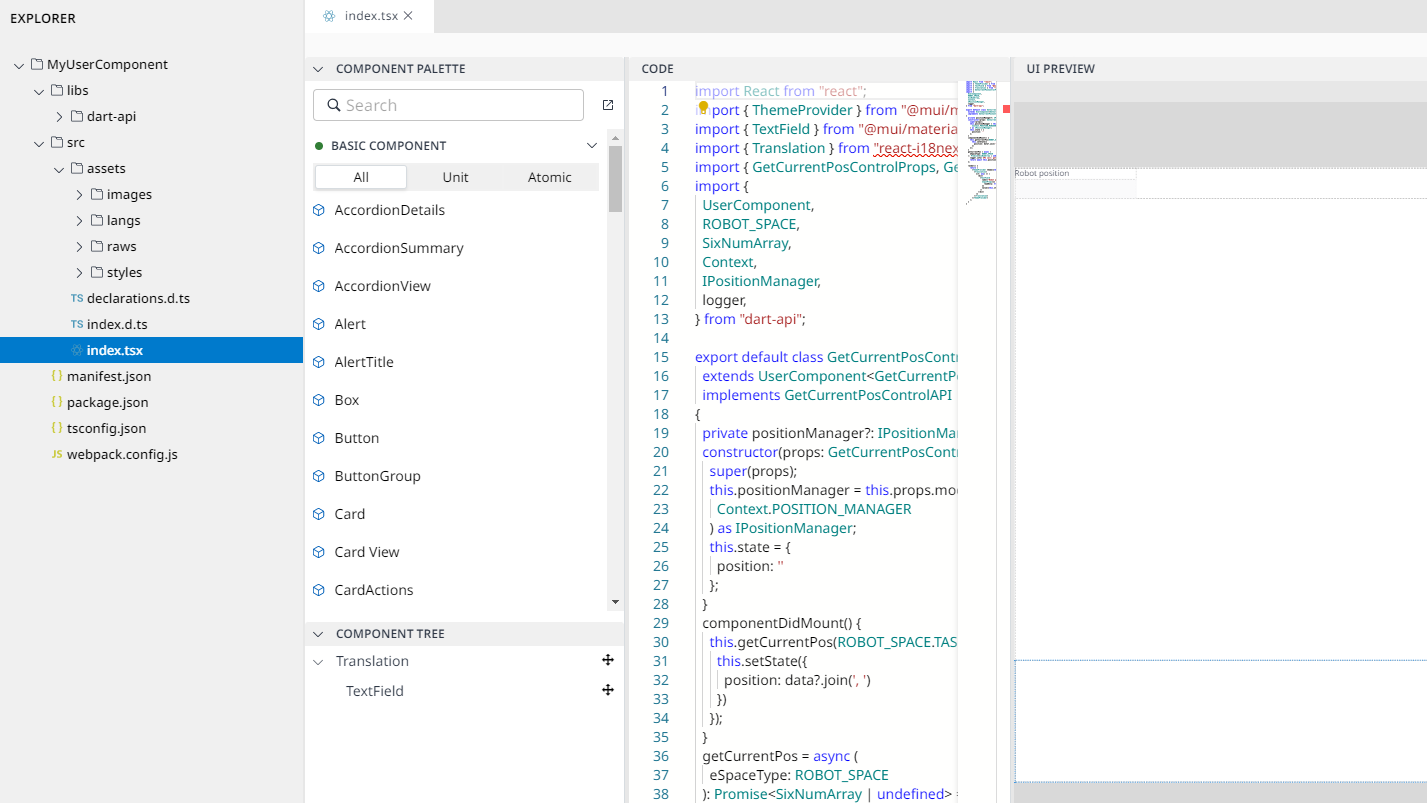
Understanding the UC project structure
The chart below describes the project source structure of a UC project.
The main parts of a UC project are:
lib: Library foldersrc: Package source foldersrc/assets: Package resources folder with Images, Styles, and Language resourcesindex.tsx: UC implementation fileindex.d.ts: UC API definition filemanifest.json: Package information definition file
Prepare the API definition file
You can declare the necessary APIs used for your project in the index.d.tsfile.
This file should be located under the src package.
Below is an example of an index.d.ts file.
This index.d.ts file is created automatically after successfully creating the Business Component project.
Prepare the UC implementation file
You can implement the logic for your UC in the index.tsx file. This is the most important file you need to prepare for your Business Component project.
This file is also located under the src package.
Below is an example of an index.tsx file.
This index.tsx file is created automatically after successfully creating the Business Component project.
Use Resource Files
You can use the necessary Images, Themes/Styles, and Language Resources for your Business Component project.
Image Resources
System Themes, System & User Style Resources
Language Resources
Update Package Information Definition File
The manifest.json included in the UC project source should have the following package information defined in JSON format.
Key | Description | Naming conventions |
|---|---|---|
name | Module Name | N/A |
packageName | Module Unique ID |
(i.e.) com.dra.jogplus (O), Com.dra.Jogplus (x), .com.dra.jogplus (x), com.dra (x) |
version | A number to determine if the package is up to date | Written according to the rules Semantic Versioning. (i.e.) 1.12.3 |
sdkVersion | The version of Dart-SDK that you used to build the package. | Positive integer |
main | Relative path to the entry script file, built (bundled) via webpack.config.js | index.js (Cannot be changed) |
requiredPermissions | Permission information required for package operation, if '@permission' is used in the declared Dart-API, the corresponding permission information must be listed. If you are developing a Dart-App with any UC package, the permission information defined in the manifest.json - requiredPermissions of the UC you used must be defined in the manifest.json - usesPermissions of that app. | Note the I/F definition of Permission in the Manifest class in dart-api.ts |
supportedLanguages | About the list of languages supported by the package | Format: language_code-REGION (according to FAQ - i18next documentation) (i.e.). en, en-GB, ko |
api | API definition file path for UC package development | index.d.ts (Cannot be changed) |
Below is an example of a manifest.json file.
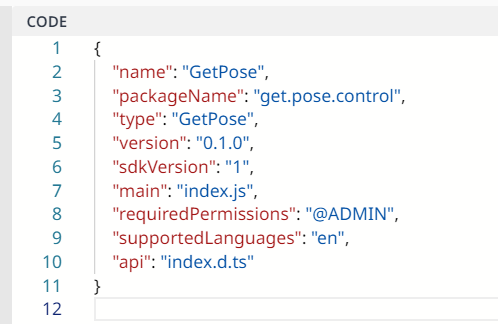
manifest.json file example
Build
After preparing the above necessary files, you can now build your UC project to the *.d/buc file.
Step 1: Click on the Build button on the top right of the screen.
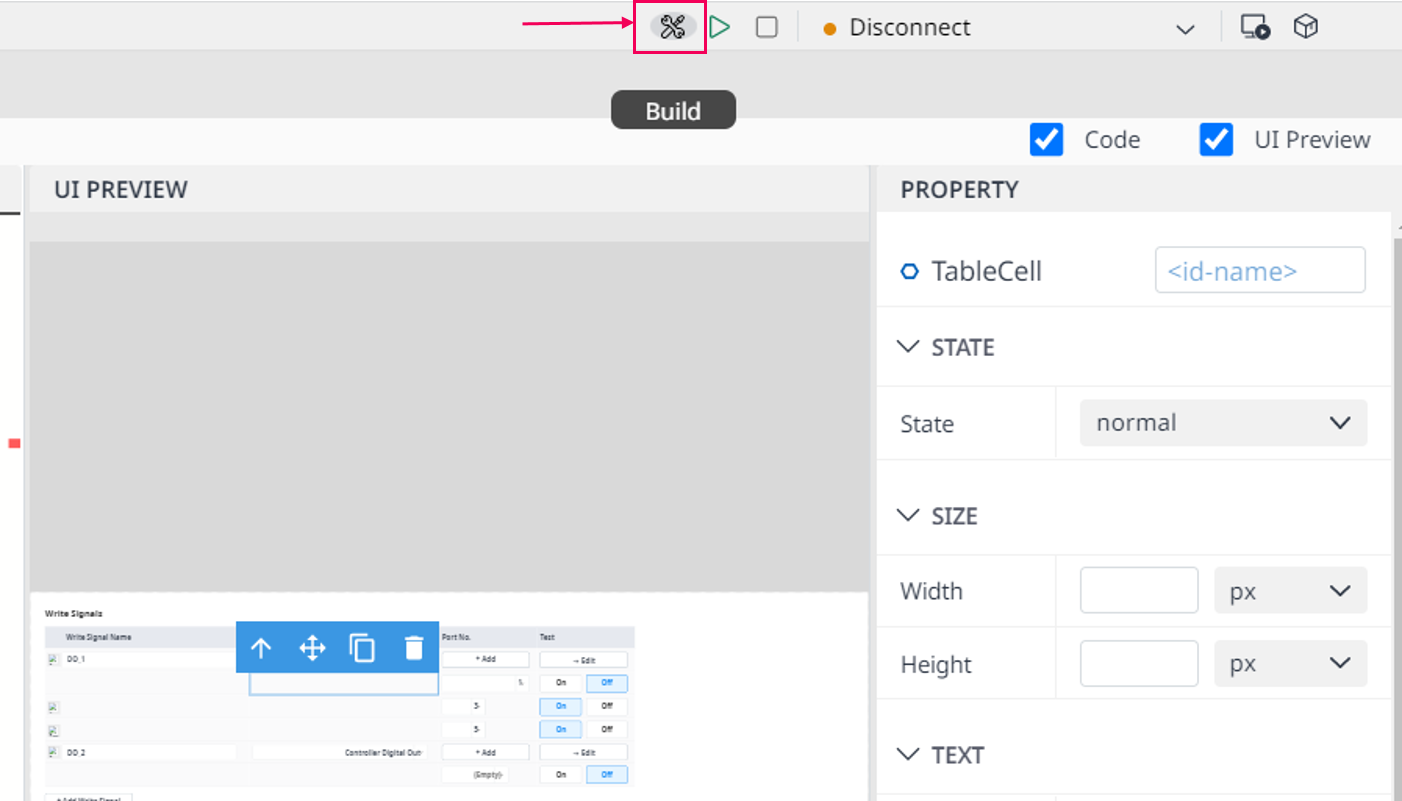
Click on the Build button
Step 2: Check the build result.
Dart-IDE will process the code line until it brings you a specific outcome.
Once done, there will be a notification [INFO] Build successfully with a download link in the OUTPUT panel of Dart-IDE, then you can download the .uc file from that link for later use.

In case failed, there will be a notification [ERROR] Build failed in the OUTPUT panel of Dart-IDE.
Also, in the OUTPUT panel, you will see the details of the errors. Here, Dart-IDE will point you to where the error is, allowing the user to correct it.
If any errors happen, you should rebuild the project. Dart-IDE will provide the detail of the code editor to adjust or delete unnecessary lines to ensure it runs as you wish.
Once you have the
.ucfile, you can import it to Dart-IDE to use for your robot application.
See User Components | Import-BUC-(Upcoming) for more information.Dart-IDE provides option to allow you to open code of UC to public when build it. But code of UC will be hidden when you set the open public code as false.
Once you publish your UC, you can also selling your UC to Dart-Store. Check Distribute User Component for more details.