Dart-Platform 3
1. Introduction
What is Dart-Platform 3?
Dart-Platform 3 is software that allows modules created in the Dart-IDE VS Code Extension to run on various operating systems.
It is primarily developed for connecting and operating Doosan robots but can also be used with other devices.
2. Key Features
Run your own modules or modules acquired from the Dart-Store.
Instantaneous signal distribution for a seamless user experience.
3. Installation
Download
Go to the Dart-Platform 3 Download Page.
Select the appropriate version for your device.
Follow the standard installation process.
Installation Guide
For detailed instructions, refer to the Installation Guide.
4. Installing Modules
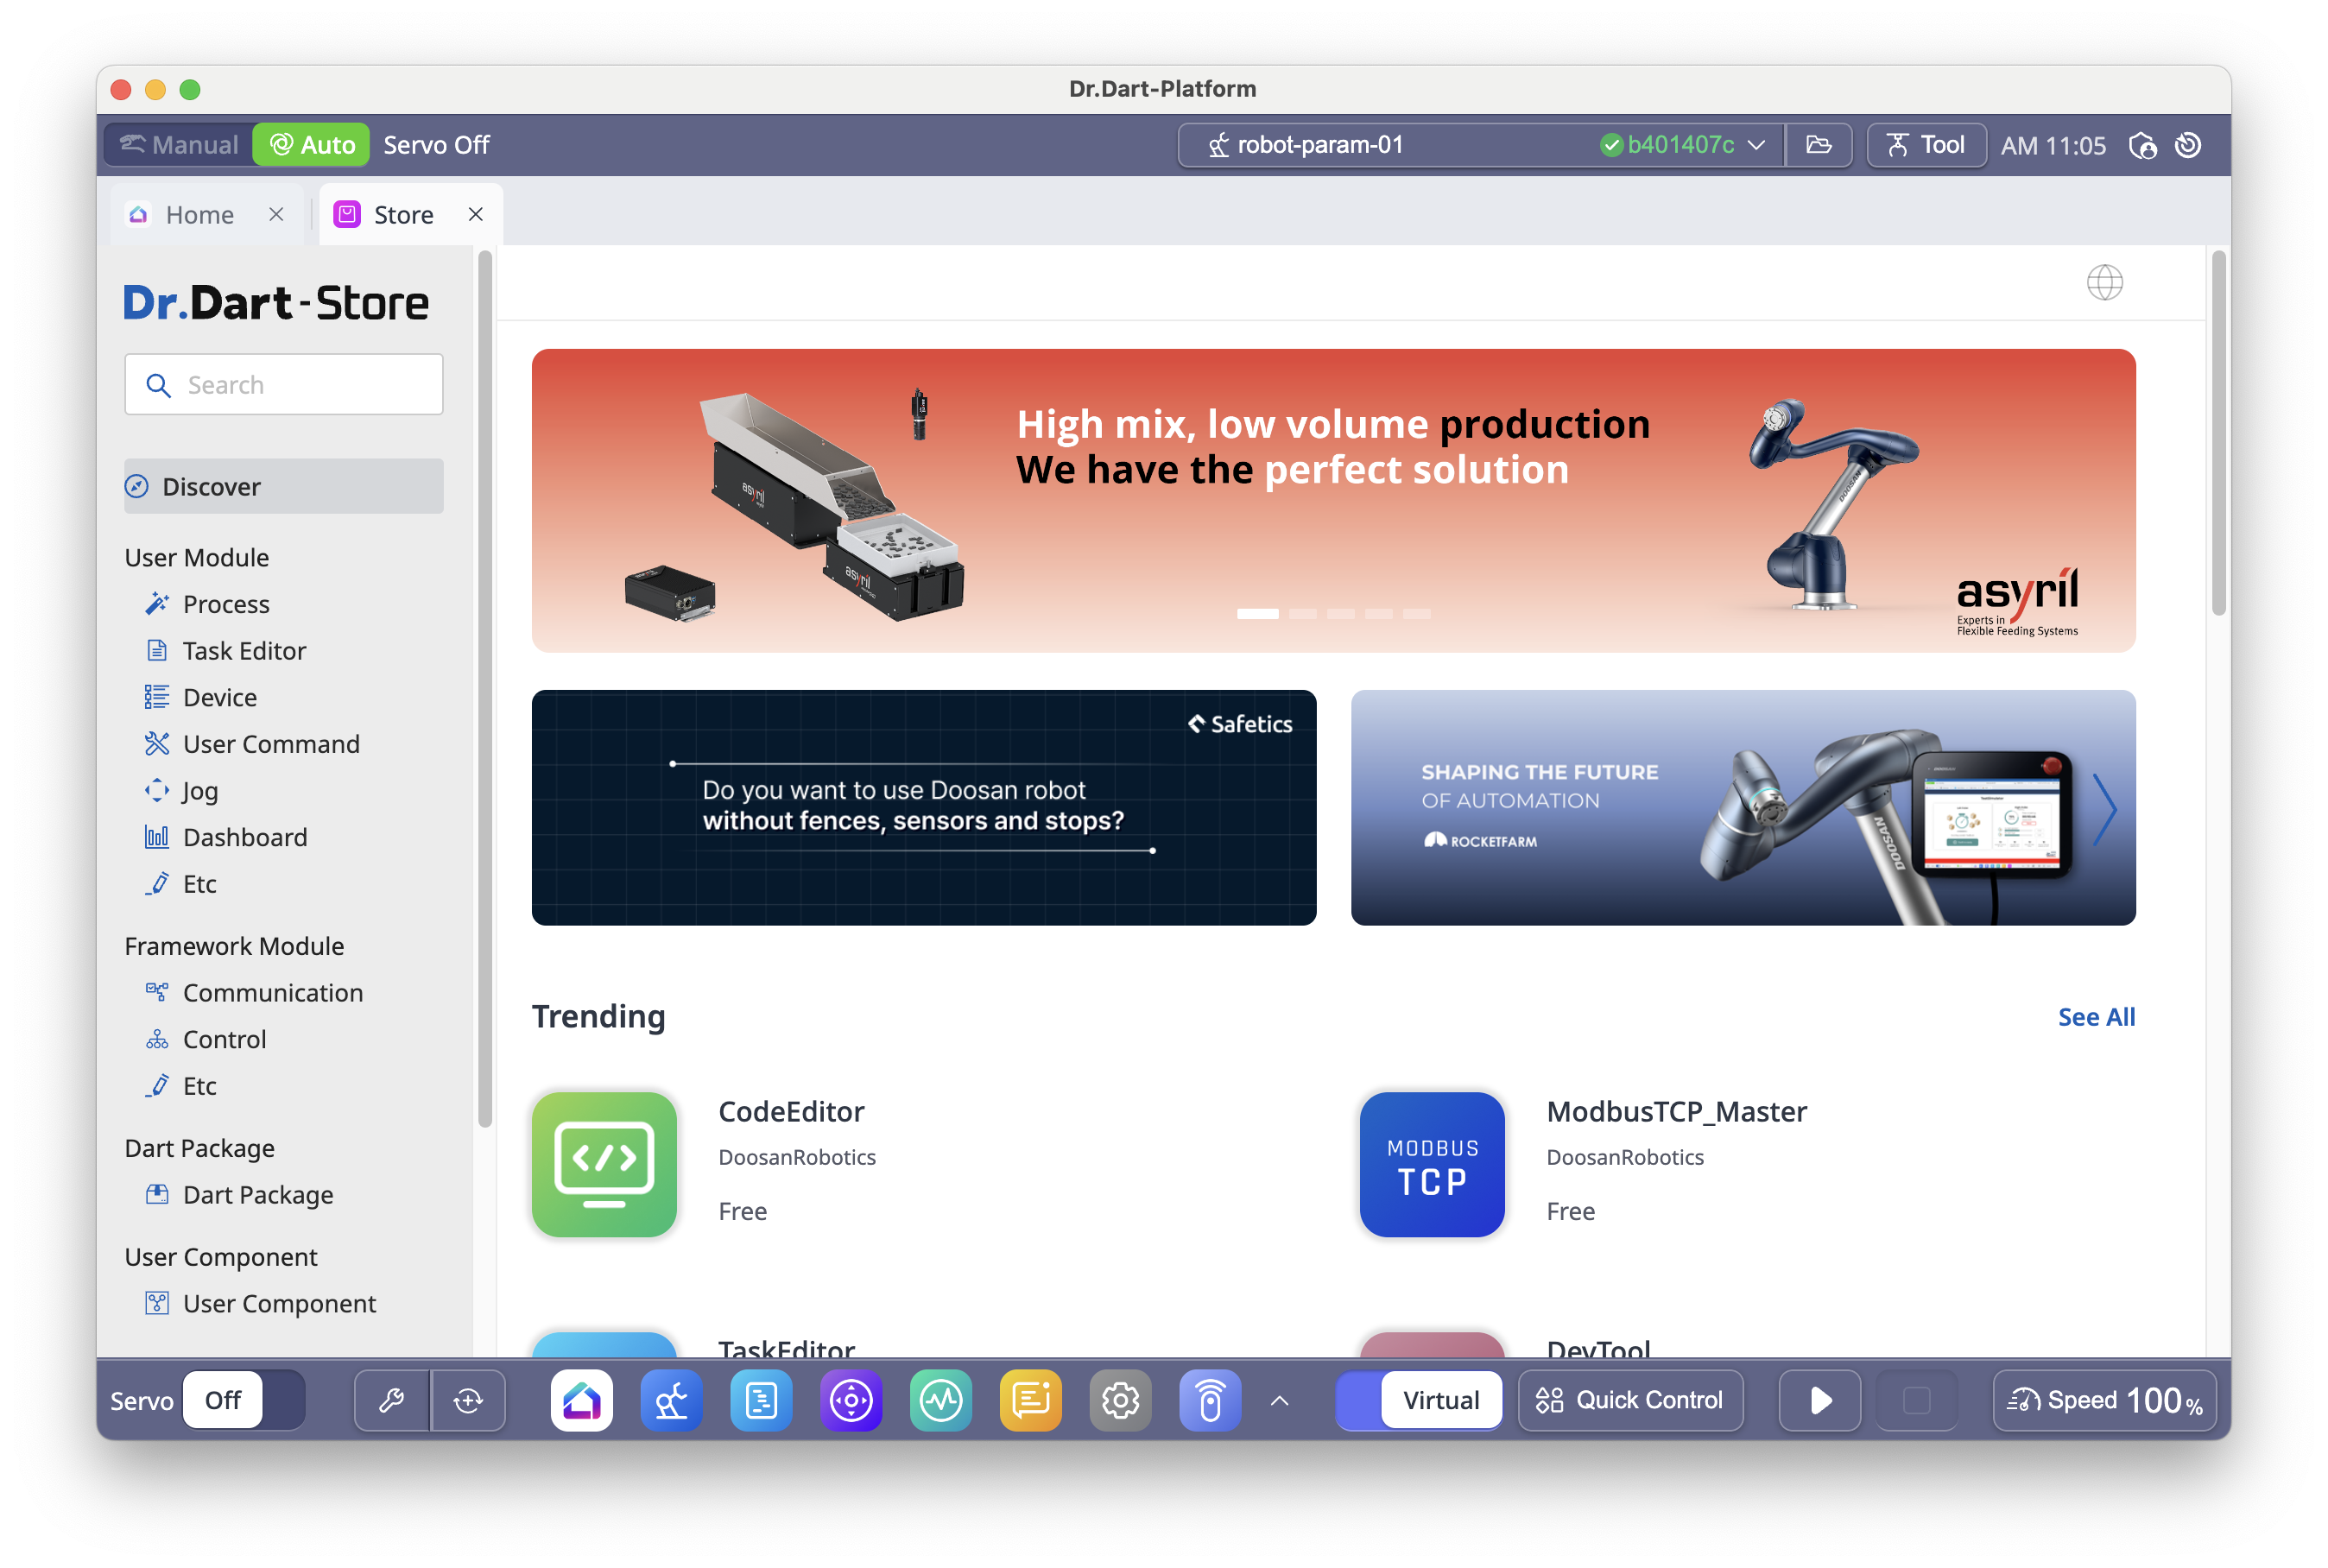
From Dart-Store
Visit the Dart-Store to download modules.
Clicking the download button will automatically install the module.
Custom Modules
If no module in the store meets your needs, you can create your own by following the Module Creation Guide.
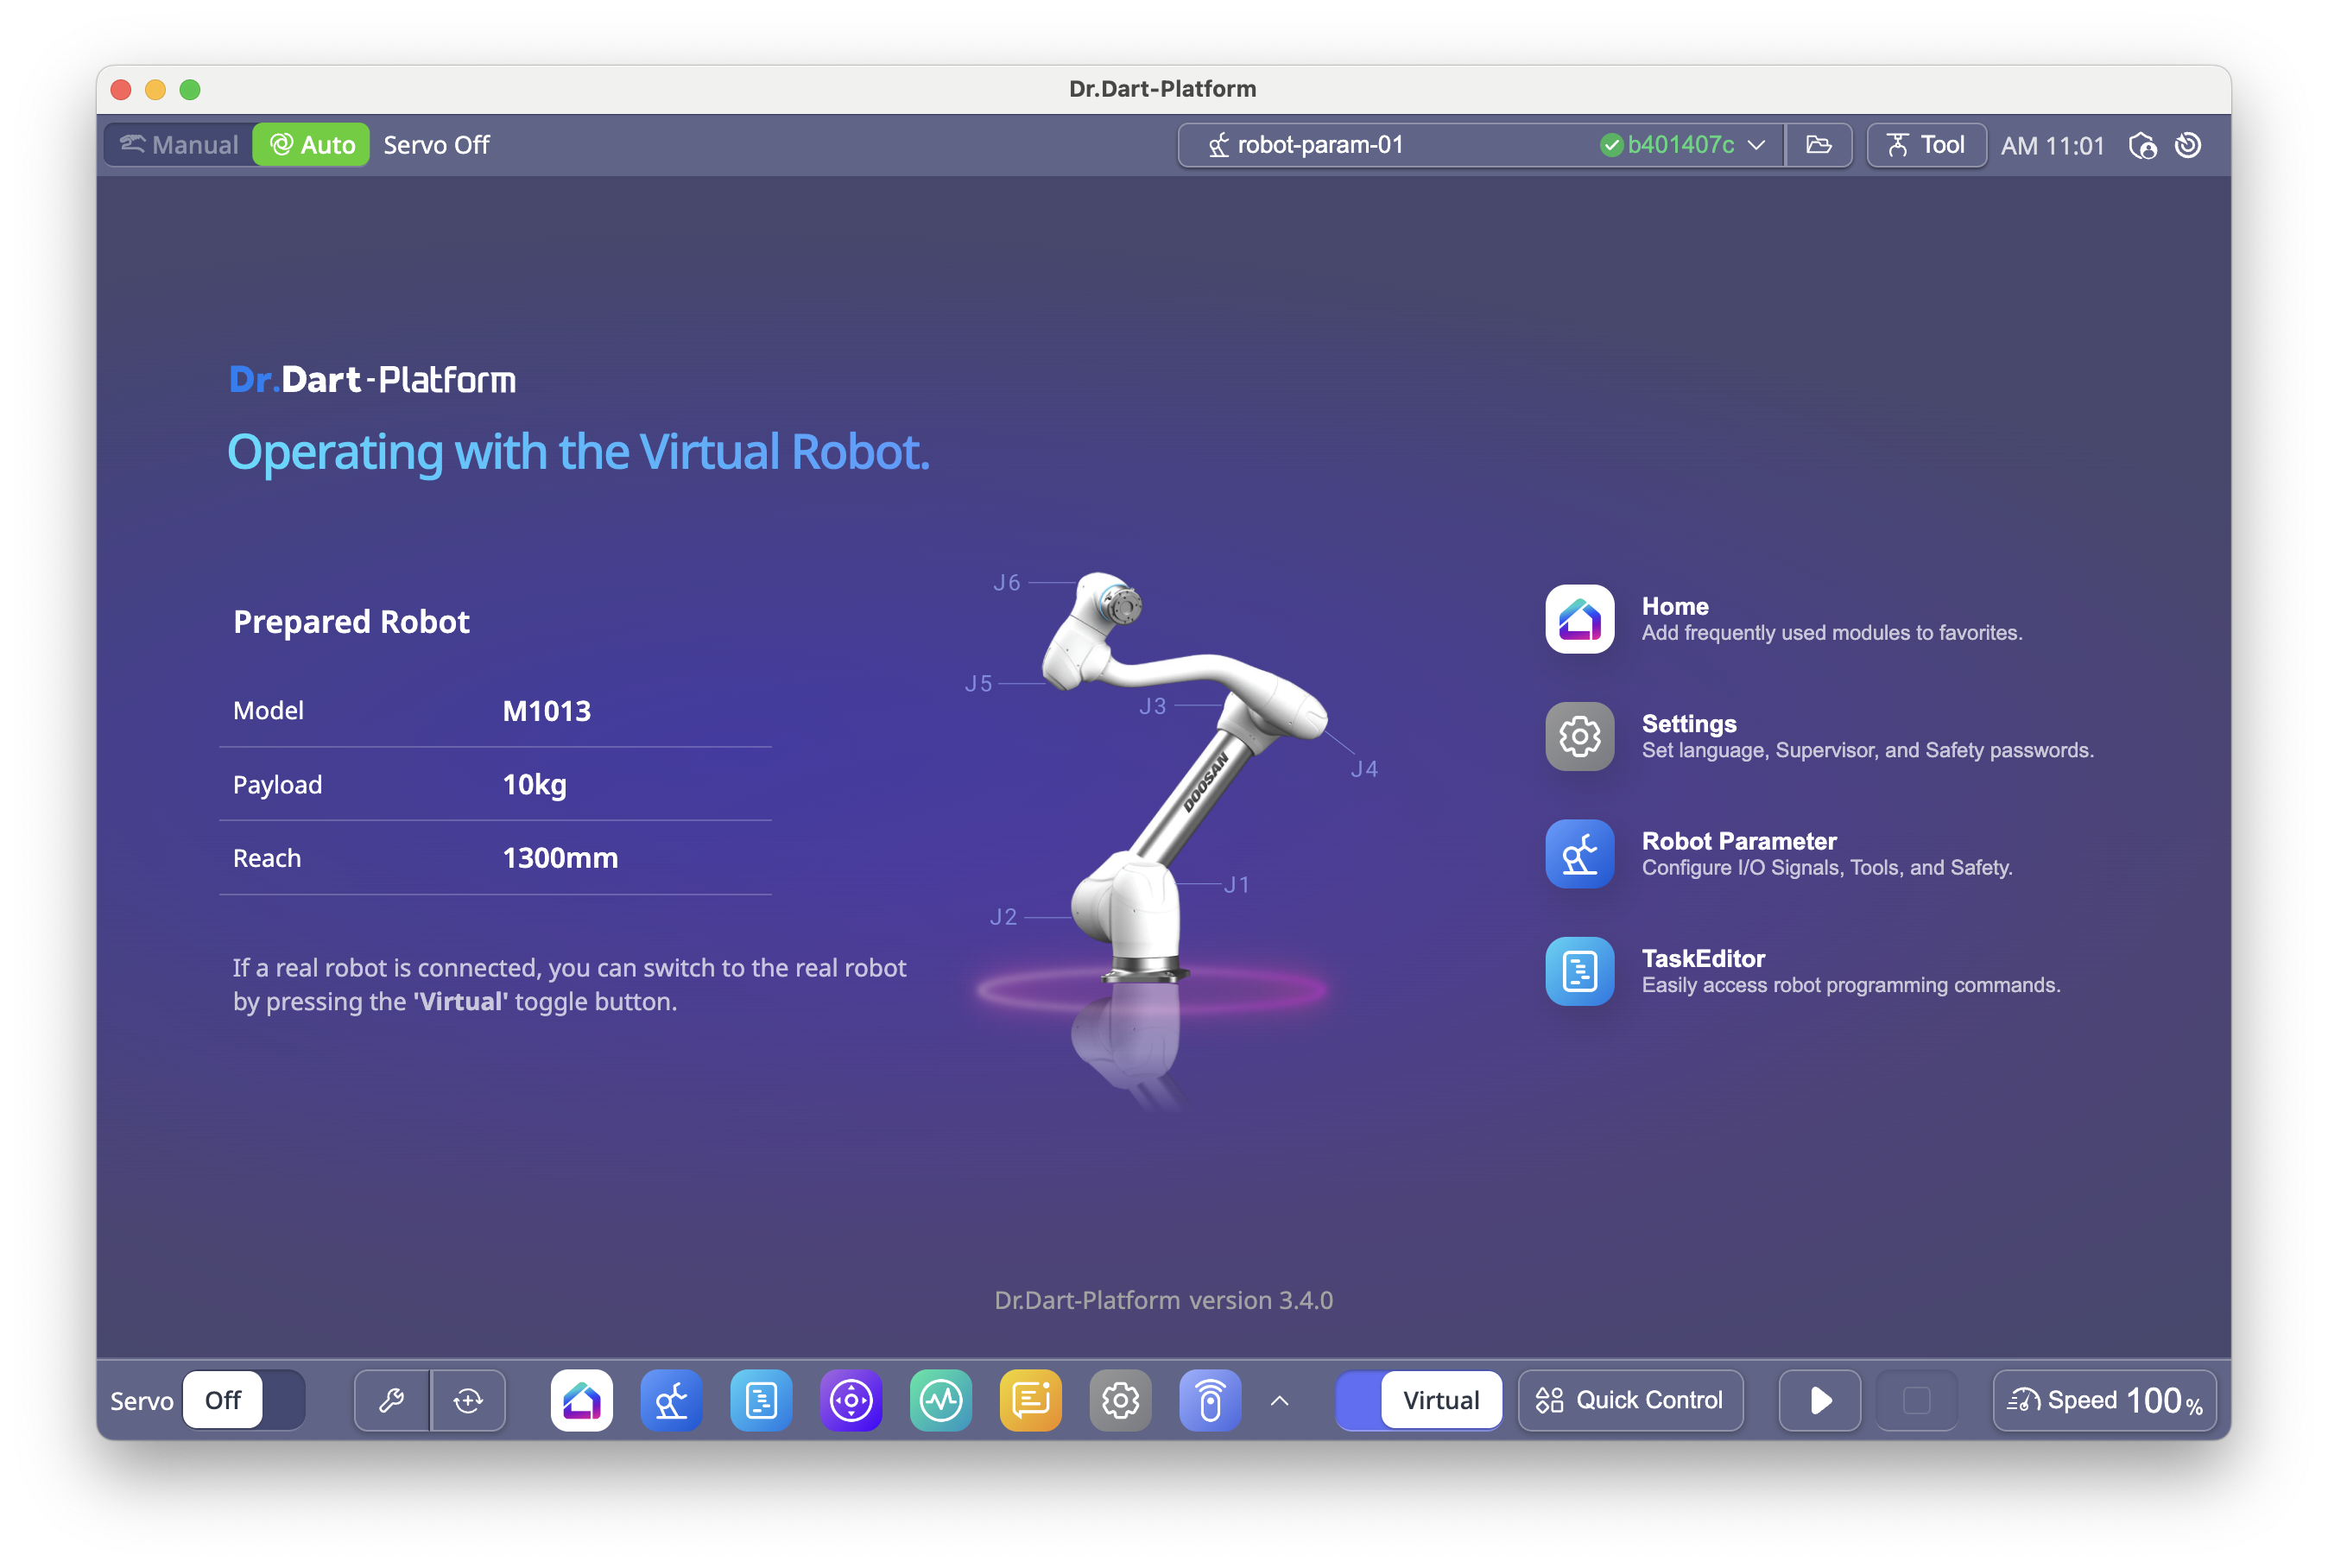
5. Product Overview
Dart-Platform 3 is designed to operate with a robot controller or the robot control simulator included in Dart-Services.
Modules are optimized for a 1280×800 resolution, the standard resolution for the Teach Pendant. While most modules are responsive, certain devices with significantly different resolutions may display modules incorrectly.
6. Using Dart-Platform 3
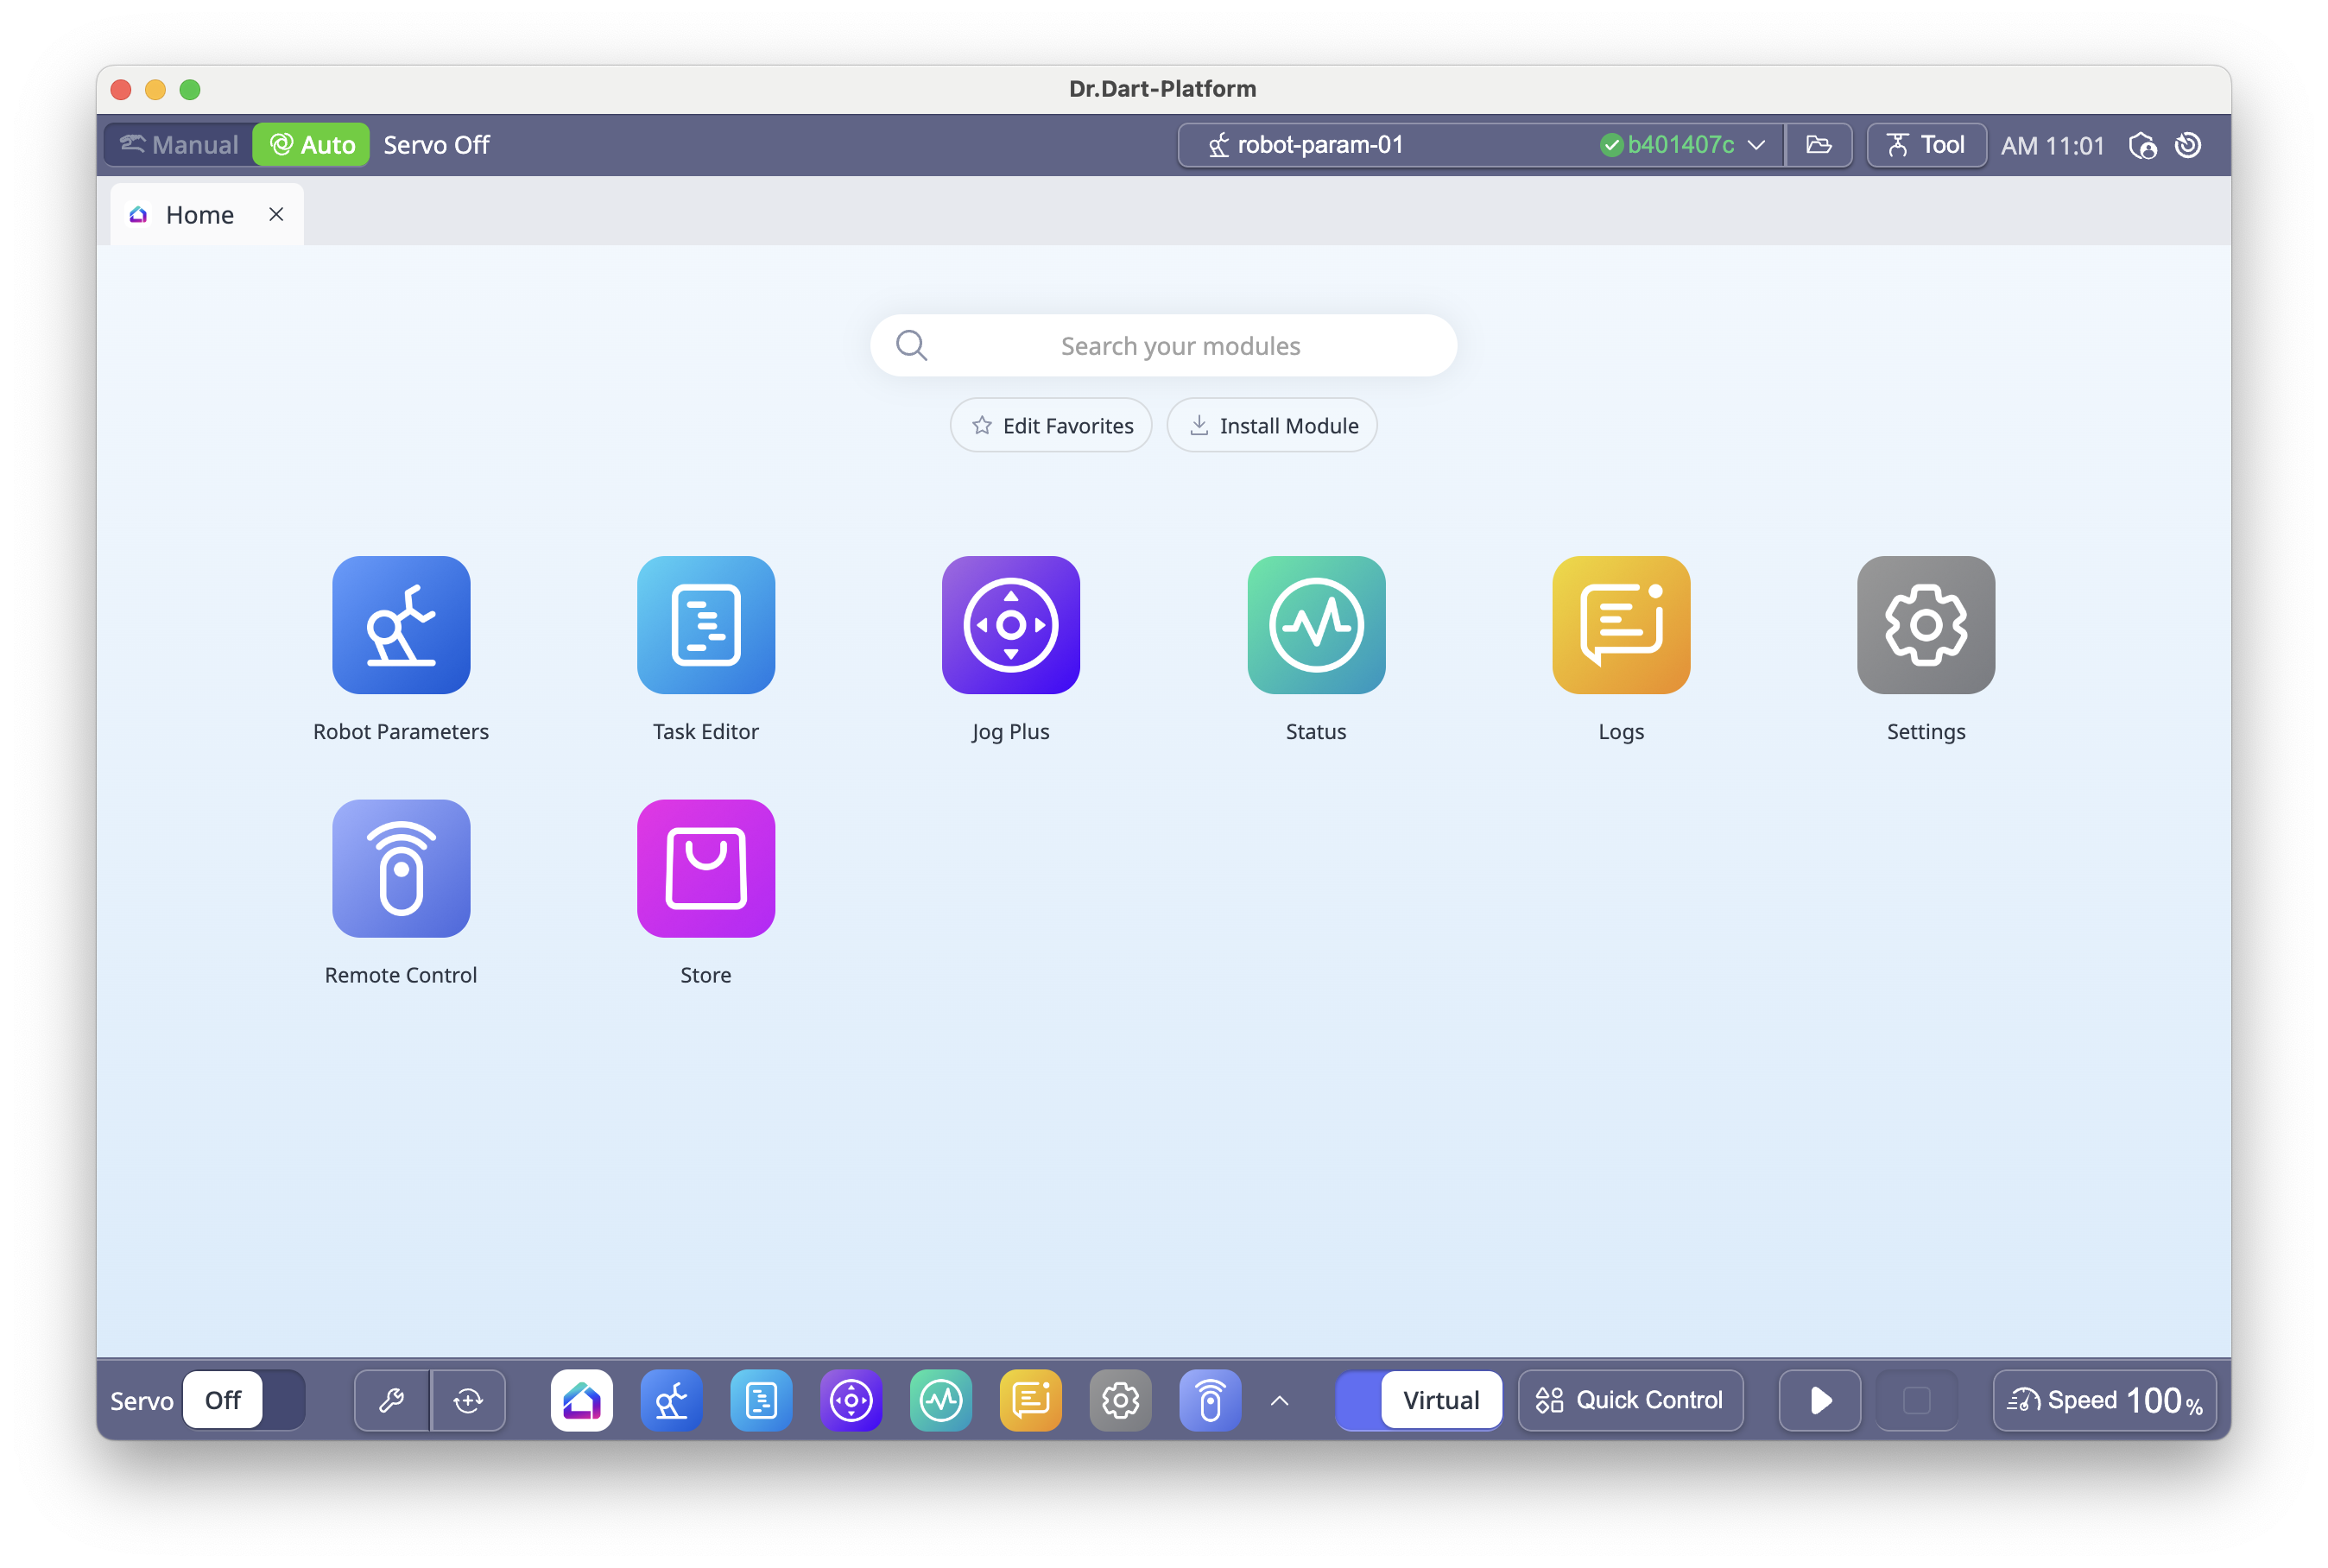
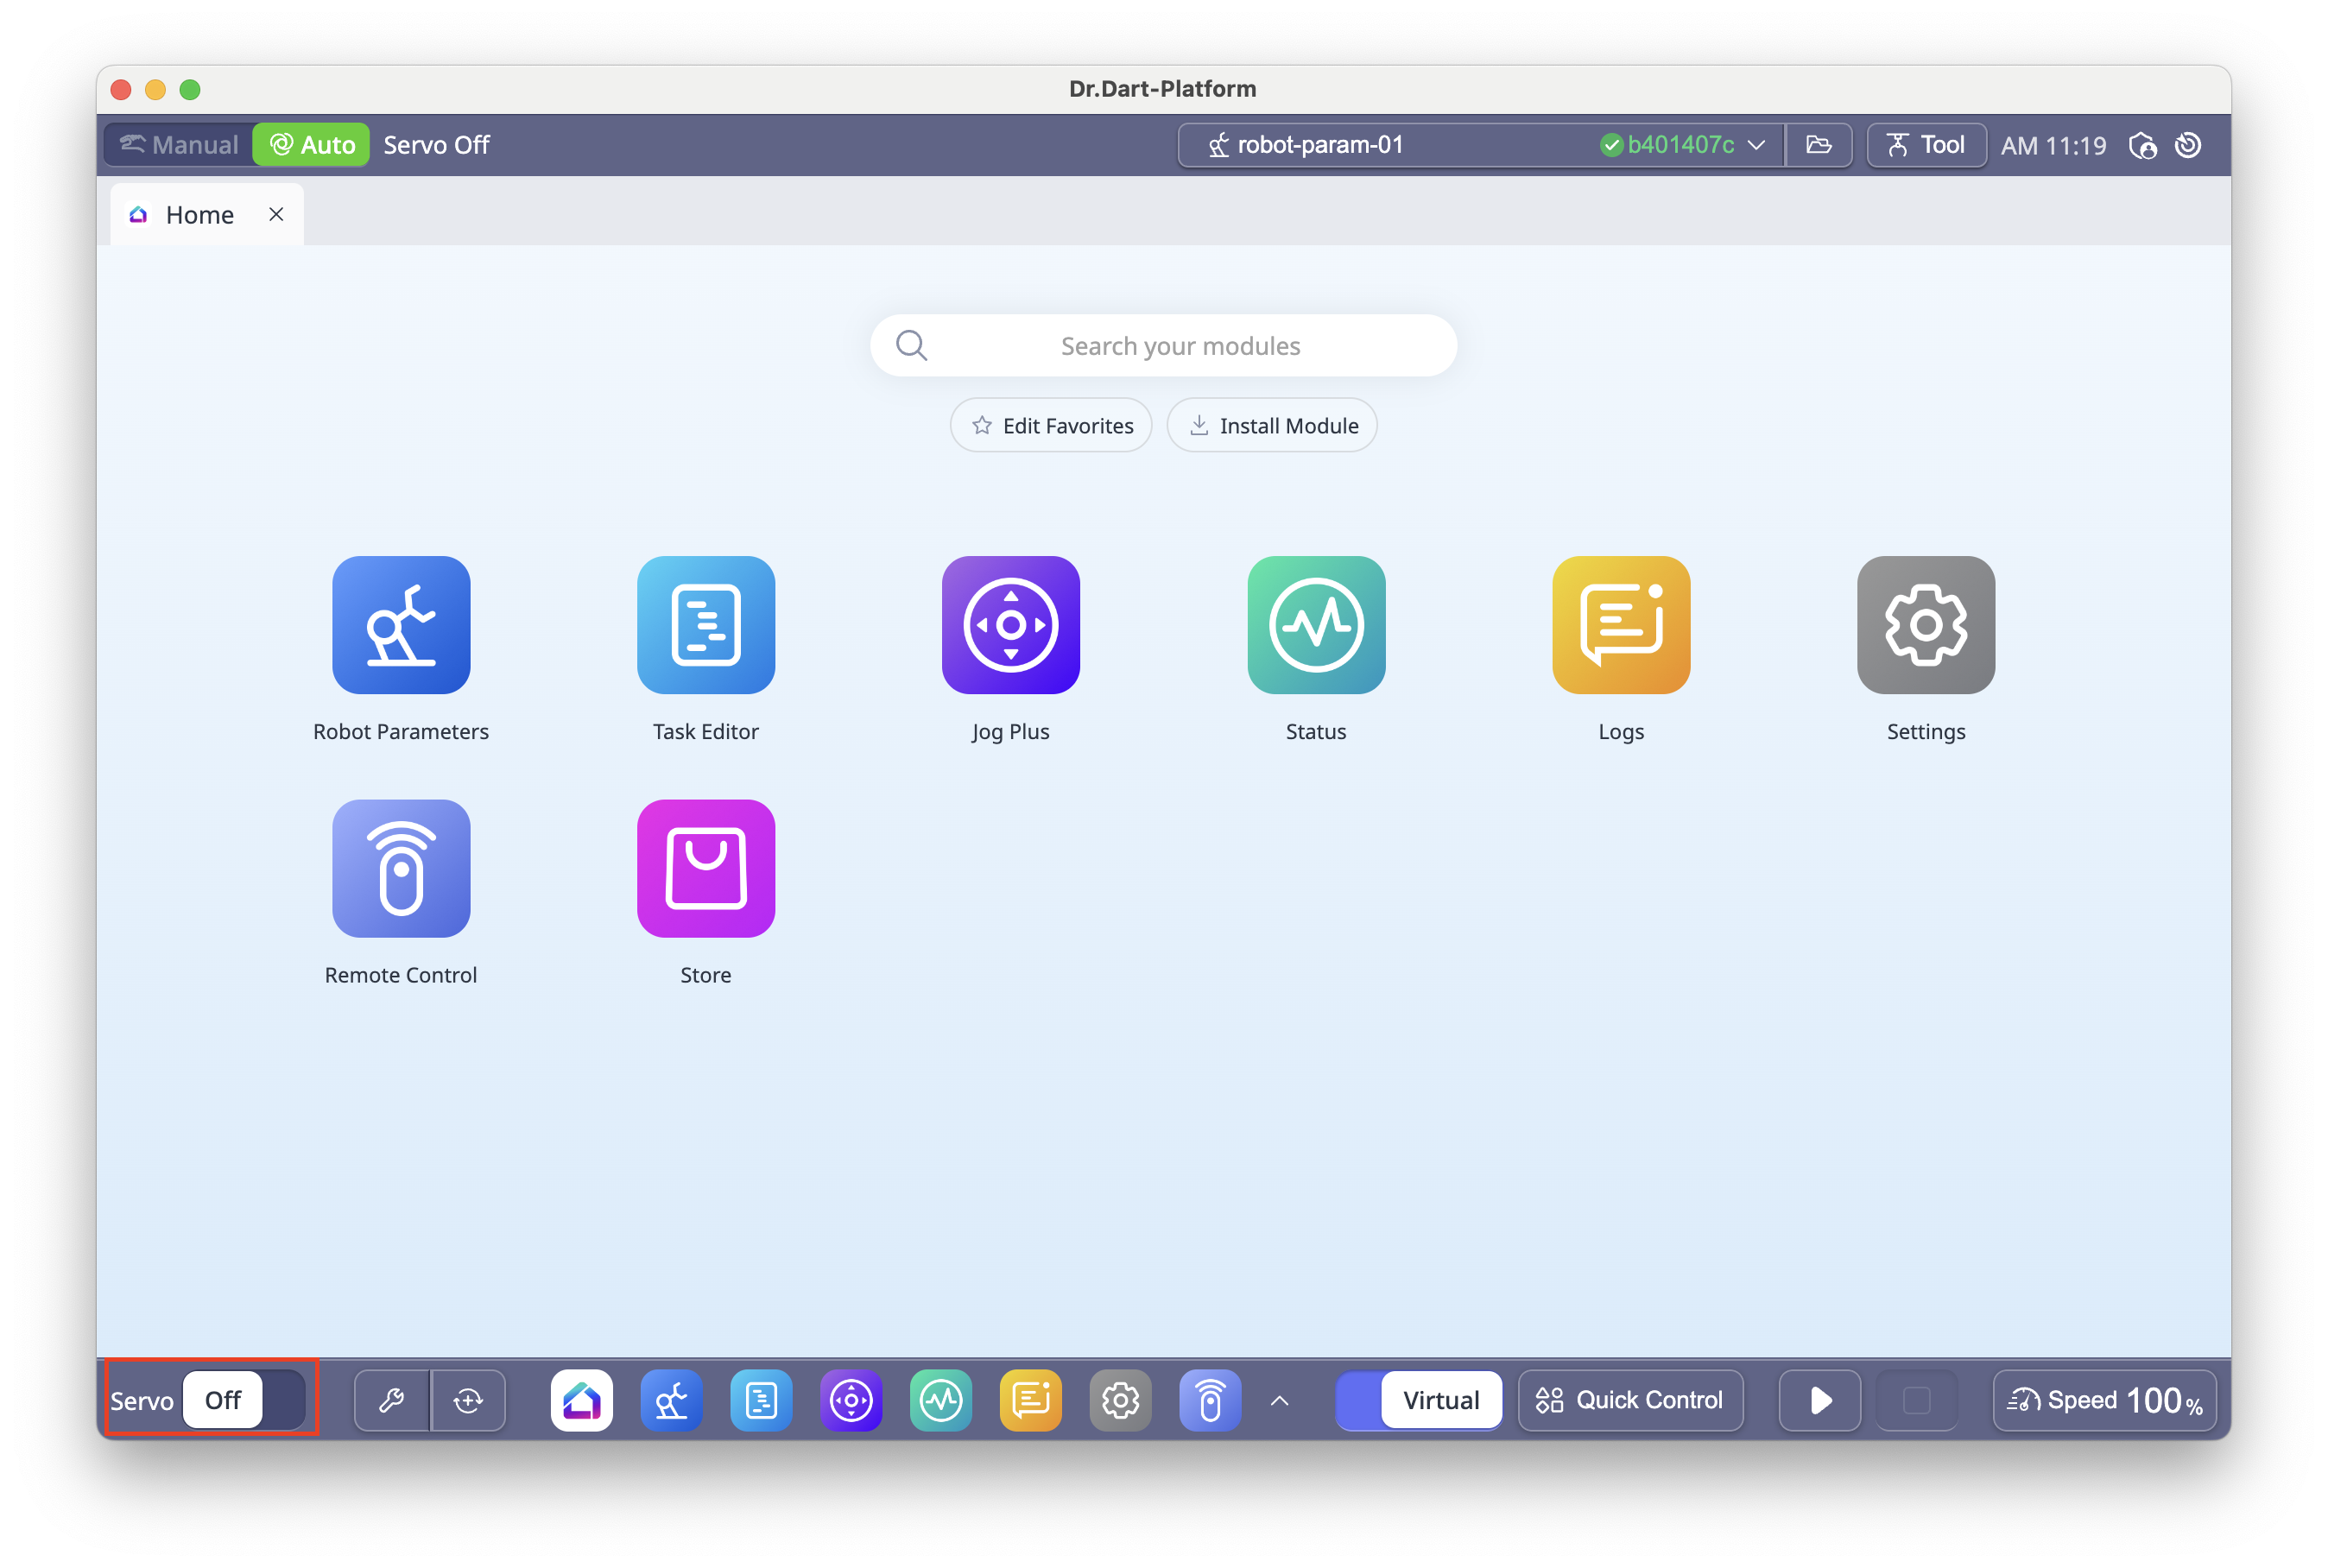
6.1 Home Screen
When Dart-Platform 3 starts, the Home module is displayed.
Tap a module icon on the Home screen, or
Select it from the Main Menu at the bottom of the screen.
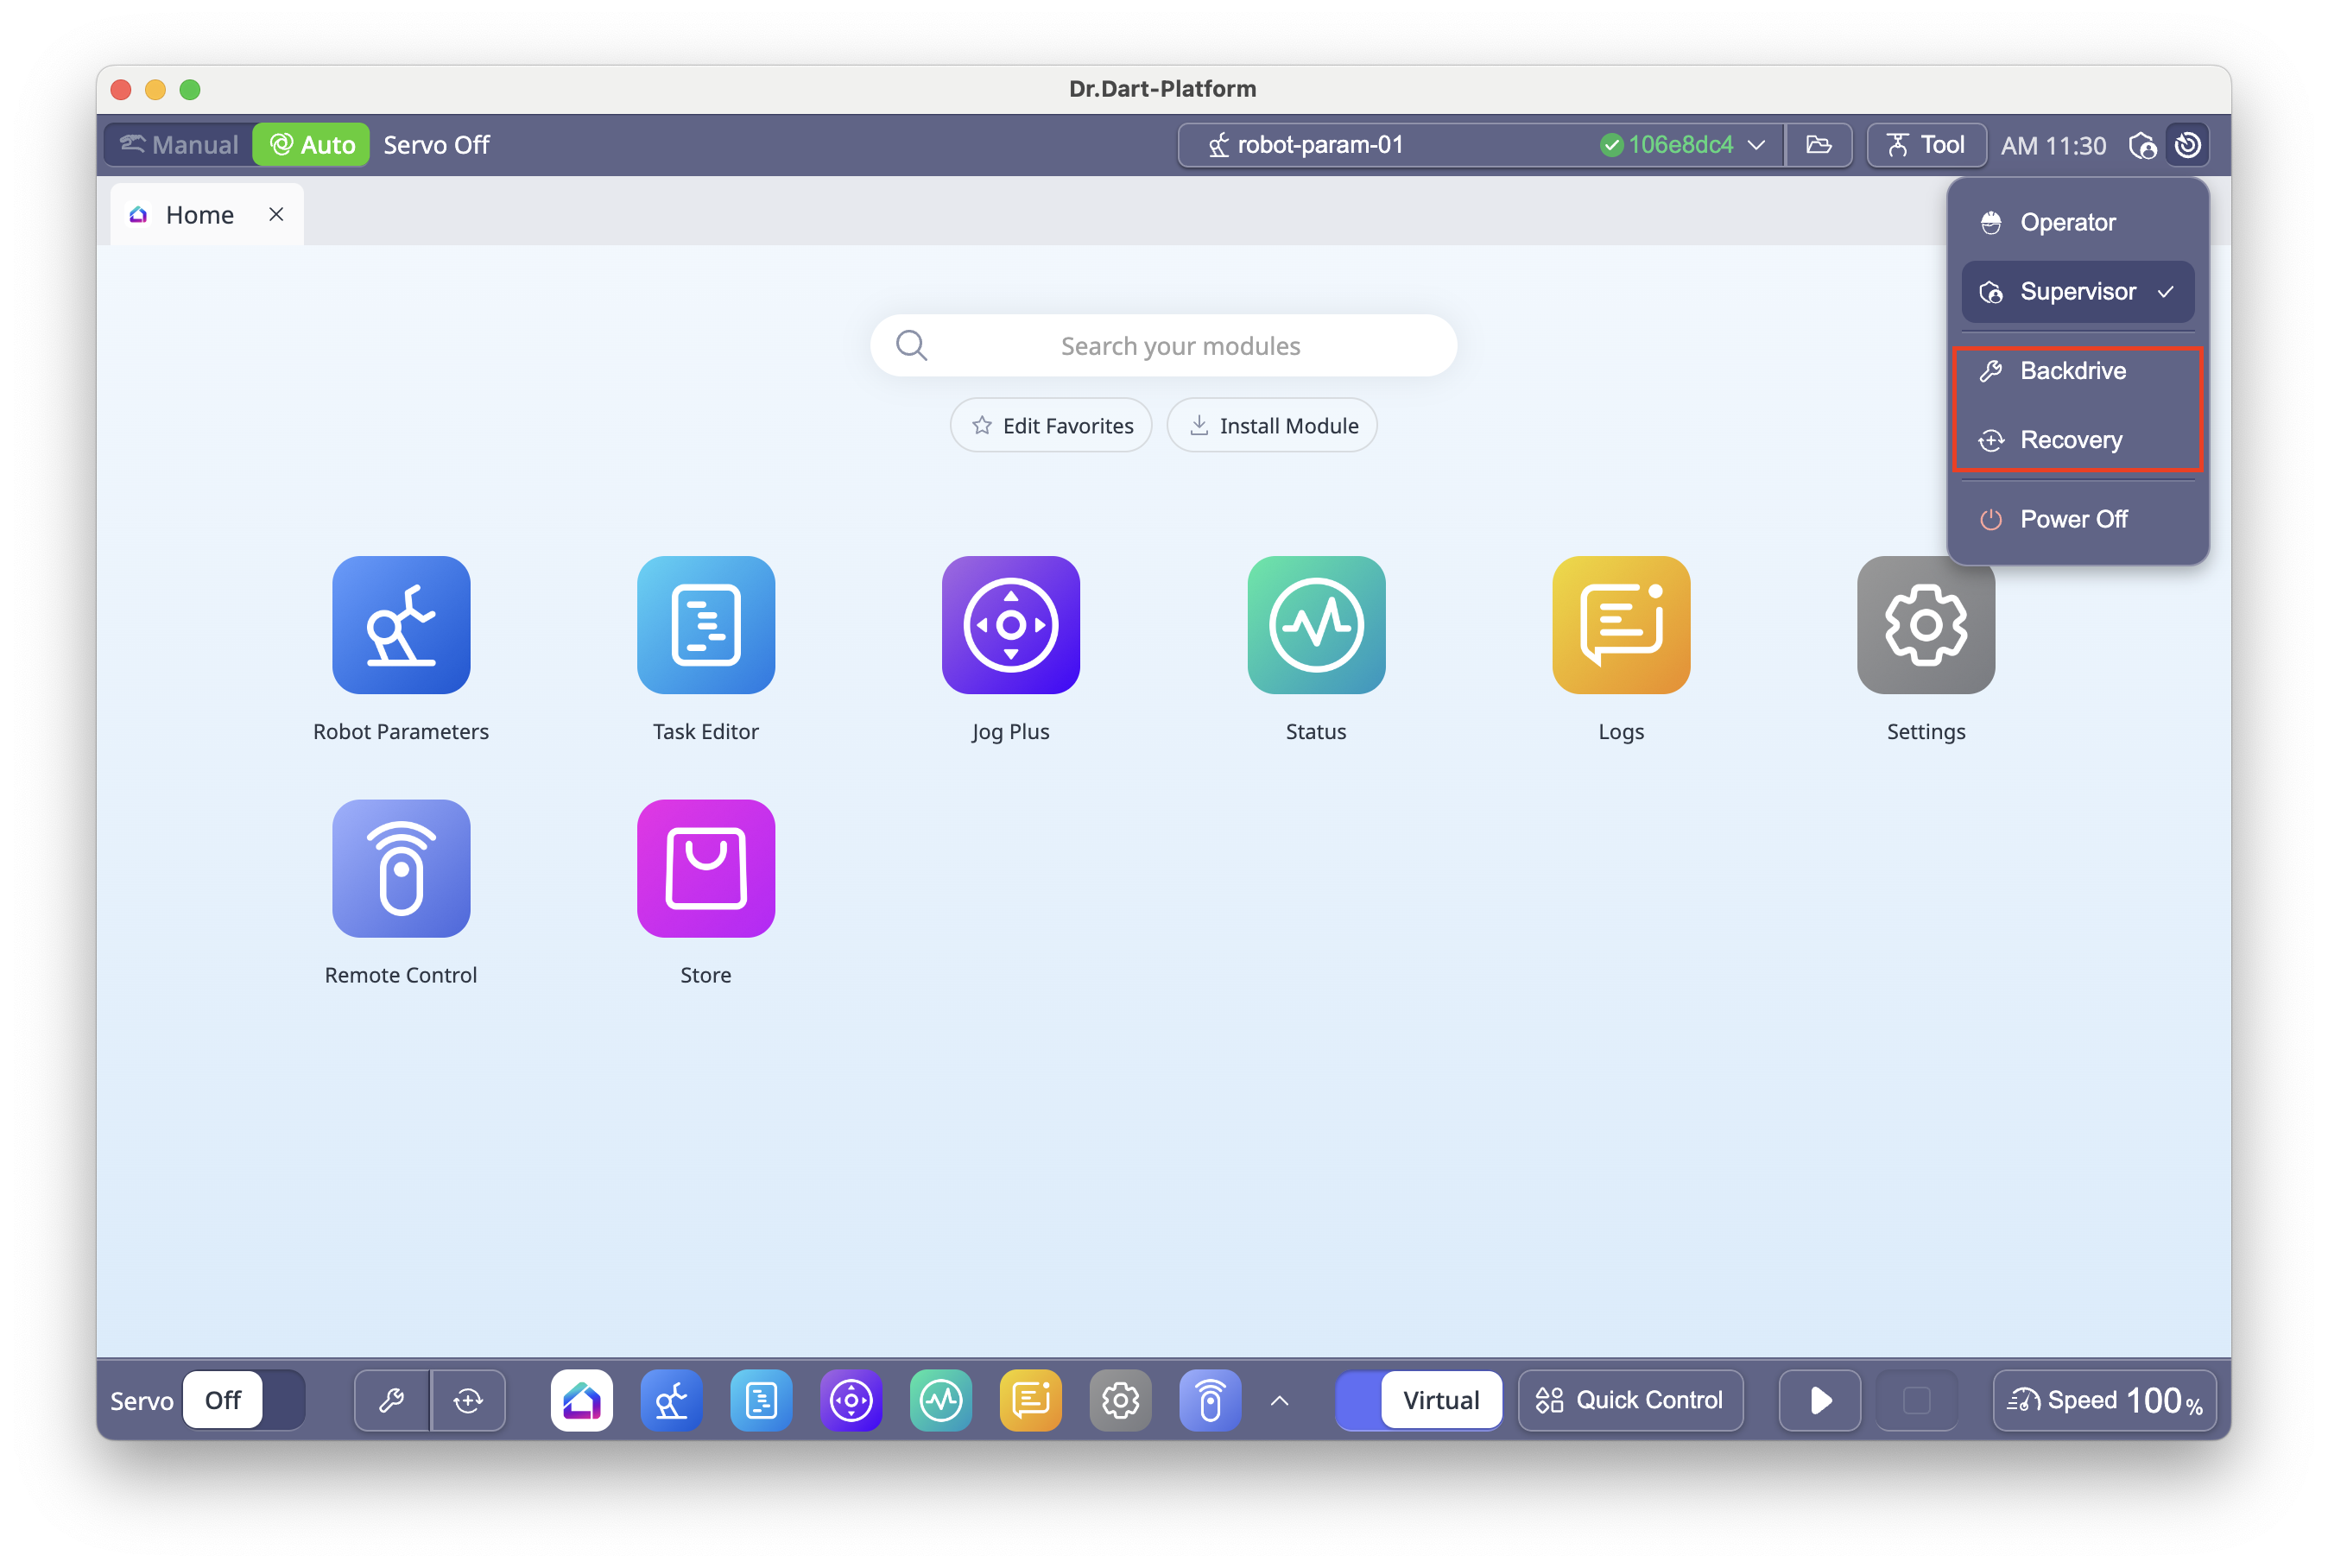
6.2 Changing Authority Level
To access all platform features, you may need to switch authority levels.
Click the
 icon in the top bar.
Select Supervisor.
Enter the safety password (Default:
admin) and click Confirm.
OPERATOR: Limited functions (e.g., Servo On, Automatic Robot Motion execution).
SUPERVISOR: Full functions (e.g., Jog Plus, Dart-Store access).
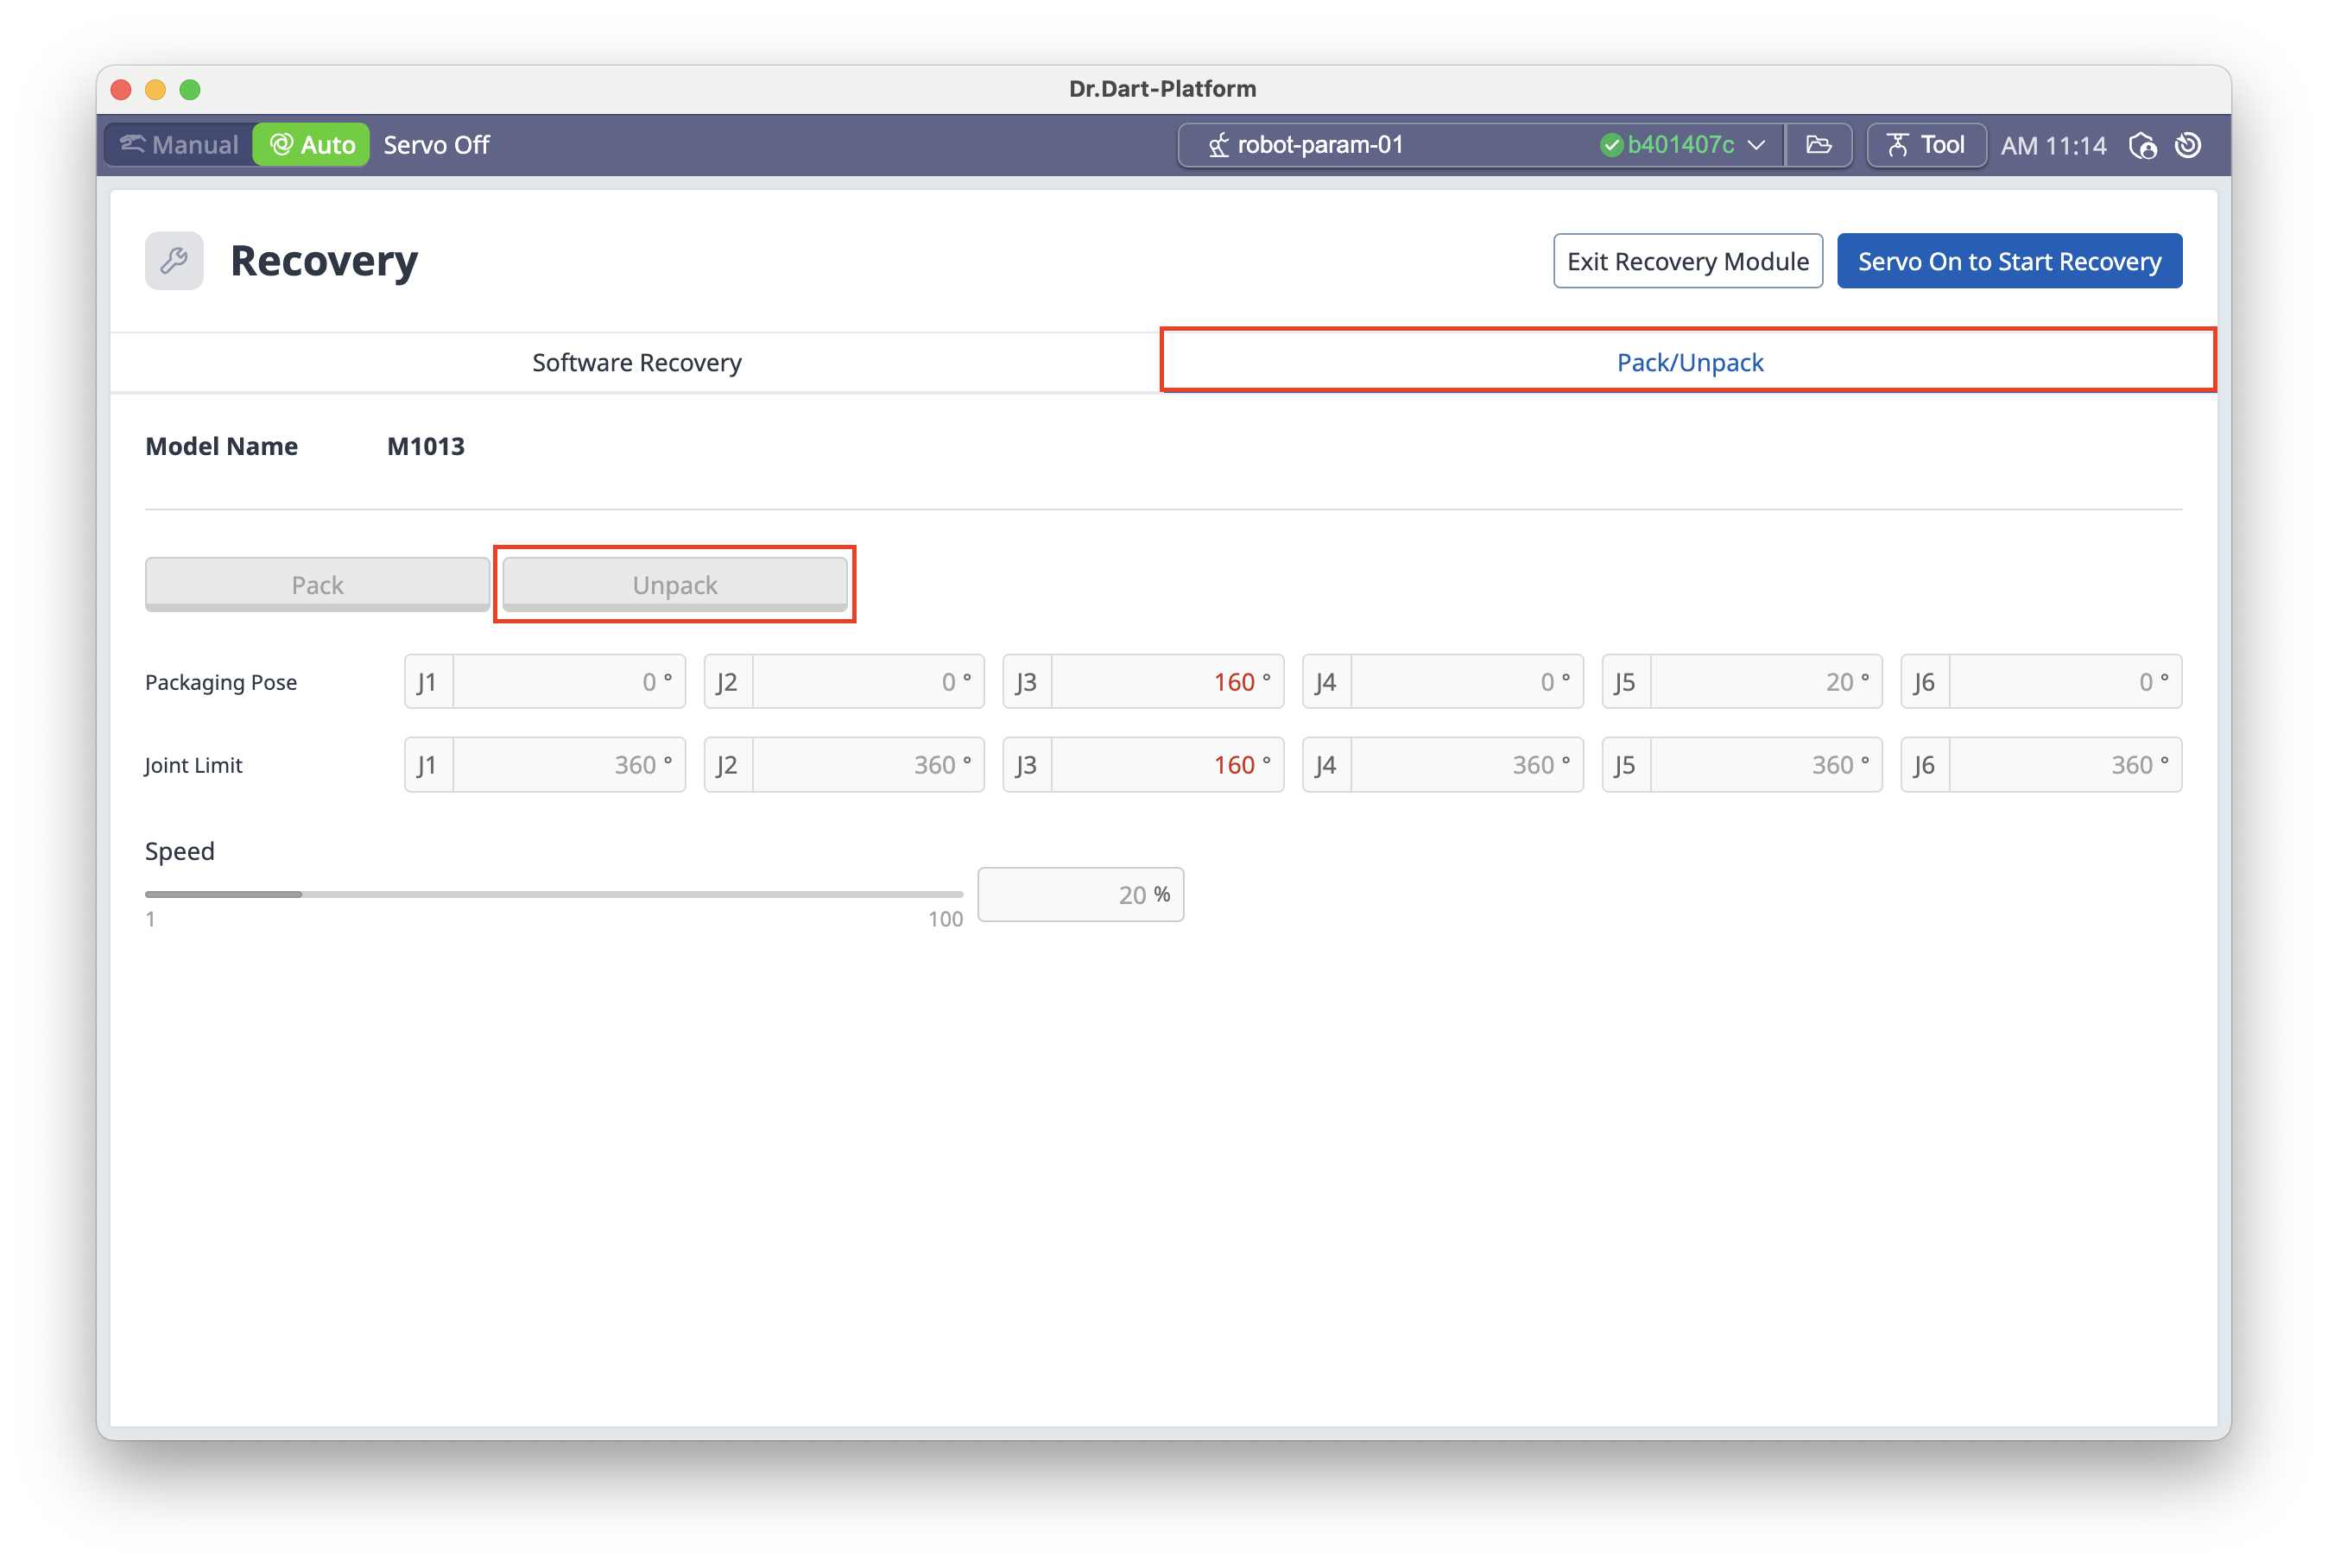
6.3 Recovery Module – Unpack
After unboxing your robot, you must unpack it in the platform before use:
Click the
icon in the top barSelect Recovery.
In the Recovery menu, select Pack/Unpack.
Click Unpack.

6.4 Servo On/Off
Servo On: Powers the robot joints, ready for motion.
Servo Off: Cuts power and engages brakes.
To toggle: Use the Servo button in the bottom left corner of the screen.
Info:
Servo On is required for robot motion. Emergency stop activation or critical safety violations will set Servo Off.
6.5 Installing a Module File (.dm)
You can install modules you’ve built:
In Dart-IDE VSCode Extension, build or run the module to generate a
.dmfile.In Dart-Platform, click Install Module on the Home screen.
Select the
.dmfile.
For more details, see:
6.6 Robot Parameter Module
The Robot Parameter Module is used to configure the robot’s core operating parameters, including robot limits, tool data, and safety settings.
This module ensures that the robot operates accurately, safely, and in accordance with the work environment.
Main Functions:
Robot Limits – Define maximum joint angles, speeds, accelerations, and other motion boundaries.
Tool Settings – Configure TCP (Tool Center Point), Tool Weight, and Tool Shape data.
Safety Zones – Create and manage restricted areas, collision sensitivity zones, and cooperative zones.
I/O Configuration – Assign and label general I/O ports and aliases.
Mounting Position – Set or measure the robot’s installation posture for accurate kinematics.
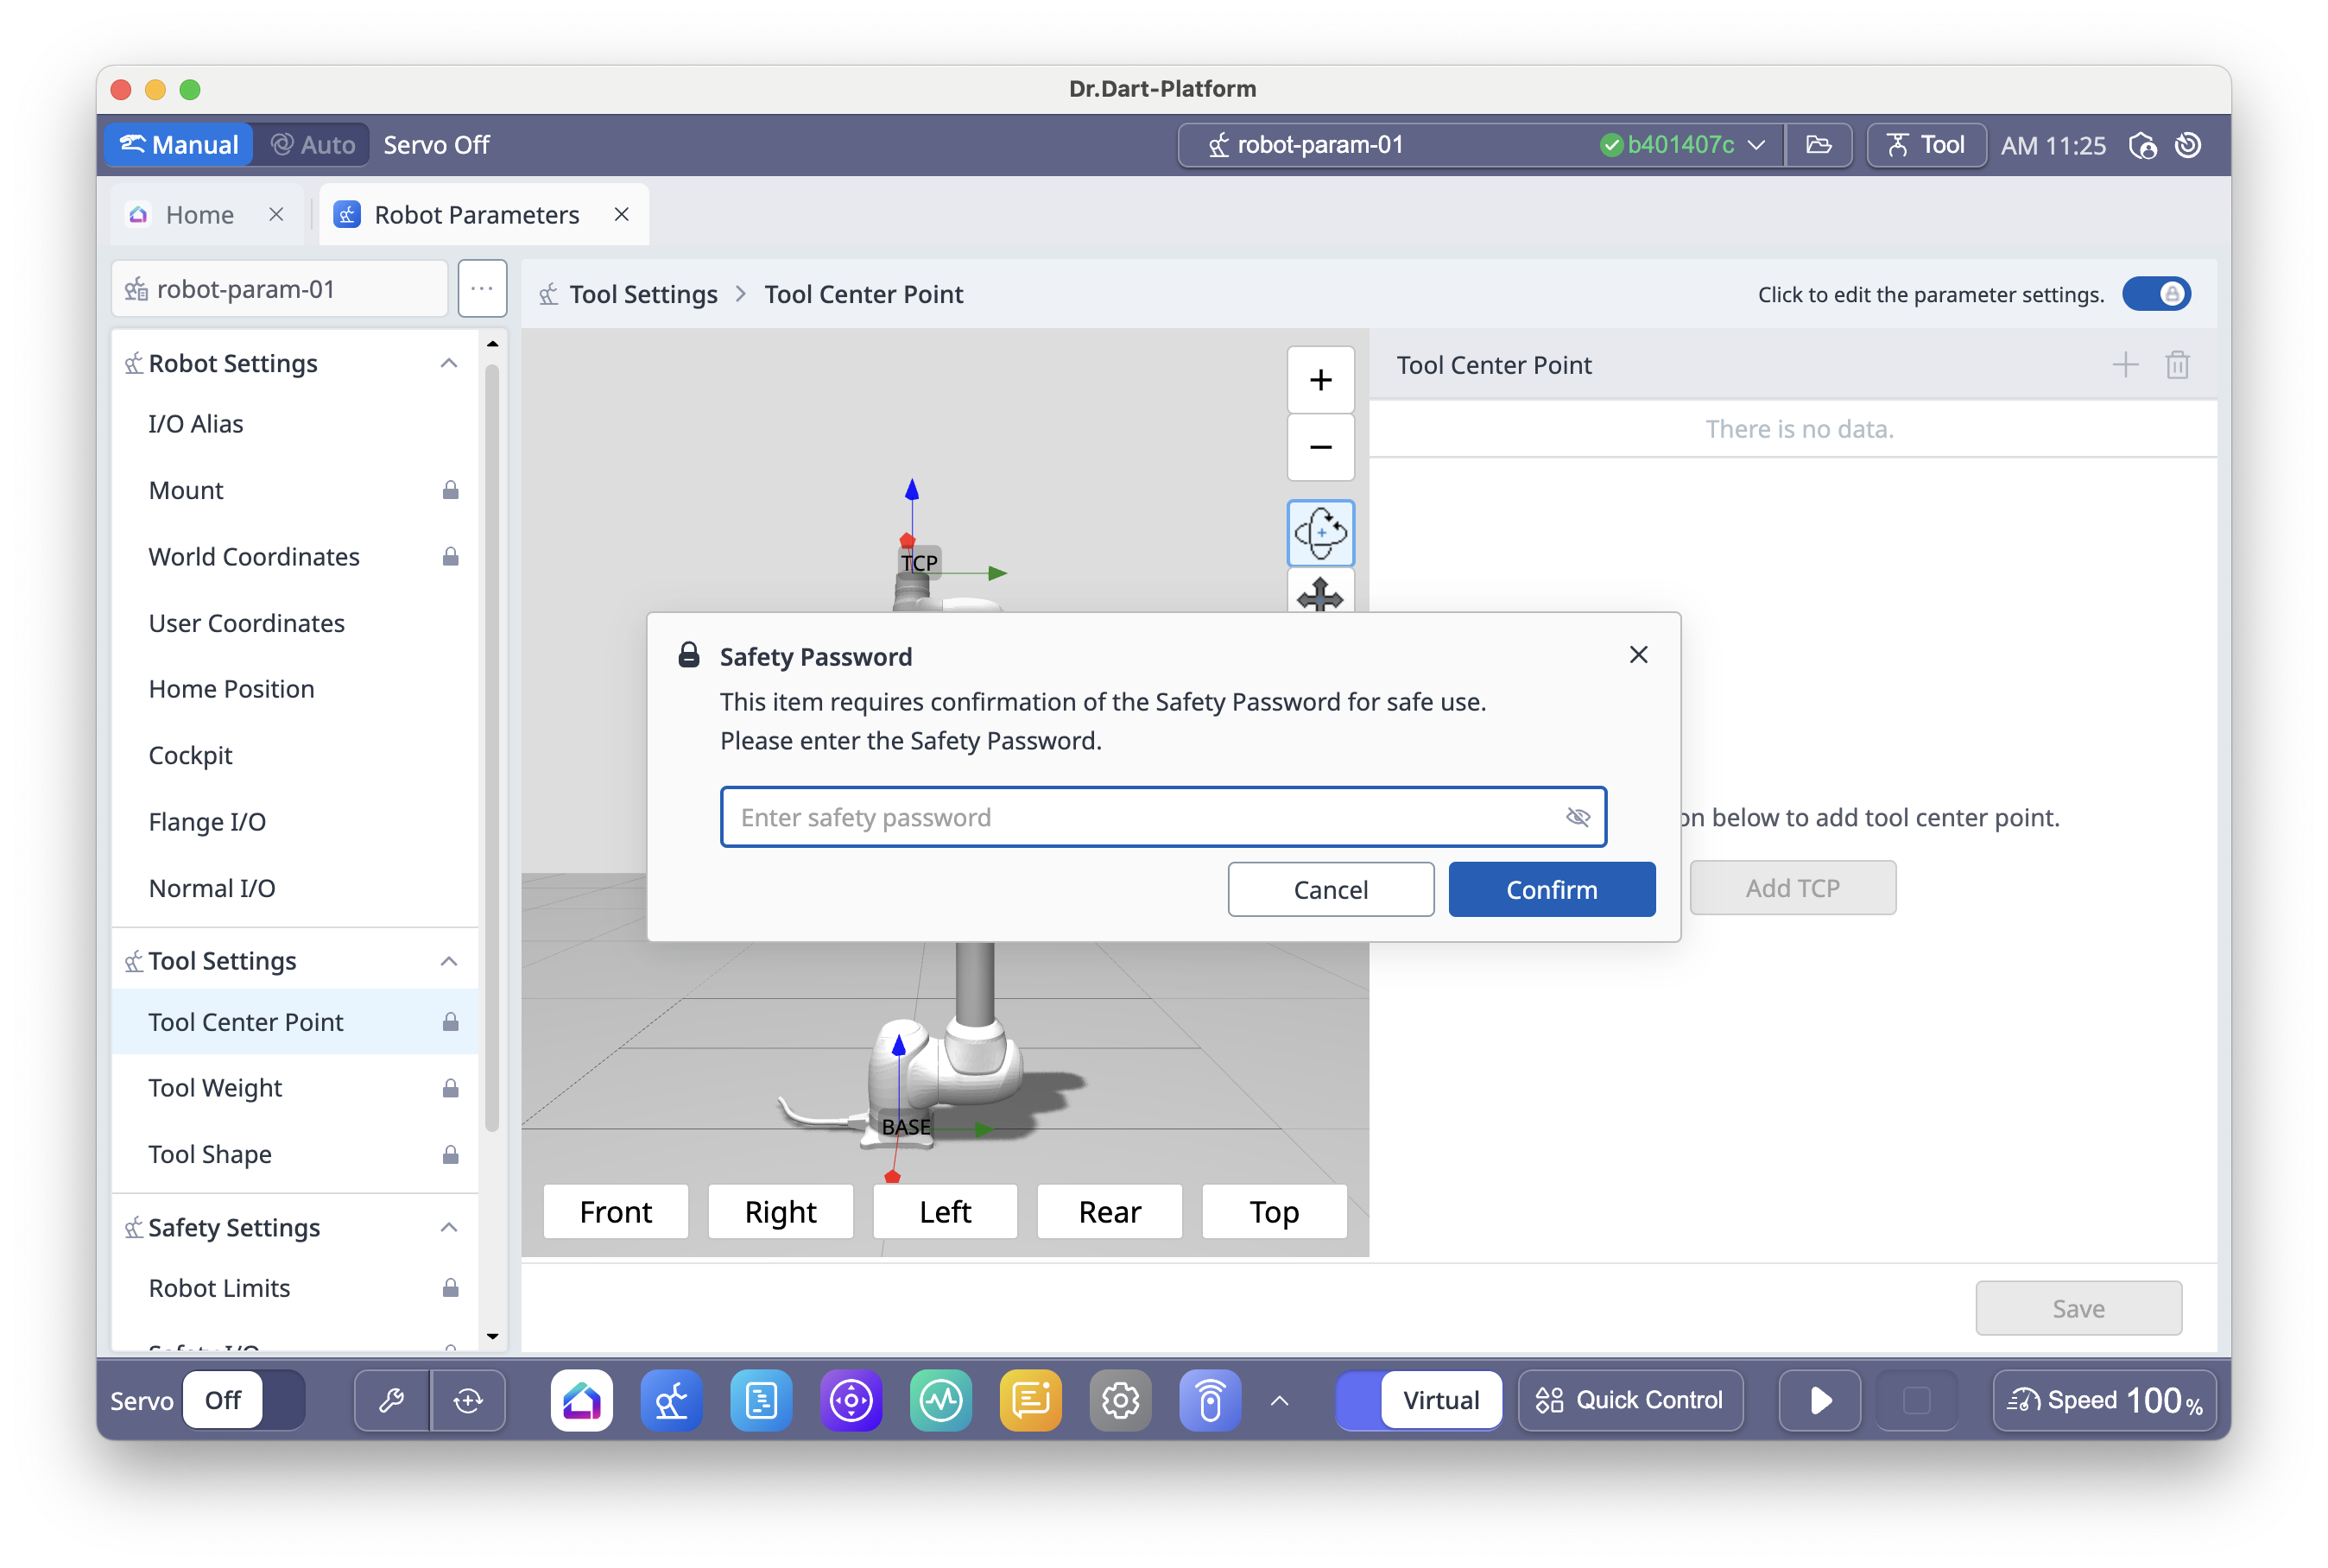
Mode & Permission Requirements:
Most robot parameter changes require Supervisor mode and the Supervisor assword (default:
admin).Certain settings, such as safety zones or robot limits, can only be changed when Servo Off is enabled.
Basic Workflow Example – Adding a New TCP:
Open Robot Parameter Module from the main menu.
Go to Tool Settings → Tool Center Point.
Switch to edit mode by clicking Click to edit the parameter setting.
Click the + button to add a new TCP.
Enter the name and define TCP points.
Save the changes and select the new TCP for use.
Note:
Incorrect tool or safety zone settings can lead to collisions, unexpected stops, or safety violations.
Always verify parameter values before applying them to a live robot.
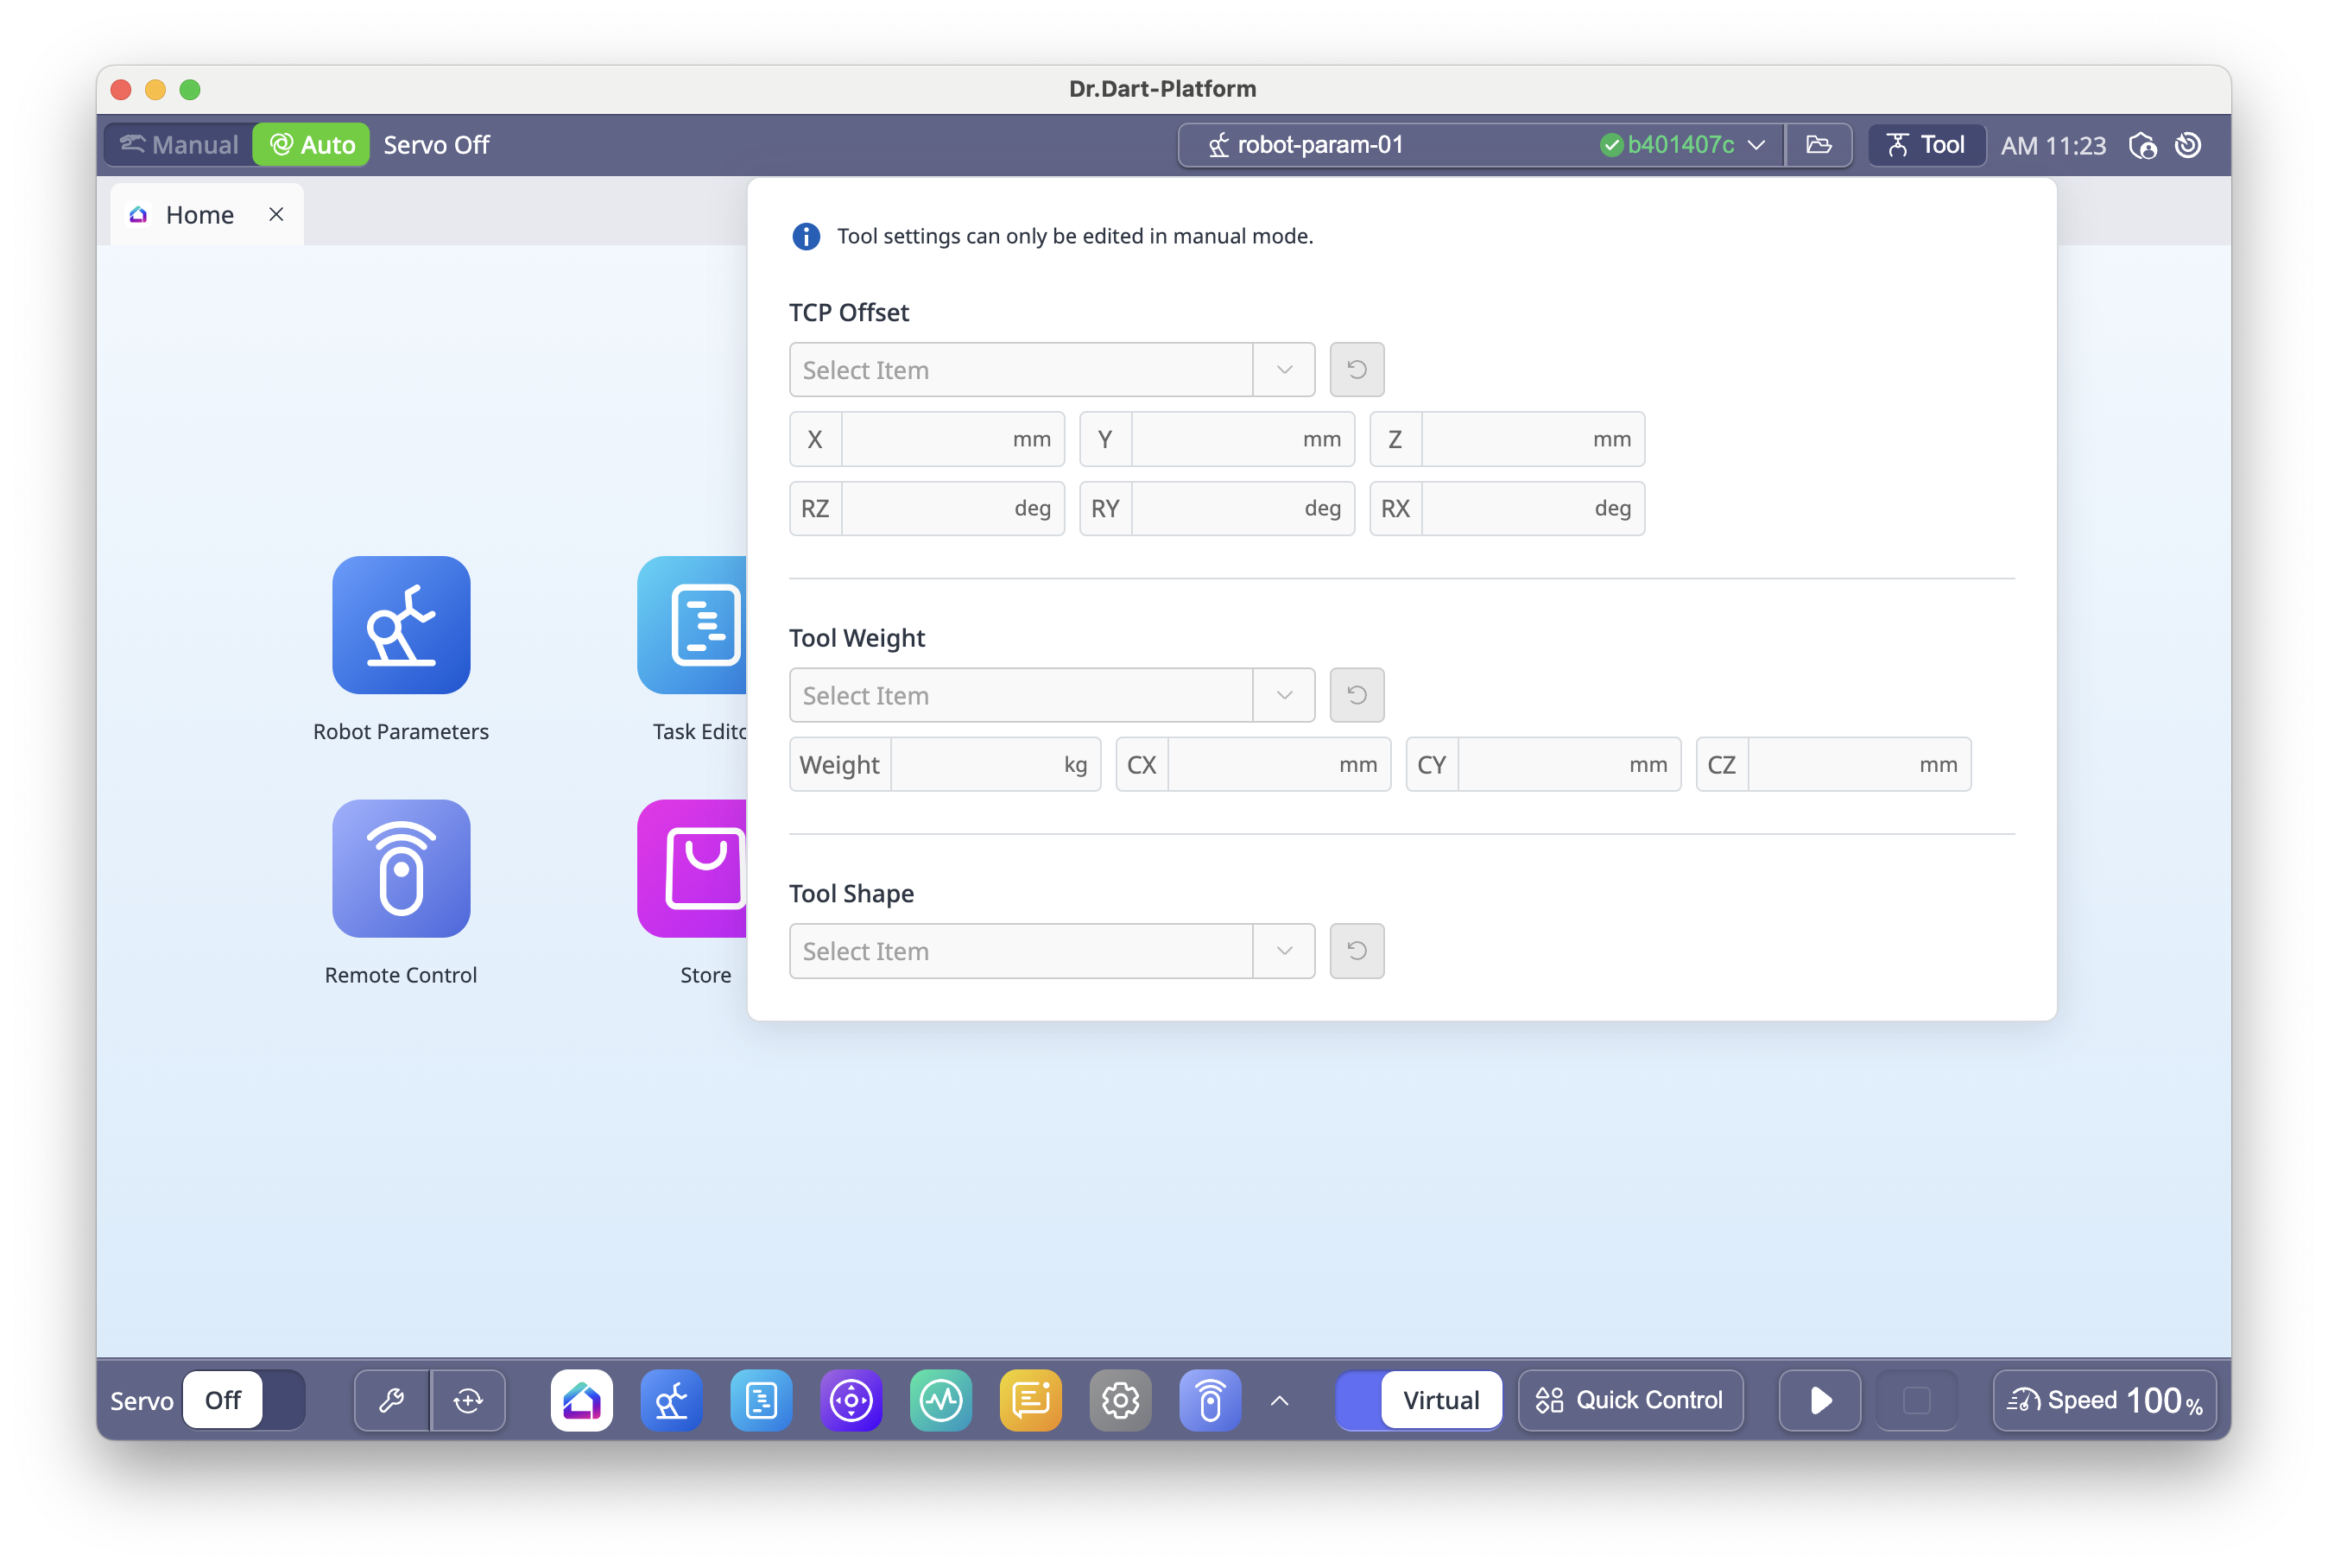
6.7 Tool Settings
Located in the top-right, lets you set:
TCP (Tool Center Point)
Tool Weight
Tool Shape
Note: Incorrect tool settings can cause collisions, unexpected stops, or unsafe behavior.
6.7 Simulation Button
Toggles between real and virtual robot modes:
Virtual Activated: Operates a virtual robot for testing.
Real Activated: Controls a connected physical robot.

6.8 Quick Control Module
Located at the bottom-right.
Provides a pop-up with:
3D Robot Viewer
Jog Controls
Dashboard
Click the double-arrow icon to expand.
6.9 Auto Mode Button
Auto Activated: Executes the entire task automatically (e.g., from Task Editor).
Manual: Allows manual operation (e.g., Jog Plus, safety parameter changes).
Supervisor level is required to change this setting.

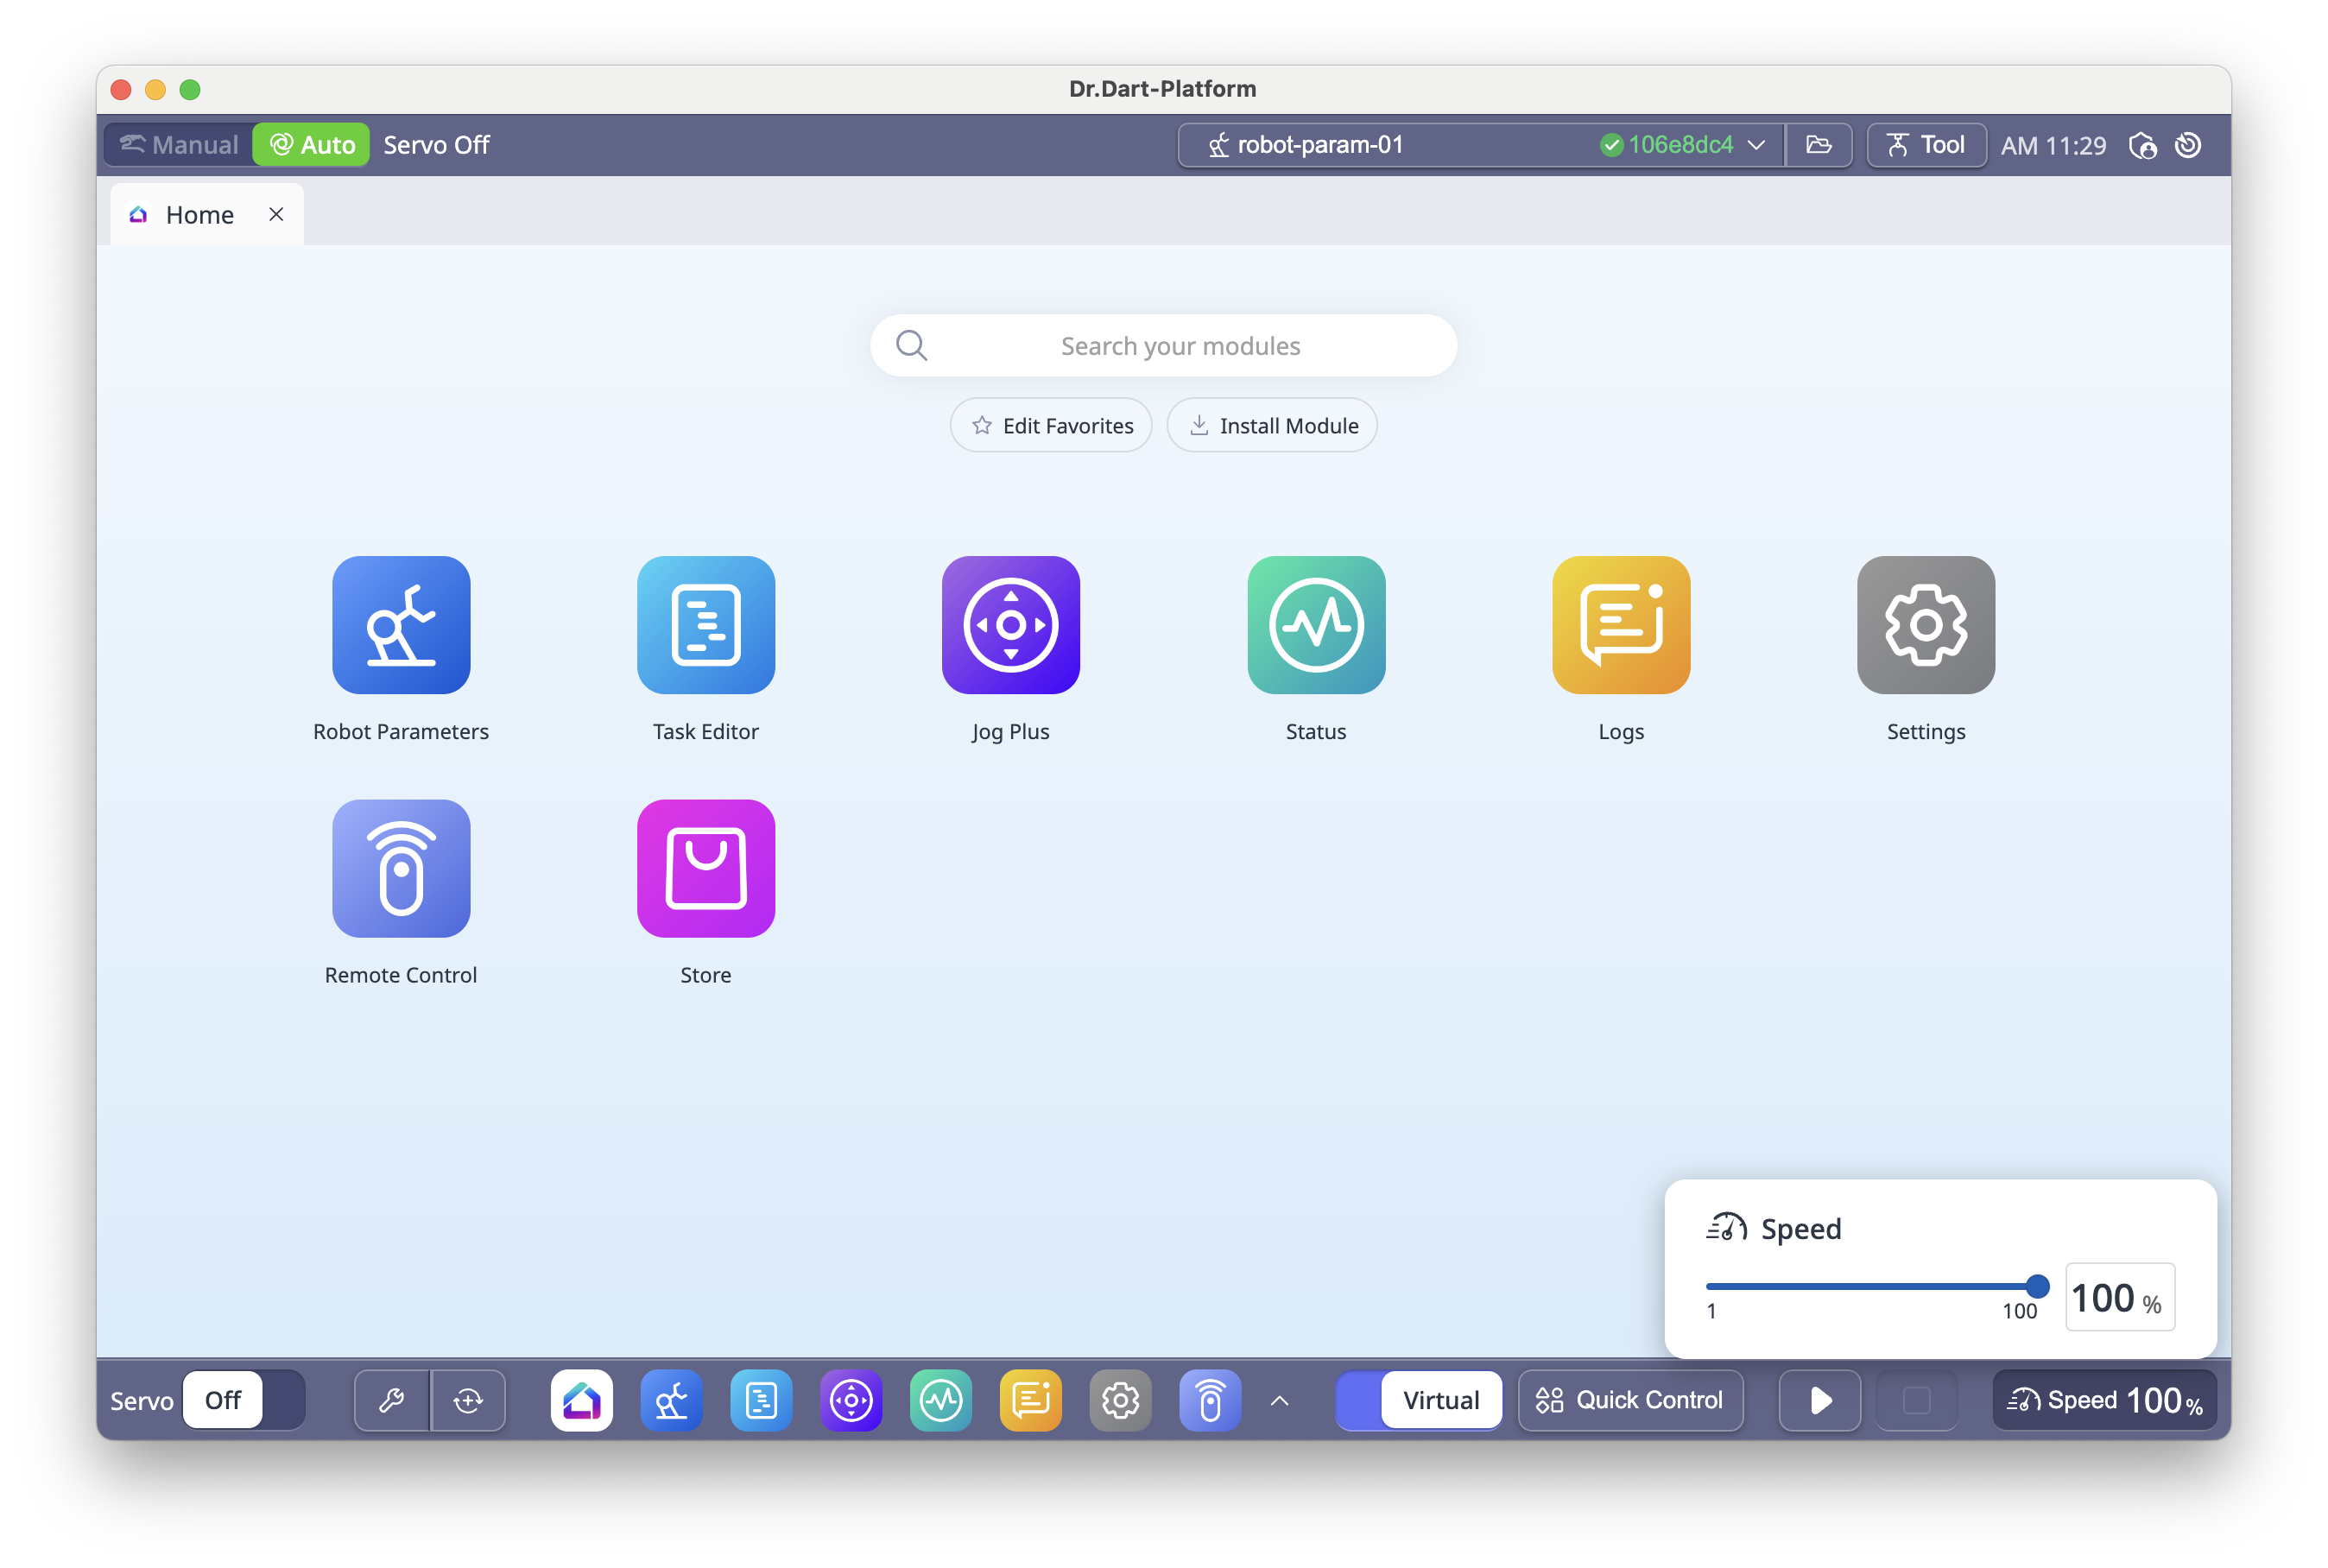
6.10 Robot Speed Adjustment
Adjusts execution speed in real time (default: 100%).
Change via slider or numeric input.
Located at the bottom-right.
6.11 Backdrive & Software Recovery
Backdrive: Releases brakes without powering motors, for manual joint positioning.
Software Recovery: Resets robot to safe state after safety violations.
6.12 Jog Plus Module (Manual Mode Only)
The Jog Plus Module provides two main functions for manually moving the robot:
Jog – Moves the robot joint or TCP along the selected joint axis or coordinate axis.
Move – Moves the robot joint or TCP directly to a specified target position.
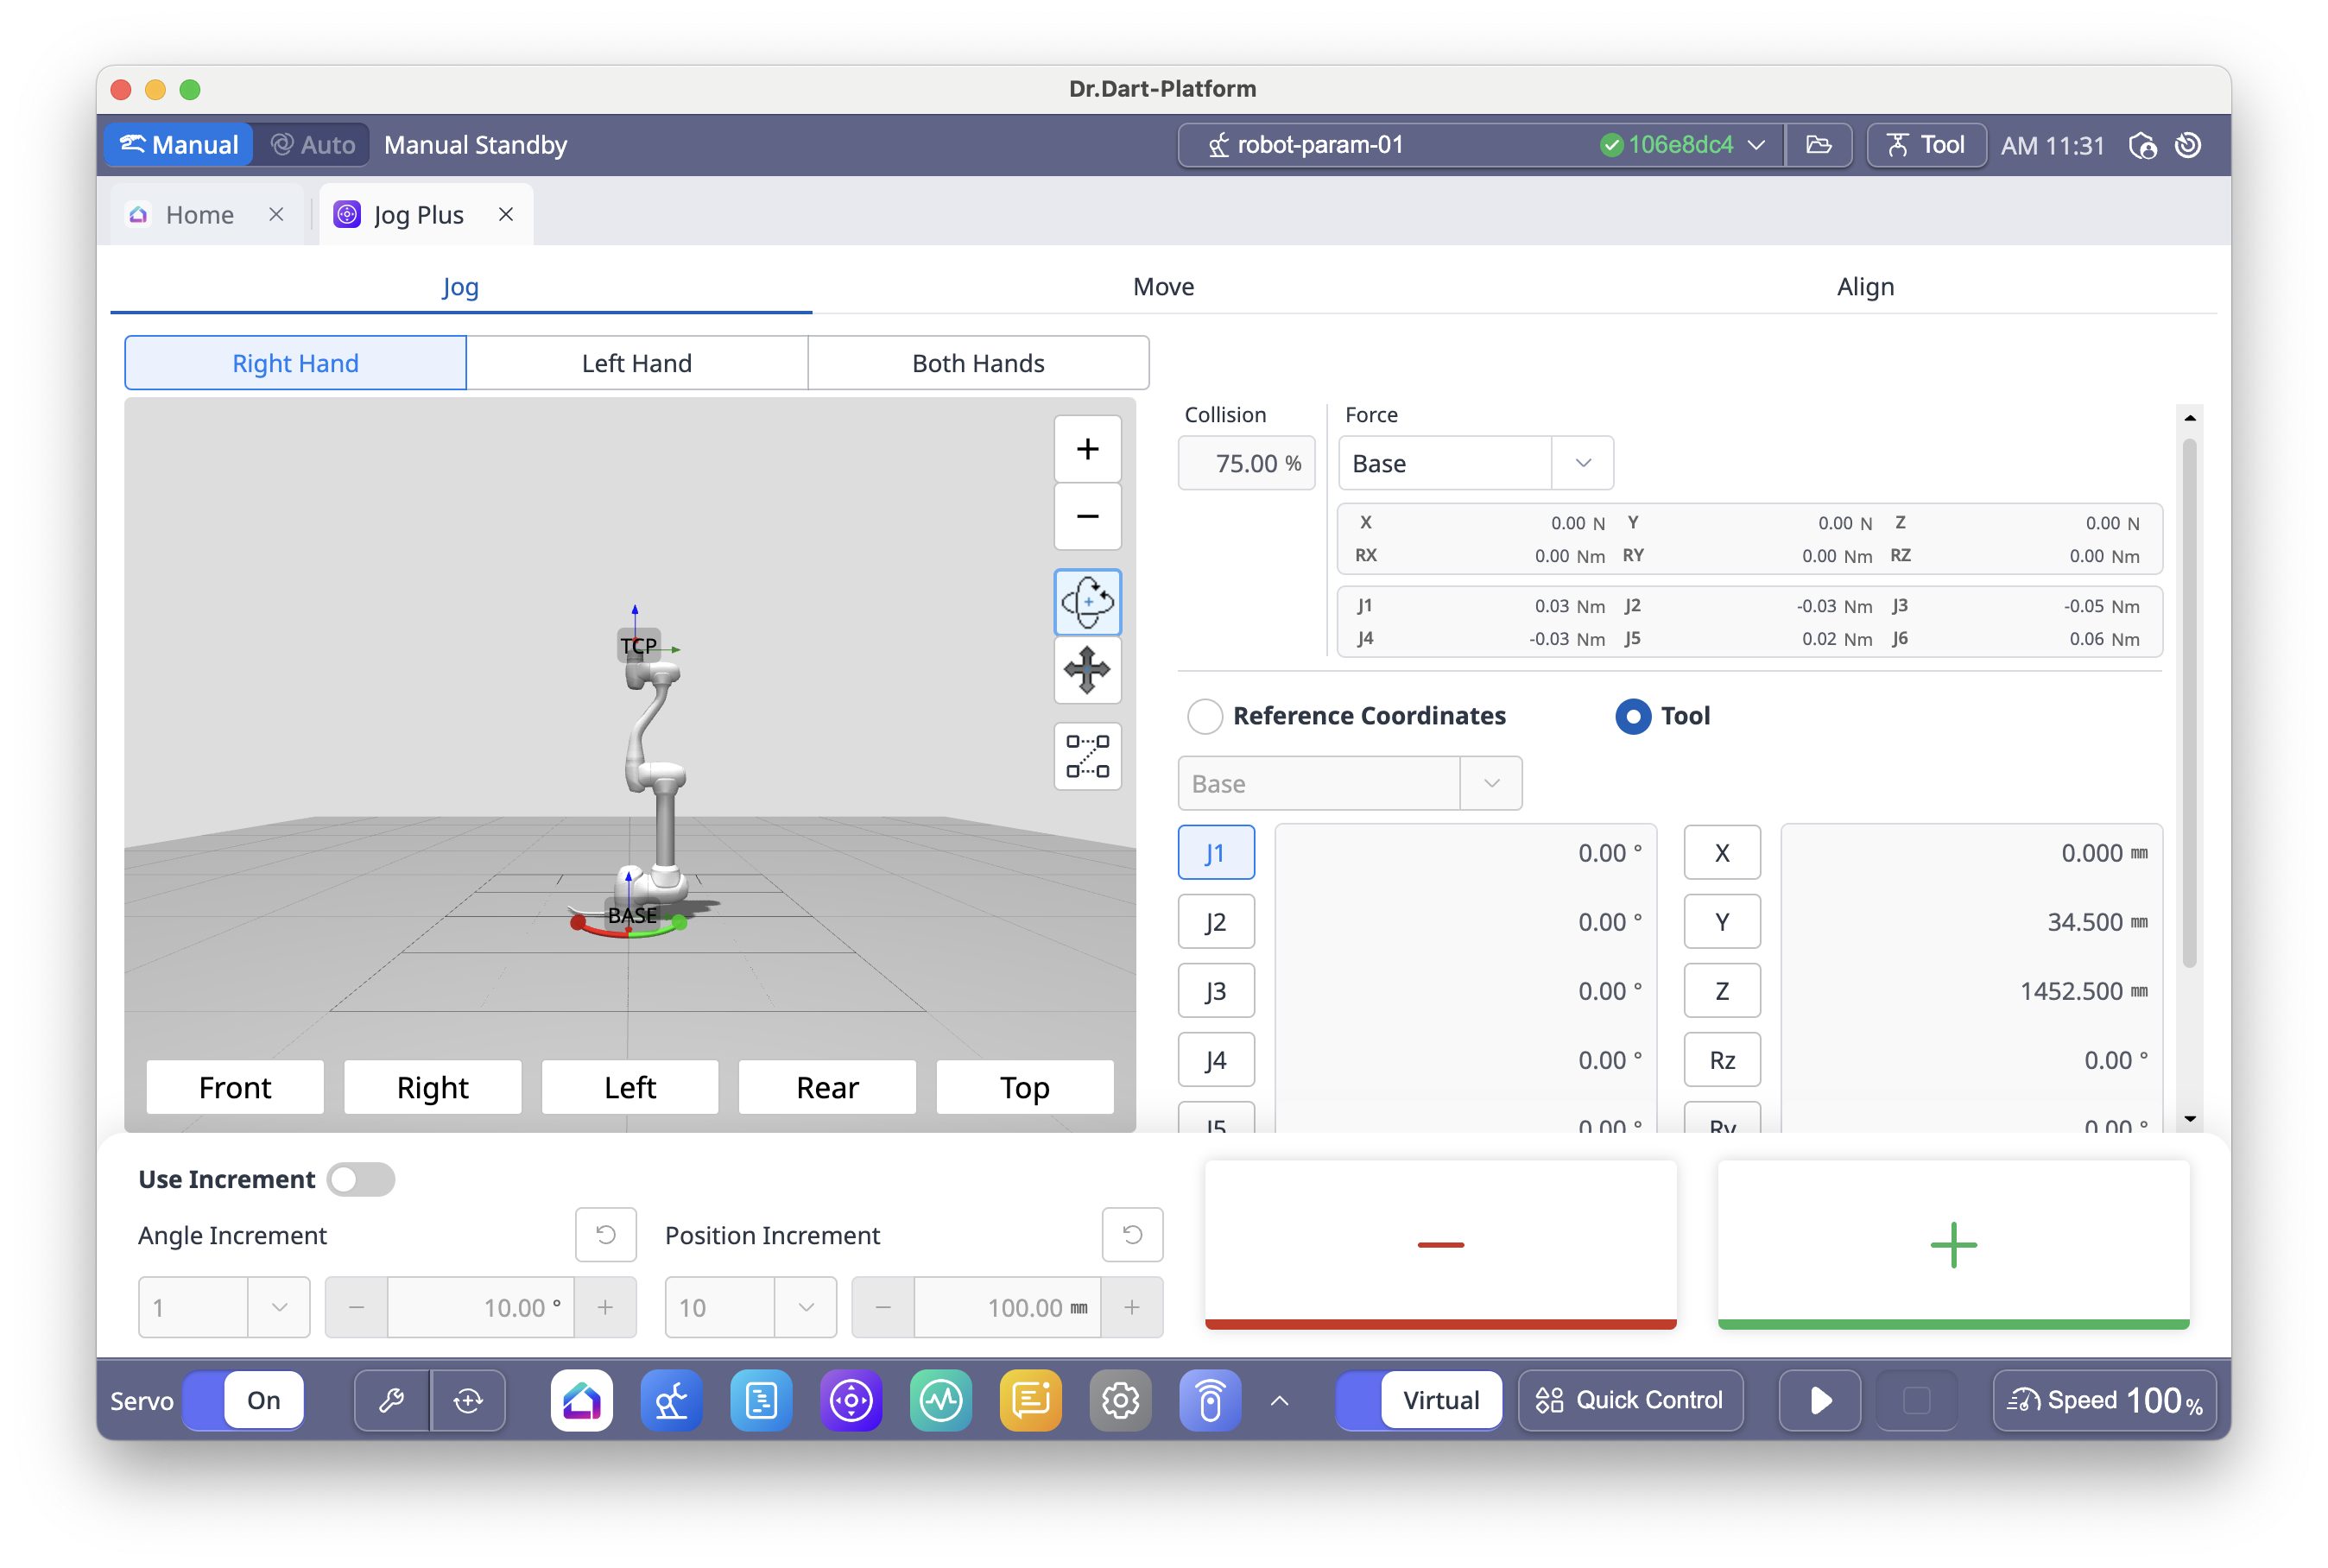
Motion Types
There are two motion types available when using Jog or Move:
Joint Motion – Rotates individual joints to move the robot.
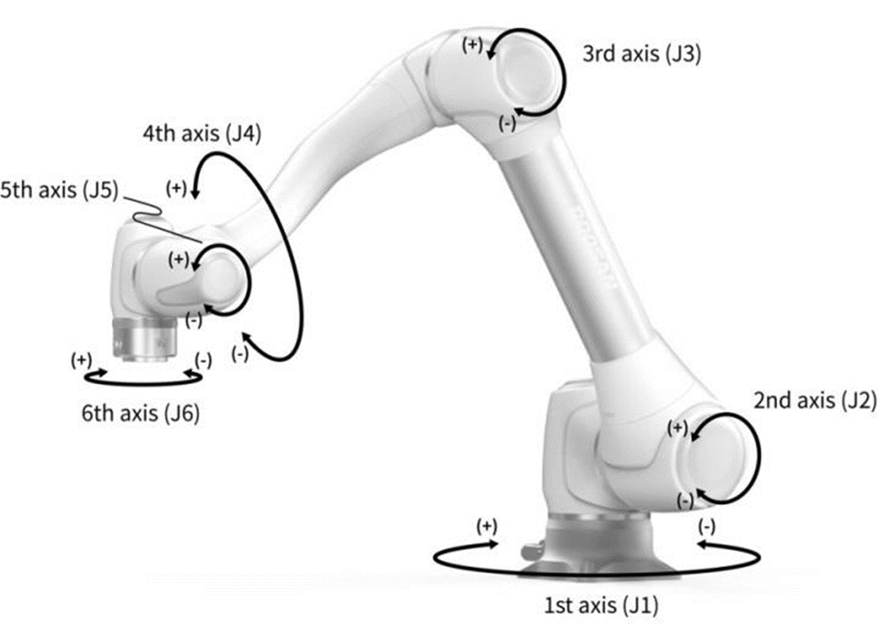
Task Motion – Moves the TCP linearly along the X, Y, or Z axis based on the selected coordinate system (Base, World, or Tool).

Note:
Jog and Move operations, including Joint Motion and Task Motion, are available only when Servo On is enabled.
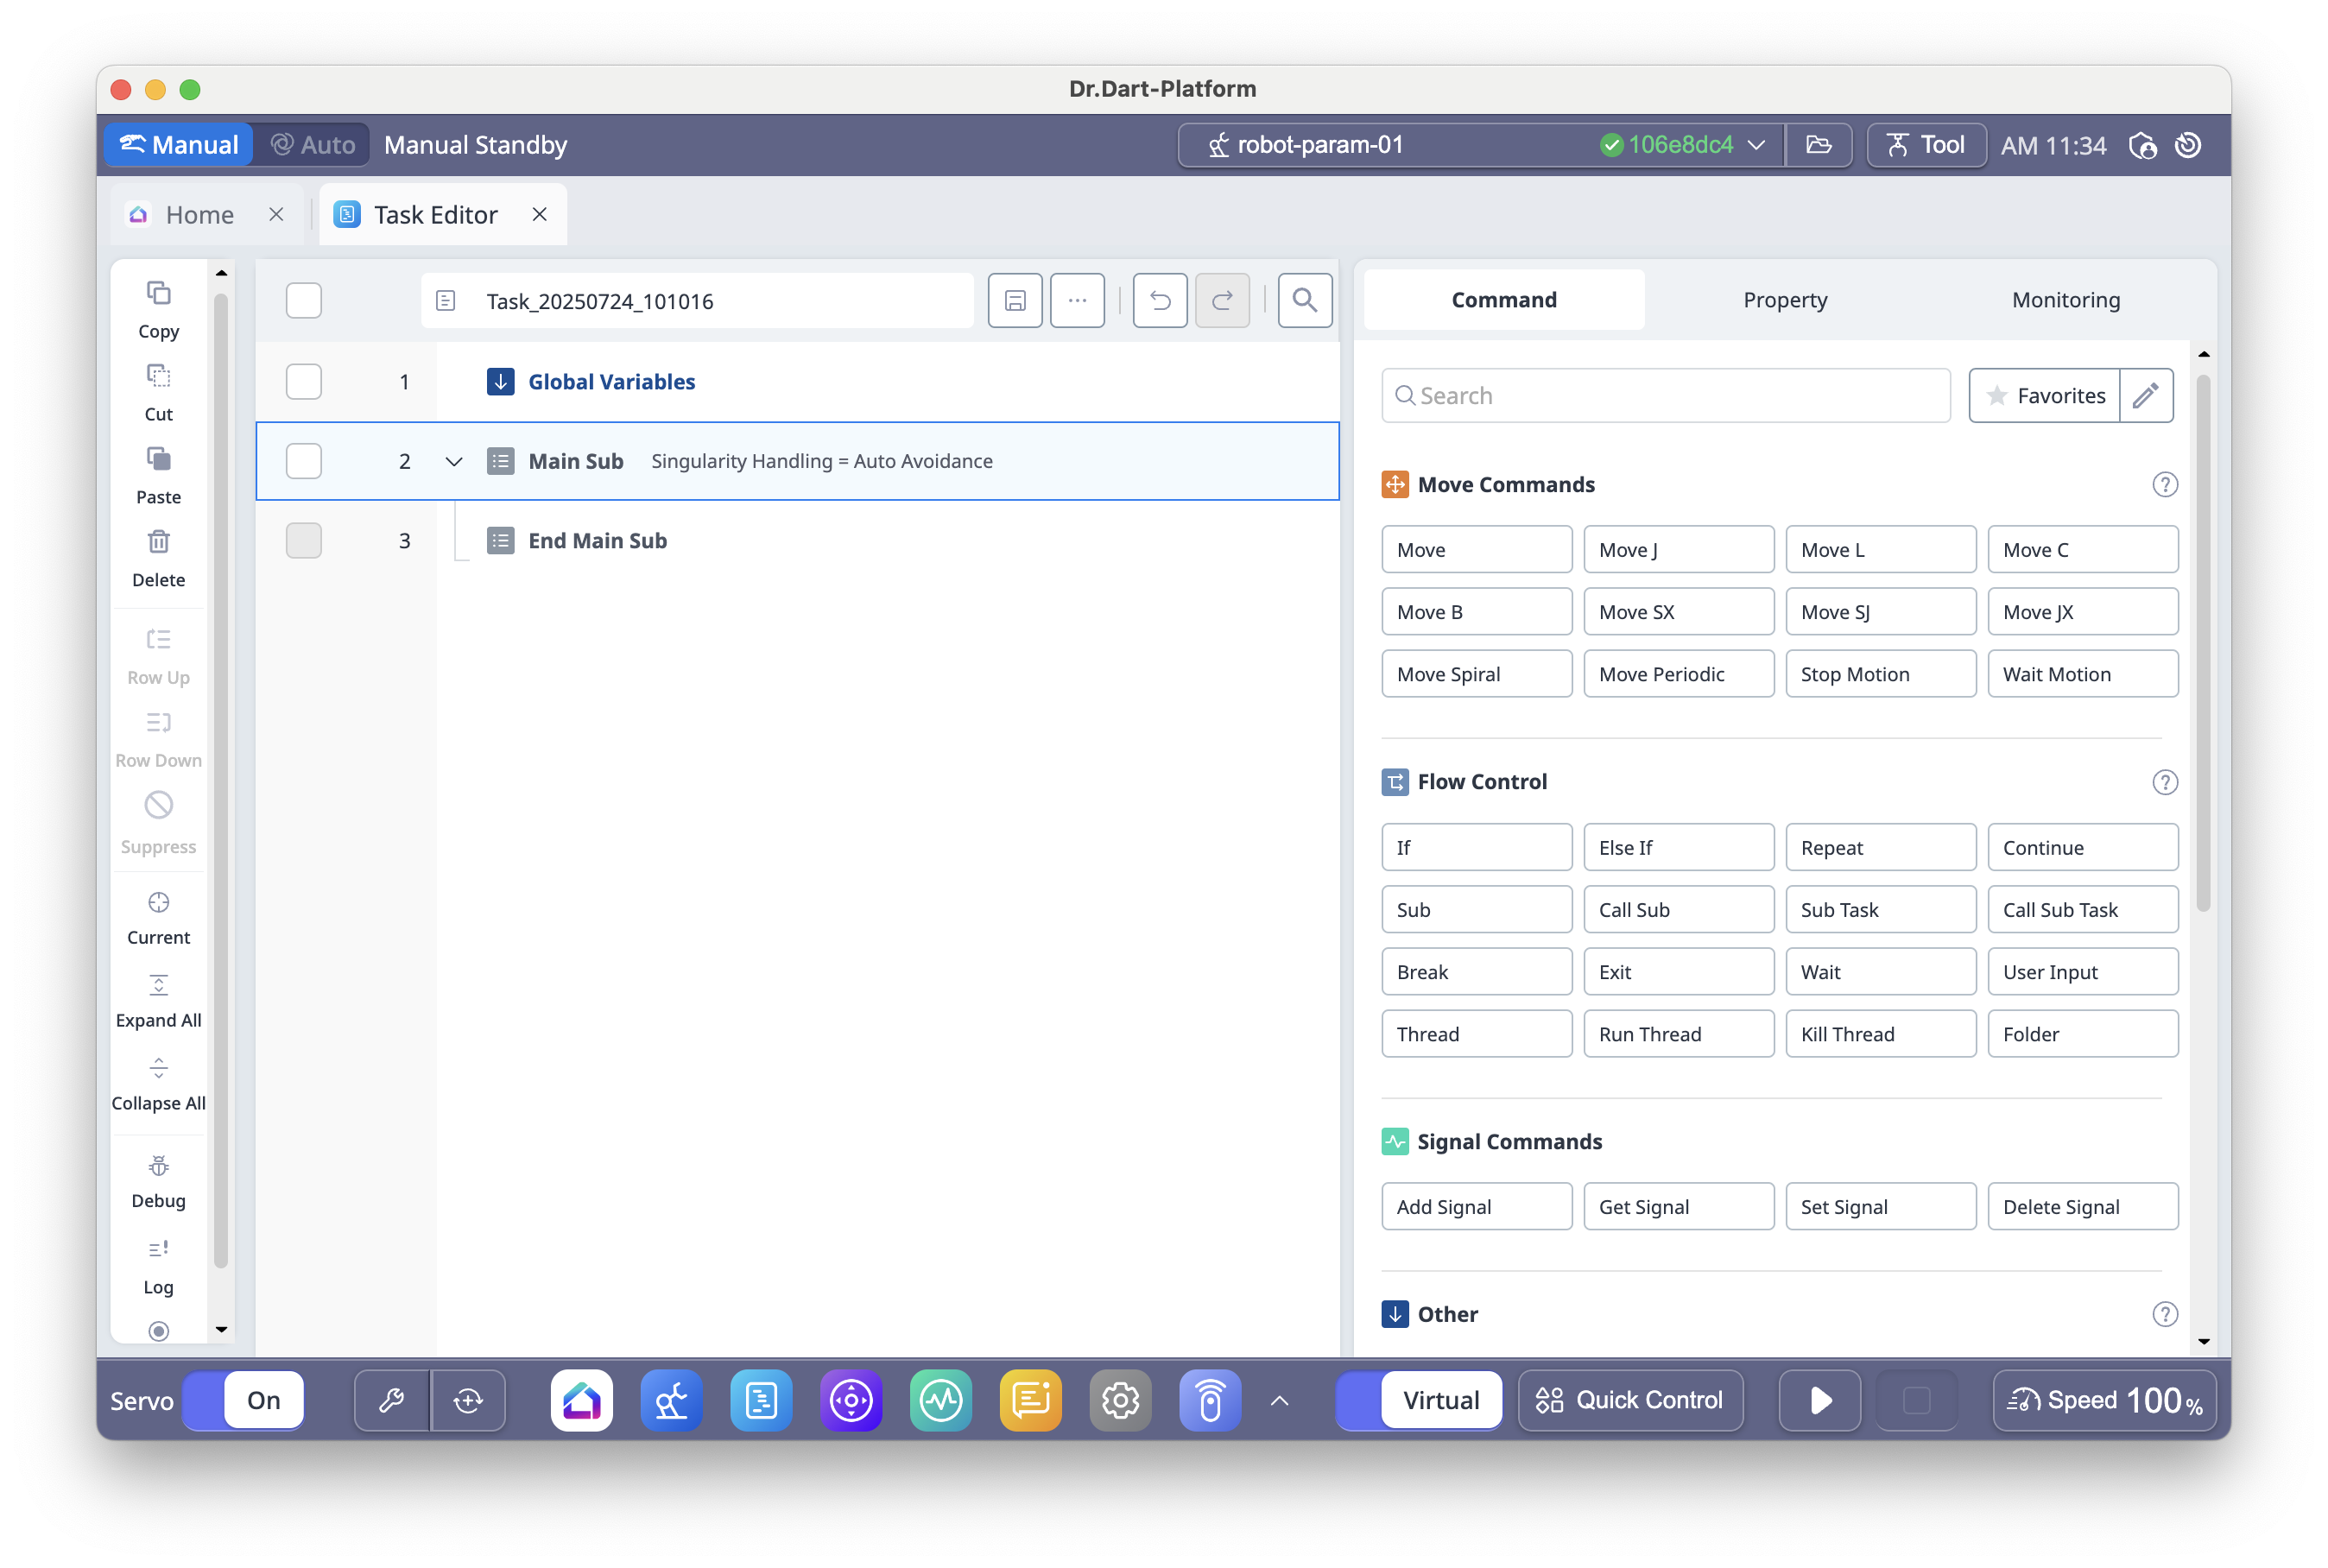
6.13 Task Editor Module
The Task Editor Module allows you to create and edit robot operation sequences as a single task file by arranging command blocks in order.
It is primarily used to program robot movements, configure task properties, and simulate operations in a 3D environment.
Main Functions
Create Tasks – Build robot motion sequences by adding command blocks.
Edit Tasks – Change properties, reorder commands, copy/cut/paste, or delete.
Simulate Tasks – Preview and test in the built-in 3D Simulator before execution.
Monitor Execution – Track task progress and robot status in real time.
Basic Workflow
Open Task Editor Module from the main menu.
The Main Sub command is provided by default as the starting point of every task.
Insert additional motion commands (e.g., Move J, Move L) and configure their properties.
Use the Get Pose function to set target positions based on the robot's current location.
Arrange commands in the desired order using drag-and-drop or row up/down controls.
Test the task in the 3D Simulator.
Click Play to execute the task, or Stop to halt execution.
Note:
Task execution is only possible when Servo On is enabled. However, command editing is available in both Servo On and Servo Off states.
6.14 Settings Module
The Settings Module allows you to configure the general system environment of Dart-Platform 3 and manage various robot-related settings.
Main Functions:
Language Settings – Select the display language for the platform.
Robot Update – Update the robot controller firmware or software from within Dart-Platform.
Safety Password – Set or change the Supervisor-level password for accessing protected functions.
Network Configuration – View and modify controller network settings (EtherNet/IP, Profinet).
Notification Settings – Choose where Toast/Snackbar notifications appear on the screen.
Log Export – Export change history for safety zones and parameters.
Mode-Dependent Availability:
Some settings (e.g., Safety Password change, Safety Parameter configuration) are available only in Supervisor mode.
Certain network or robot update options may require Manual mode and Servo Off for safety.
Basic Workflow Example – Changing Safety Password:
Open Settings Module from the main menu.
Select Safety Password from the settings list.
Enter the current password, then the new password.
Click Confirm to save changes.
Note:
Some settings require a system reboot or controller restart to take effect. If prompted, save your work before proceeding.