Visual Scripting
Visual Scripting is a tool in Dart-IDE that uses a graphical interface to help the developer create programs based on visual representations of logic rather than writing it out in the required language syntax.
How to open the visual scripting panel?
Step 1. Open Dart-IDE
Access: https://ide.drdart.io
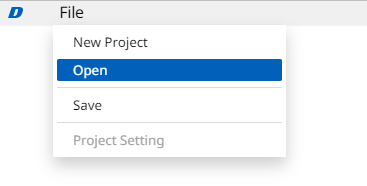
Step 2. Open your project
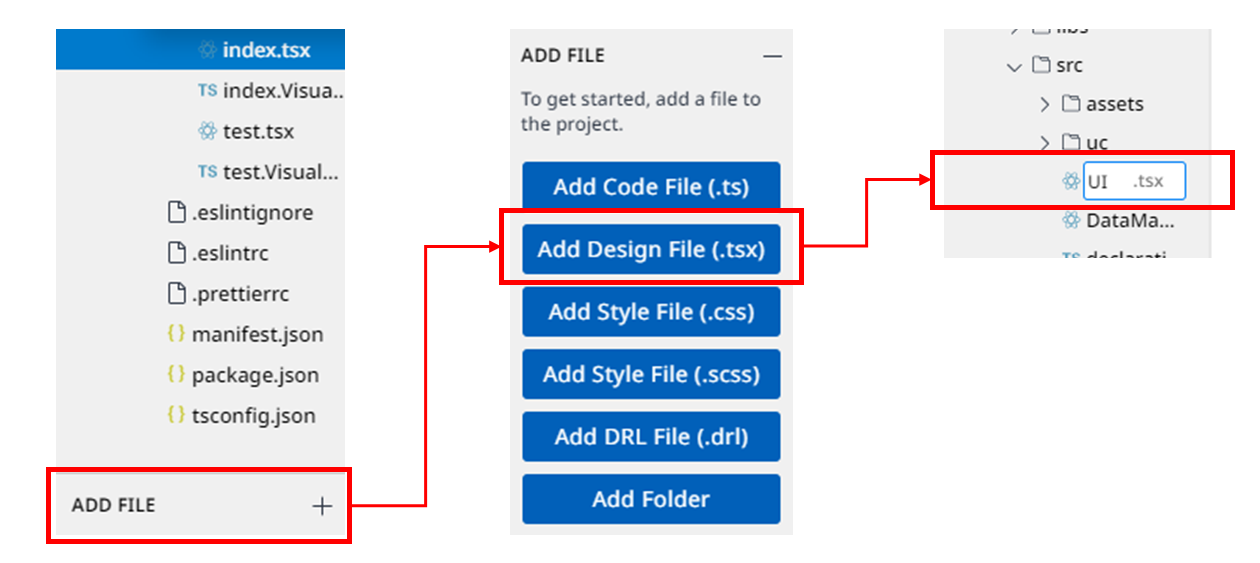
Step 3. Add the file
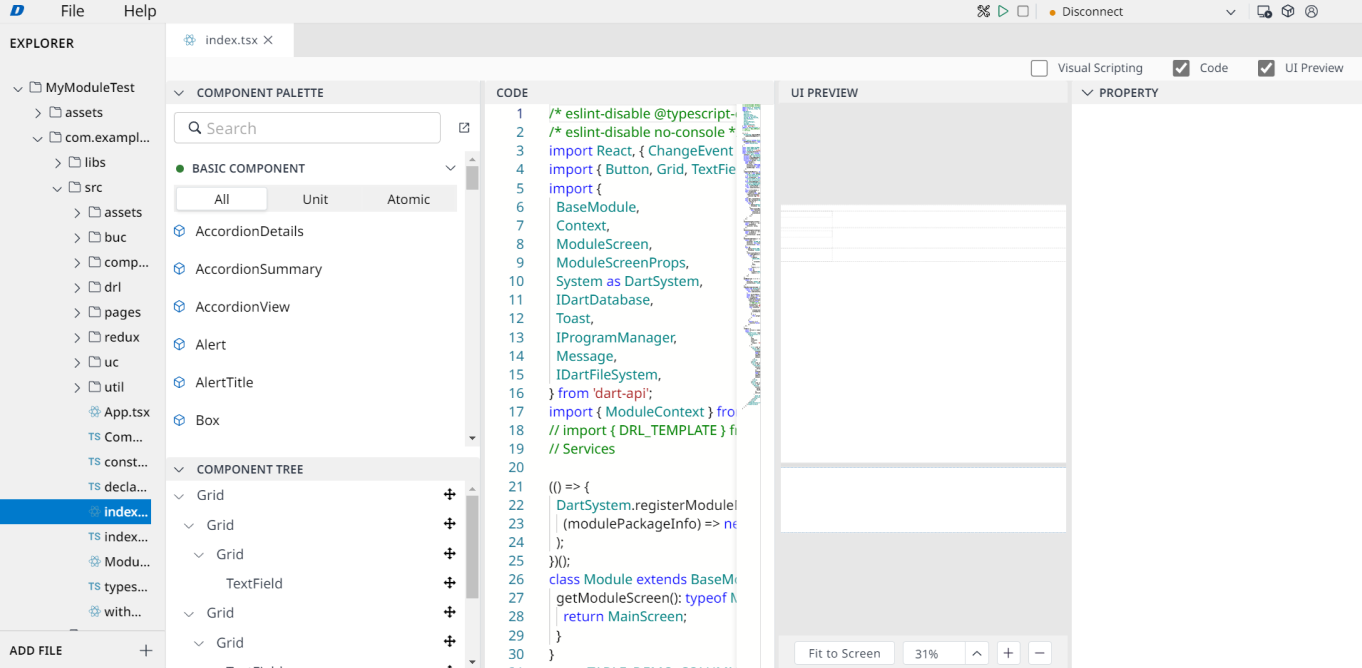
UI.tsx(File name doesn’t matter). It will show youCode EditorandUI Preview.
You must use the Visual Scripting function after creating separate *.tsx file.
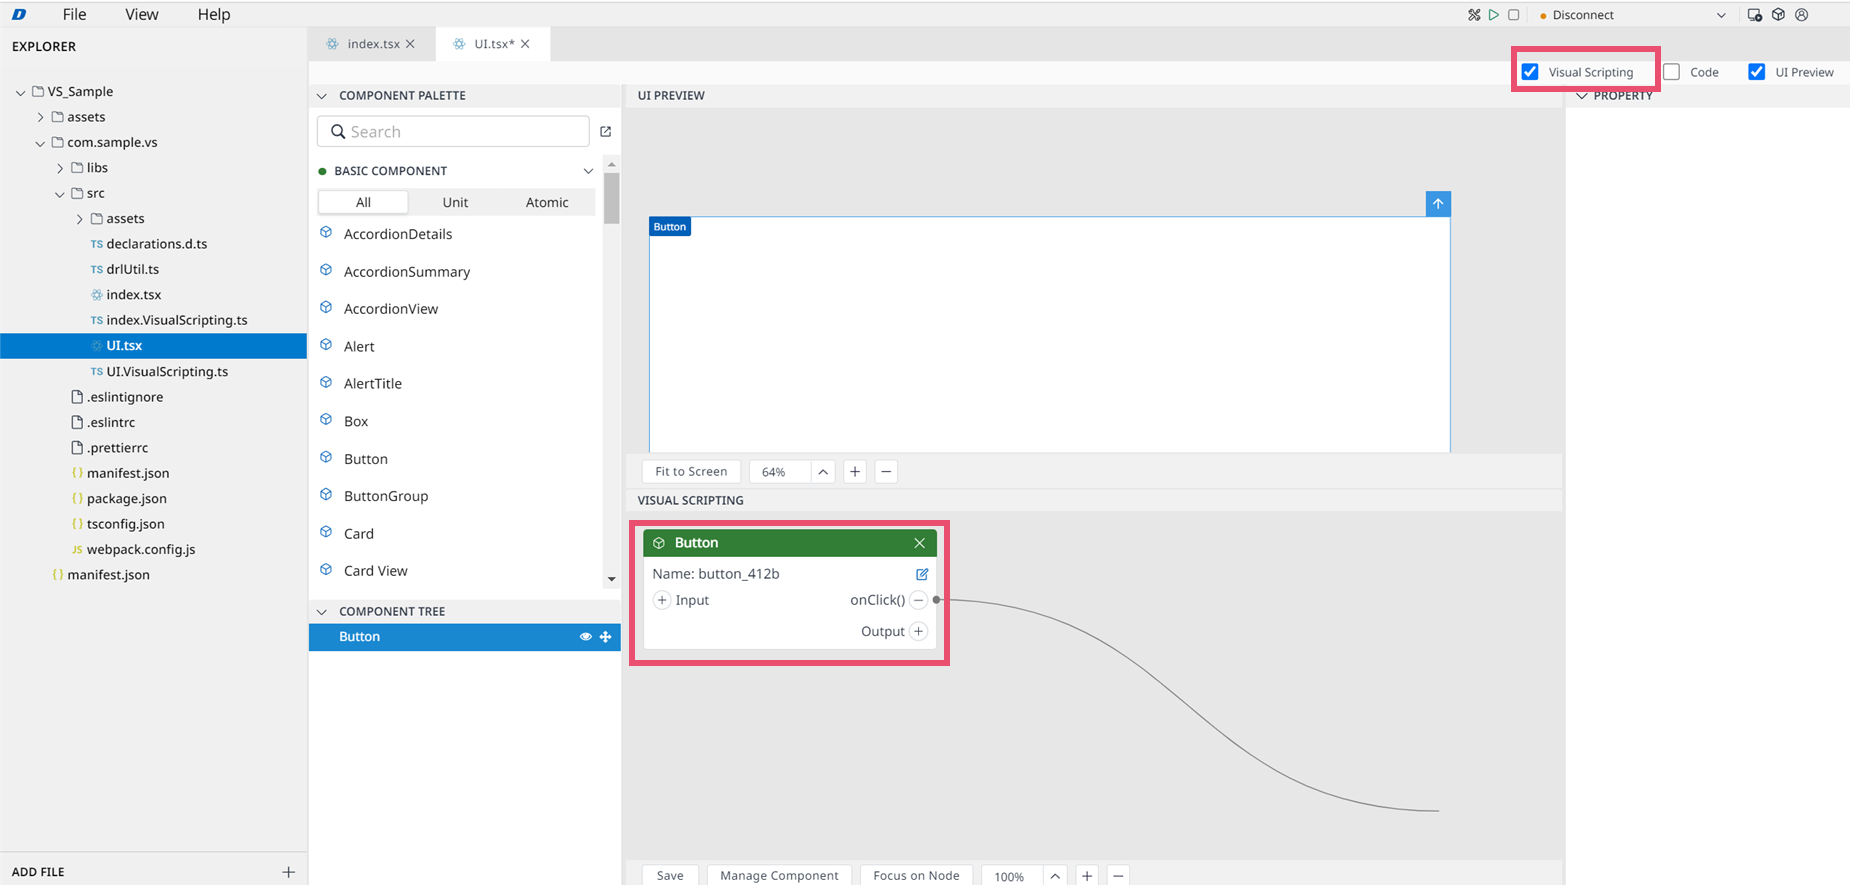
Step 4. To activate Visual Scripting in
UI.tsx, add and save the Button Component to the UI Preview .
Select
UI.tsxfile in the EXPLORER window.Activate VISUAL SCRIPTING window by clicking the Visual Scripting checkbox.
Select Button in the COMPONENT PALETTE window by mouse, and drag & drop it to the UI Preview window.
Click the Save button at the bottom of the Visual Scripting window. Then,
UI.visualScripting.tsfile is automatically created. This file is only used internally, and the user does not need to edit it.
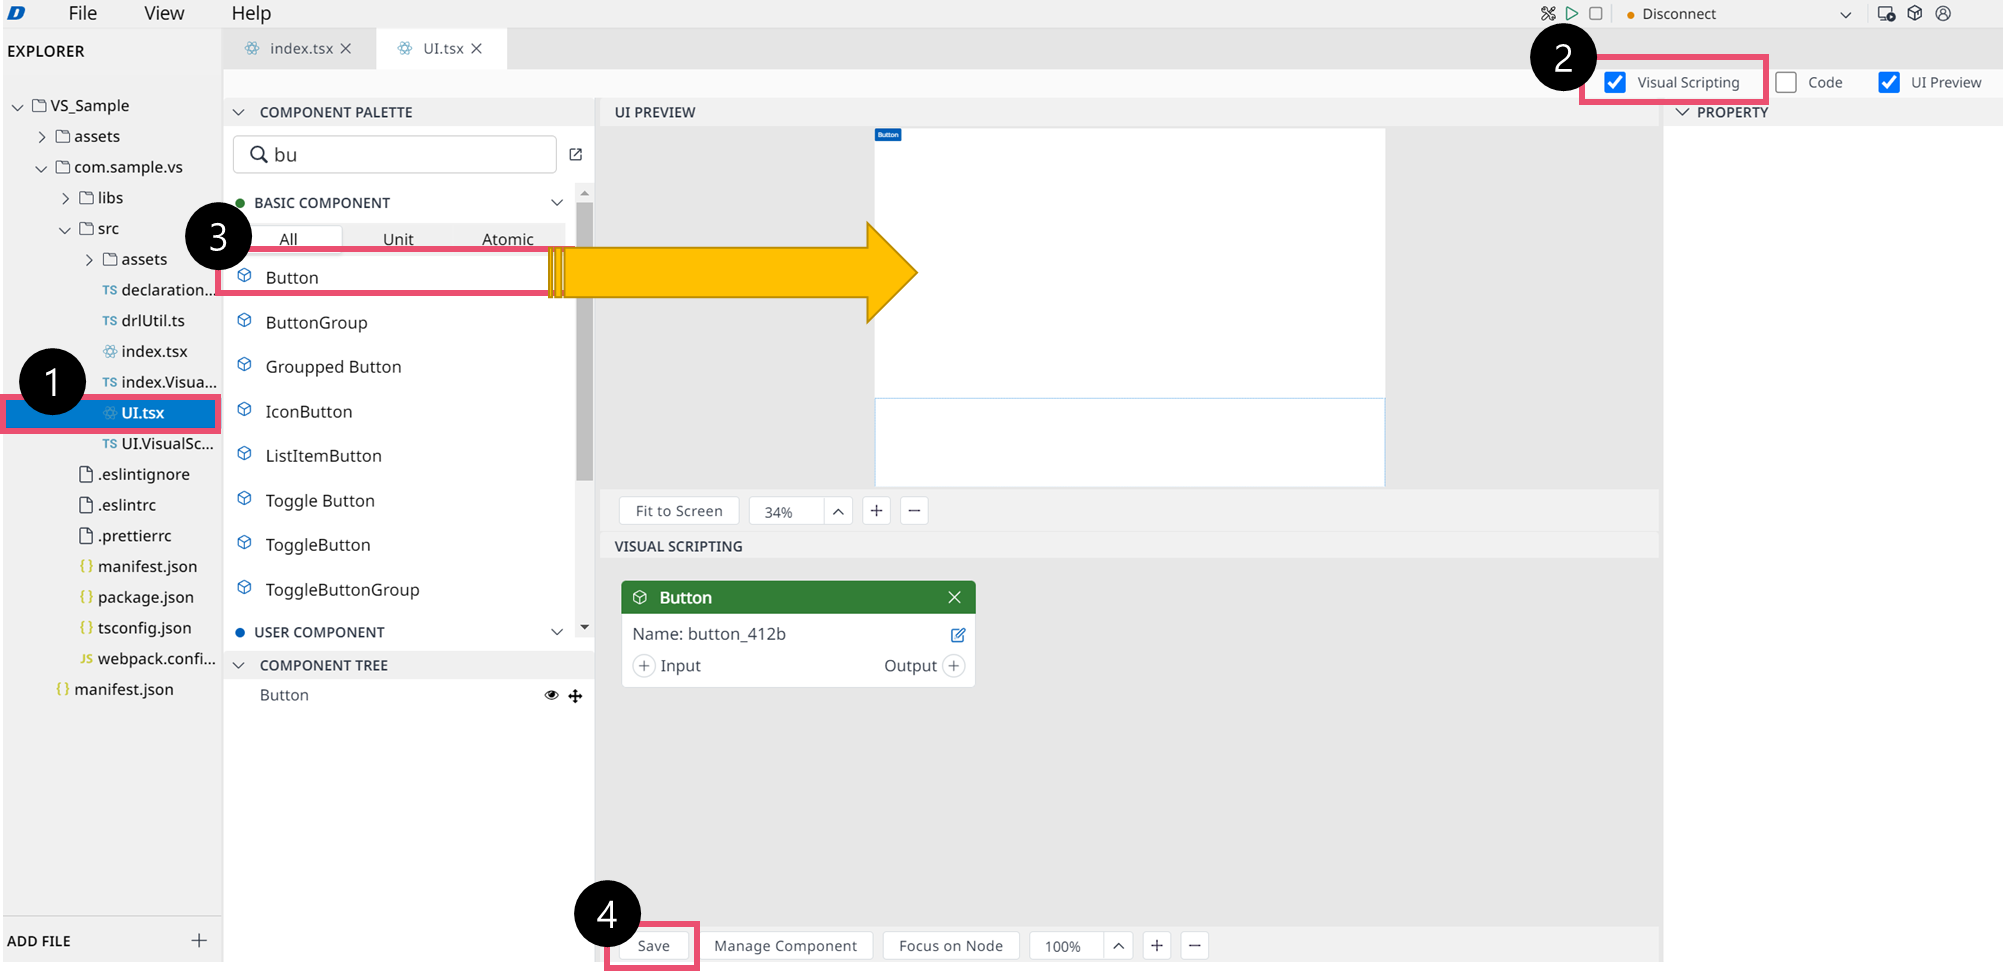
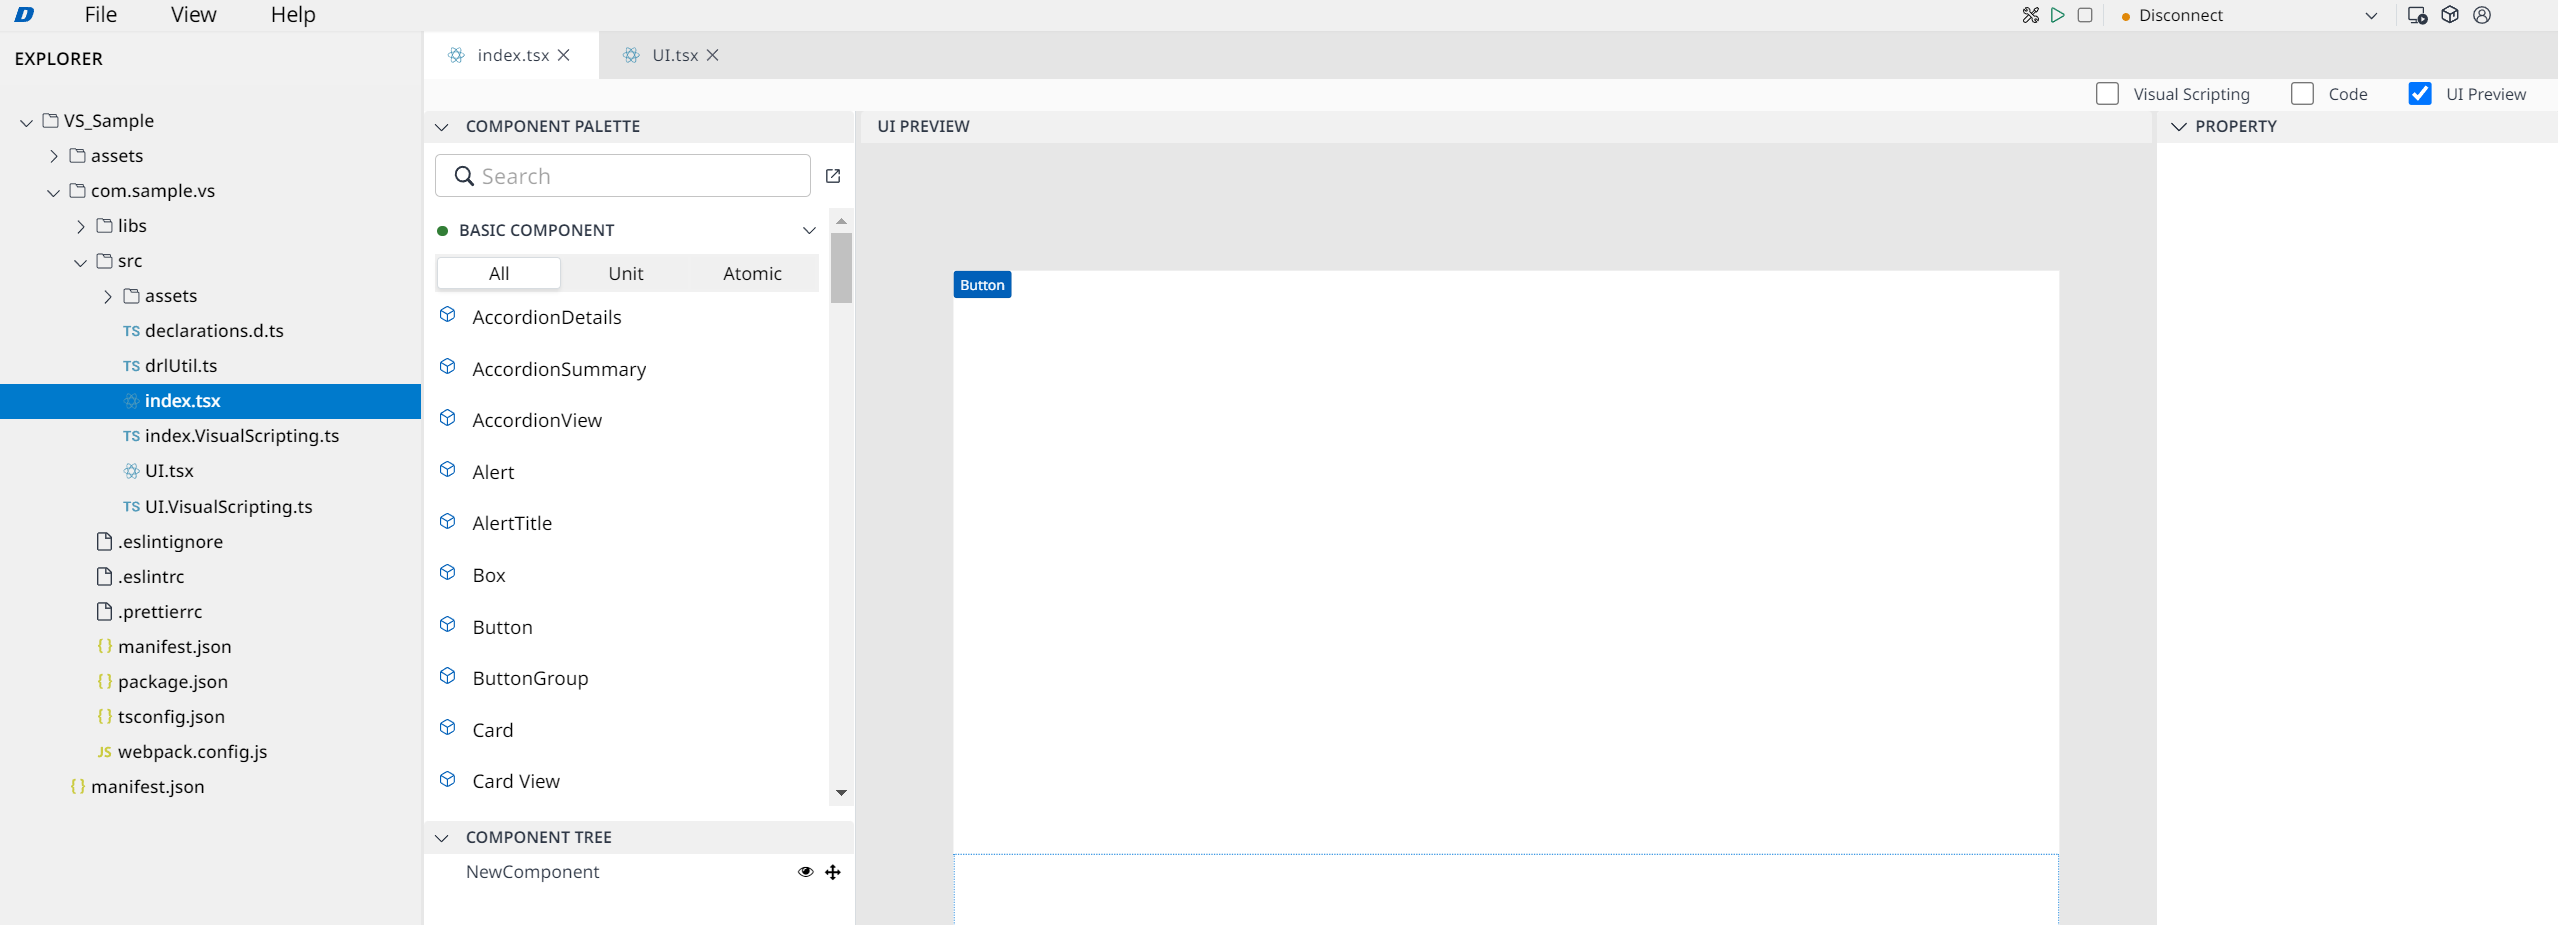
If you open other file .tsx or create new one, its own Visual Scripting panel will be shown.
Vice versa, when you turn back to the current file .tsx , The Current Visual Scripting panel will be shown.
Step 5. To display
UI tsxscreen in theIndex.tsxscreen, replace the code within theIndex.tsxto the following code.
Note.
When released, we plan to provide the function that allows you to create modules only with Visual Scripting without any code modifications.
import {
    BaseModule,
    Context,
    IDartFileSystem,
    IProgramManager,
    Message,
    ModuleScreen,
    ModuleScreenProps,
    System,
} from 'dart-api';
import React from 'react';
import { ThemeProvider } from '@mui/material/styles';
import { getDBManager, runAppDrl } from './drlUtil';
import NewComponent from './UI';

// IIFE for register a function to create an instance of main class which is inherited BaseModule.
(() => {
    System.registerModuleMainClassCreator((packageInfo) => new Module(packageInfo));
})();
class Module extends BaseModule {
    getModuleScreen(componentId: string) {
        if (componentId === 'MainScreen') {
            return MainScreen;
        }
        return null;
    }
}
class MainScreen extends ModuleScreen {
    constructor(props: ModuleScreenProps) {
        super(props);
    }
    render() {
        return (
            <ThemeProvider theme={this.systemTheme}>
                {/* Put this code in this location*/}
                <NewComponent context={this.moduleContext} />
            </ThemeProvider>
        );
    }
}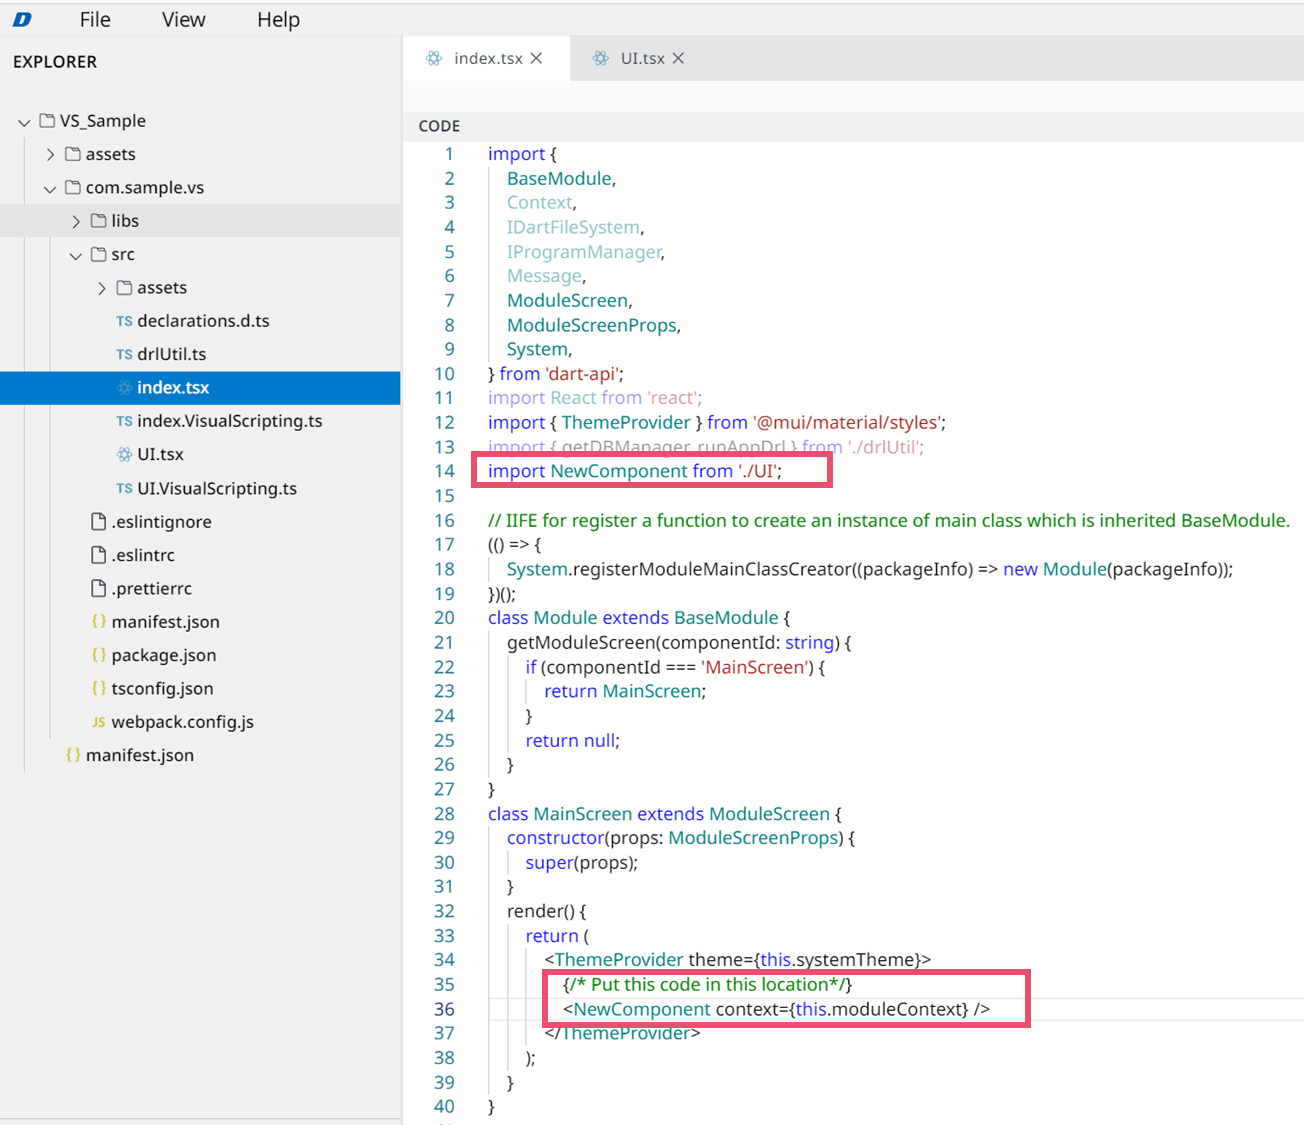
The added code in the default template is as follows.
Added code in order to load NewComponent of
UI.tsxfrom the top of the text
import NewComponent from './UI';Code that added
NewComponentcomponent inside render() within the MainScreen Class
<ThemeProvider theme={this.systemTheme}>
    {/* Put this code in this location*/}
    <NewComponent context={this.moduleContext} />
</ThemeProvider>
Now in UI.tsx, you can compose the UI Component placement and Visual Scripting. In the Index.tsx screen (start screen), the same screen as the screen configured in UI.tsx will be displayed.
Types of Component in Visual Scripting
1) Basic Component Node
Component | |
|---|---|
| 1 | Accordion View |
| 2 | Alert |
| 3 | Button |
| 4 | Checkbox |
| 5 | CircularProgress |
| 6 | Dialog |
| 7 | Fab |
| 8 | LinearProgress |
| 9 | Radio |
| 10 | RadioGroup |
| 11 | Select |
| 12 | Slider |
| 13 | Snackbar |
| 14 | Switch |
| 15 | Tab |
| 16 | TextField |
| 17 | ToggleButton |
| 18 | ToggleButtonGroup |
| 19 | Tooltip |
Refer to this link for further information: Basic Component Node.
2) User Component Node
Component | |
|---|---|
| 1 | 3D Simulator View |
| 2 | Get Pose |
| 3 | Move To |
| 4 | Joint Jog View |
| 5 | Task Jog View |
| 6 | Joint Pose Control |
| 7 | Task Pose Control |
| 8 | Digital Input Monitoring |
| 9 | Digital Output Test Button |
| 10 | Analog Input Monitoring |
| 11 | Analog Output Test Button |
| 12 | Robot Pose Monitoring |
Refer to this page for further information: User Component Node
3) Logic Component
Component Node | |
|---|---|
| 1 | If Node |
| 2 | Switch Node |
| 3 | Looping Node |
Refer to this link for further information: Logic Component Node
4) Read & Write Data Component Node
Component | |
|---|---|
| 1 | Data Mapping Node |
| 2 | State Node |
| 3 | Customer Node |
Refer to this link for further information: Read & Write Data Component Node
5) API Component Node
Component | |
|---|---|
| 1 | API Node: getCurrentPos() |
| 2 | API Node: getUserCoordinate() |
| 3 | API Node: moveStop() |
| 4 | API Node: moveJoint() |
| 5 | API Node: moveJointPosH2R() |
| 6 | API Node: getDigitalInput() |
| 7 | API Node: getDigitalOutput() |
| 8 | API Node: getAnalogInput() |
Refer to this link for further information: API Node